Introduction
Use this guide to replace a faulty or broken display on your MacBook Air 13" Early 2017.
What you need
-
Tool used on this step:P5 Pentalobe Screwdriver Retina MacBook Pro and Air$5.99
-
Use a P5 Pentalobe driver to remove ten screws securing the lower case, of the following lengths:
-
Two 9 mm screws
-
Eight 2.6 mm screws
-
-
-
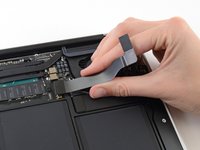
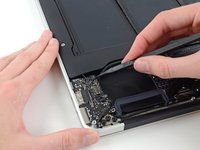
Grab the clear plastic pull tab attached to the battery connector and pull it parallel to the board toward the front edge of the Air.
-
-
-
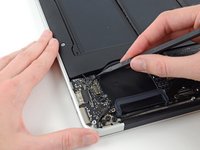
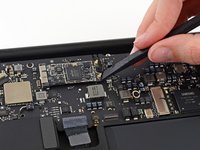
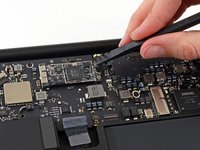
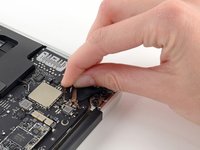
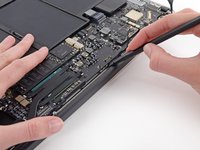
Use the flat end of a spudger to pry the I/O board cable connector up out of its socket on the I/O board.
-
-
-
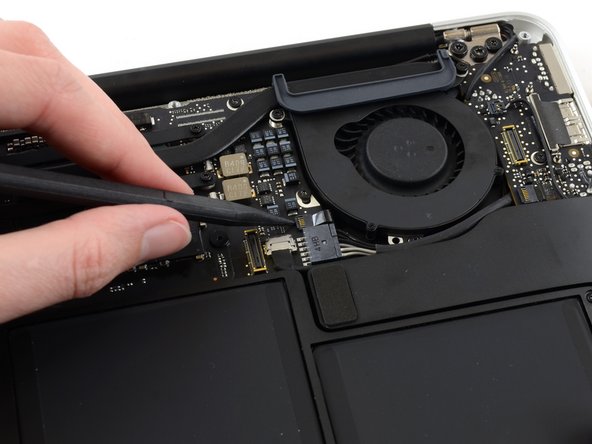
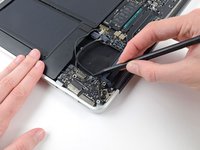
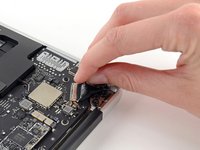
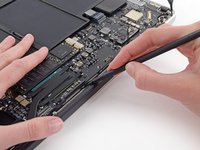
Use the tip of a spudger to carefully flip up the retaining flap on the fan cable ZIF socket.
-
-
-
-
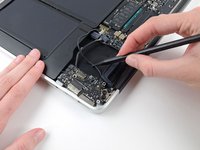
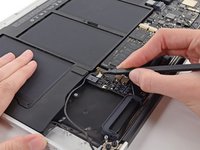
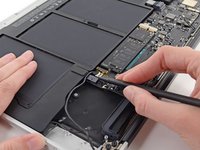
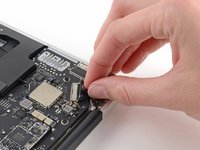
Disconnect the I/O board by pulling its power cable away from its socket on the logic board.
-
-
-
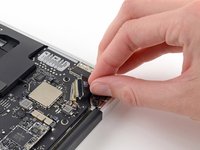
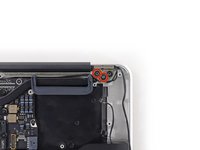
Use the flat end of a spudger to pry each of the antenna connectors up from their sockets on the AirPort/Bluetooth card.
-


To reassemble your device, follow these instructions in reverse order.
Take your e-waste to an R2 or e-Stewards certified recycler.
Repair didn’t go as planned? Try some basic troubleshooting, or ask our Answers community for help.
Cancel: I did not complete this guide.
37 other people completed this guide.

6 Guide Comments
Thank you so much! I fixed my Macbook Air display! I feel like a champion lol
My MacBook air screen needed to be replaced. There were lines vertical and horizontal. I decided to replace the screen. Got everything put back together from the directions up top. Everything worked except the screen stay black. I hooked the MacBook up to a second screen to make sure. I decided maybe it was a broken replacement so I put the old one back and its also a blank screen also. Before I took the MacBook apart the screen and apple logo both lit up and now I cant get the old screen to come on.