Introduction
Use this guide to replace your MacBook Air's upper case. The upper case includes the keyboard and trackpad.
What you need
-
-
Remove the following ten screws:
-
Two 8 mm 5-point Pentalobe screws
-
Eight 2.5 mm 5-point Pentalobe screws
-
-
-
Use the flat end of a spudger to pry both short sides of the battery connector upward to disconnect it from its socket on the logic board.
-
Bend the battery cable slightly away from the logic board so the connector will not accidentally contact its socket.
-
-
-
Remove the single 2.9 mm T5 Torx screw securing the SSD to the logic board.
So when i change my ssd in mac do i have to reinstall Mac OS
Correct, the SSD does not come with OS preinstalled. To install the OS you can completely clone your existing hard drive or you will need to create a bootable flash drive and format your SSD and create a partition in order to be able to install the OS.
-
-
-
Use a spudger to help lift the free end of the SSD just enough to grab it with your other hand.
-
Pull the drive straight out of its socket and remove it from the logic board.
I performed all the steps above and fitted a Transcend JetDrive 500 which was very easy however when I re-assembled and turned on all I get is a question mark in the middle of the screen, can you explain if I did anything wrong?
-
-
-
Use the flat end of a spudger to pry the I/O board cable connector upward out of its socket on the I/O board.
-
-
-
Use the tip of a spudger to carefully flip up the retaining flap on the fan cable ZIF socket.
-
-
-
Use the flat end of a spudger to pry both short sides of the battery connector upward to disconnect it from its socket on the logic board.
-
Bend the battery cable slightly away from the logic board so the connector will not accidentally contact its socket.
-
-
-
Remove the following five screws securing the battery to the upper case:
-
Two 5.2 mm T5 Torx screws
-
One 6 mm T5 Torx screw
-
Two 2.6 mm T5 Torx screws
Don’t be like me! Make sure you use the *other* screw driver, not the one you took the case off with. I got five of them out with the wrong screwdriver, stripped the head on the sixth, got it out with a screw extractor, cut a new slot in it so I could use a normal flat head screw driver on it to put it back in, and then realized….
-
-
-
Lift the battery from its edge nearest the logic board and remove it from the upper case.
-
Charge it to 100%, and then keep charging it for at least 2 more hours. Next, unplug and use it normally to drain the battery. When you see the low battery warning, save your work, and keep your laptop on until it goes to sleep due to low battery. Wait at least 5 hours, then charge your laptop uninterrupted to 100%.
-
If you notice any unusual behavior or problems after installing your new battery, you may need to reset your MacBook's SMC.
I need to point out here that the replacement battery that I bought here at iFixit for this MacBook Air says that the battery calibration consists on draining the battery below 10%, then charging it uninterruptedly to 100%, but this is not consistent with the battery calibration that appears on this guide. Which one should I follow? Any additional thoughts on this? Thanks.
Hi Rafael,
We updated our battery calibration technique recently. The most reliable way would be to follow the guide method (charge full + 2 hours, drain completely, charge full again).
This was wonderfully easy-peasy! I just have one small suggestion: you might add a word (and a photo would be great), reminding folks that they need to connect the new battery connector. I know, it should (ok, it is! :) obvious and all… but I have to admit, after having my hand held so well through the rest of the process, having to engage brain again and realize that needed to be done (“what’s missing here?”) - took a moment. It was a bit nervous-making, too, since the new battery cable was quite stiff, resistant to bending, and I had to apply a wee bit of brute force and ignorance to position and connect the connector. Adding a note about that might be useful. Just a thought! Otherwise, super easy and straight forward - I feel so empowered! :)
-
-
-
Disconnect the I/O board by pulling the power cable away from its socket on the logic board.
-
-
-
-
Gently push the tip of a spudger under the black plastic flap stuck to the display data cable lock to make the lock pop upward and away from the socket.
-
While holding the lock away from the socket, use the tip of a spudger and your fingers to gently remove the display data cable from its socket.
-
-
-
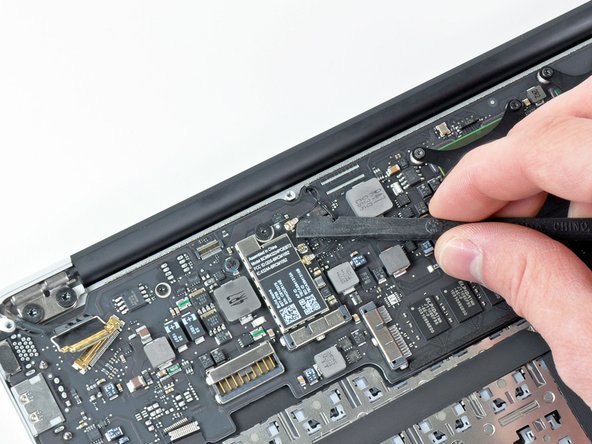
Use the flat end of a spudger to pry both antenna cable connectors up and off their sockets on the AirPort/Bluetooth card.
Heads up when replacing a late 2010 display with a 2011 or later... On later model Airs the wifi card orientation changed, which causes two issues: 1) the antenna cables are longer on the newer displays, so you have excess wire to deal with, 2) On 2010 displays the longer wire goes on the antenna port closer to the battery, on 2011 and later displays the longer cable goes on the port further from the battery (flip-flopped). If you switch them up, your wifi reception will be terrible
-
-
-
Pull the camera cable parallel to the face of the I/O board toward the rear edge of the Air to disconnect it from its socket.
-
-
-
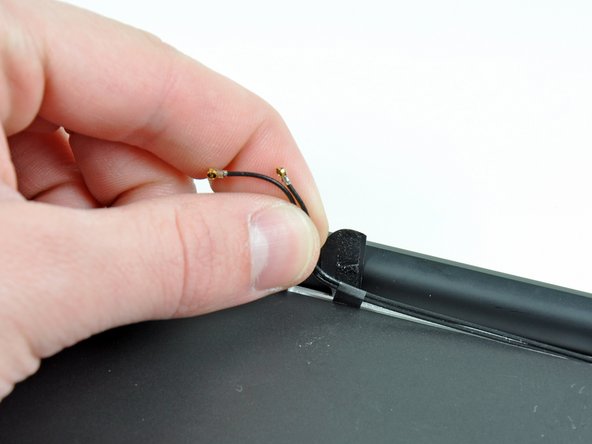
Peel up the six cable loops securing the antenna cables to the upper case.
-
Gently pull the cable loops slightly out of the channel cut into the upper case one at a time.
-
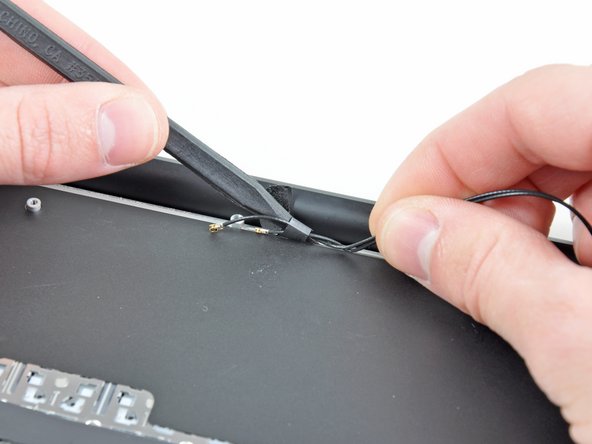
Use your spudger to open up the plastic loops as you de-route the antenna cables through them.
-
Repeat this for all five retaining loops.
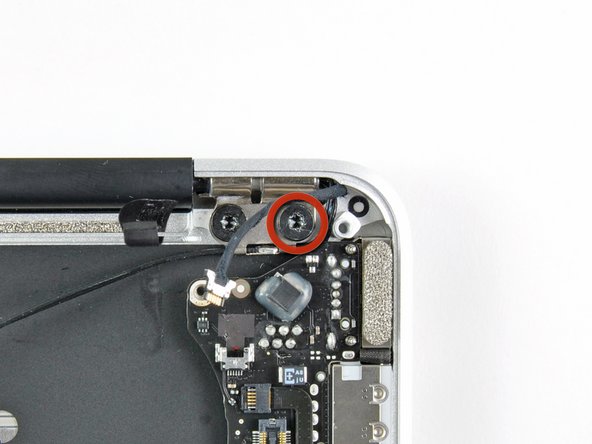
The last cable loop on the right side, was actually stuck around the screw which hold the I/O board.
A hole was specially made in the cable loop, it was not an assembling error.
So I had to remove this screw to be able to peel the cable loop.
I actually did the lcd only repair but this guide led me through getting the display out and reassembly. I would recommend this particular guide to anyone! Professional technician or hobbyist.
-
-
-
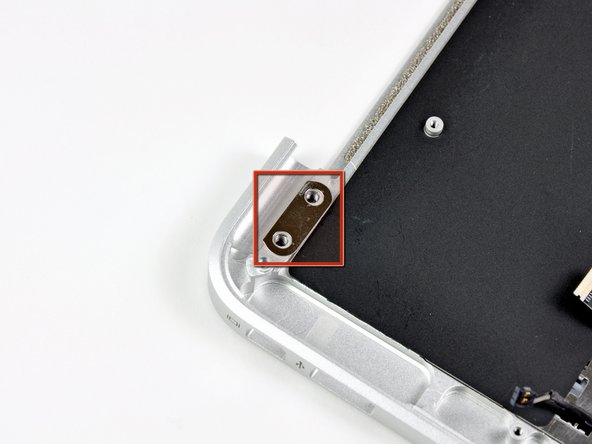
Remove the outer 4.9 mm T8 Torx screw securing each display hinge to the upper case (two screws total).
Tried to edit a comment from earlier, but had to delete and start over. I echo Edward's comment but stronger: Try a T-9 before you try a T-8. Or you could end up completely stripping the head before you can even react (one turn, in my case). Then you're left staring at a $500 screw stuck in your MBA case...
-
-
-
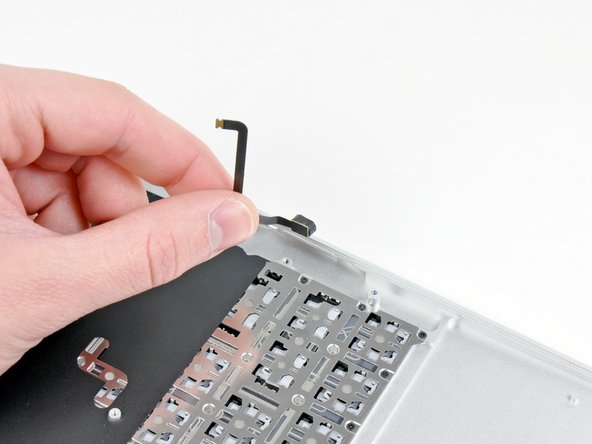
Use the flat end of a spudger to pry the right speaker off the adhesive securing it to the upper case.
-
Remove the right speaker from the upper case.
-
-
-
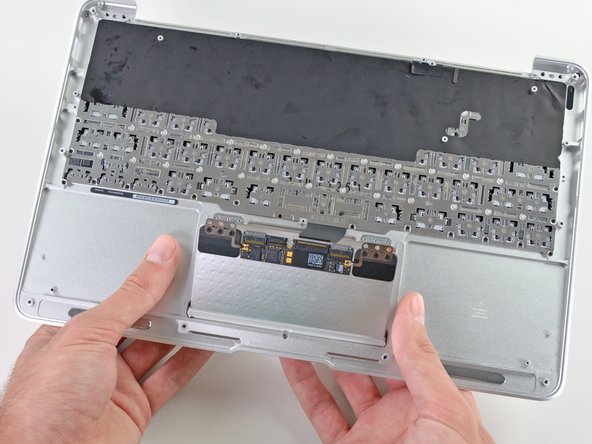
Use the tip of a spudger to pry up the retaining flap on the trackpad data cable ZIF connector.
-
Gently slide the trackpad ribbon cable out of the ZIF connector.
-
-
-
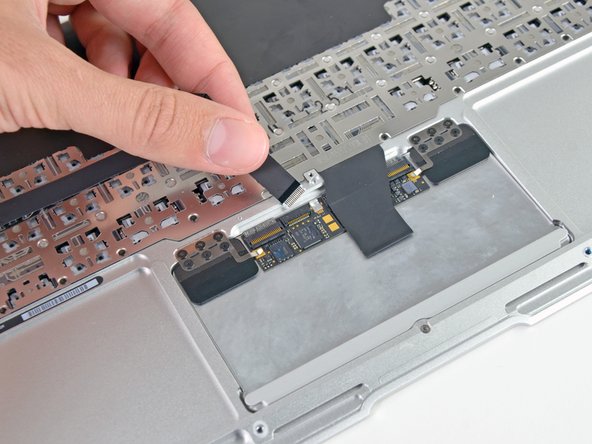
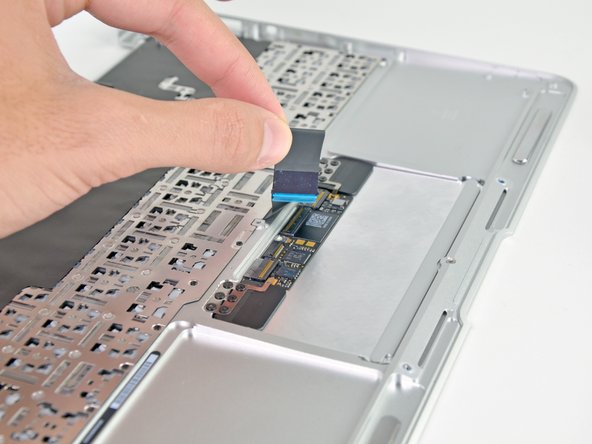
With one hand, lift the keyboard ribbon cable up and push it slightly away from the trackpad to access the ZIF connector underneath.
-
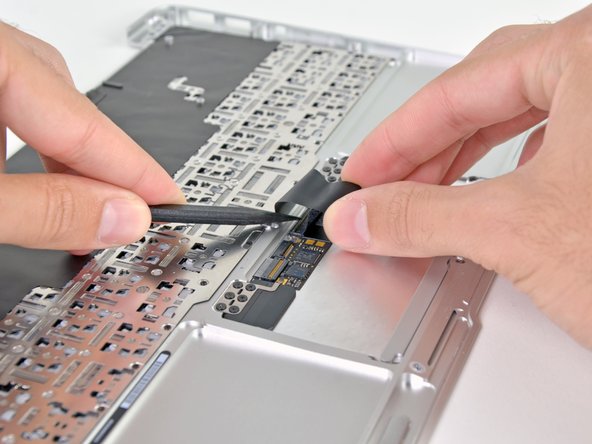
Use a spudger tip to pry up the retaining flap on the keyboard ribbon cable ZIF connector.
-
Gently slide the keyboard ribbon cable out of the ZIF connector.
-


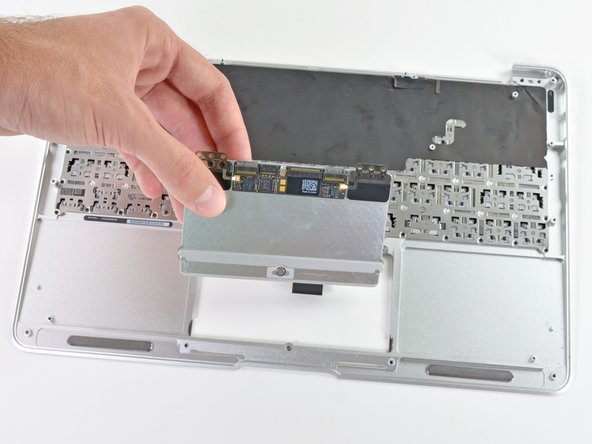
To reassemble your device, follow these instructions in reverse order.
To reassemble your device, follow these instructions in reverse order.
Cancel: I did not complete this guide.
28 other people completed this guide.


3 Comments
There is a T5 screw-thing in the upper case below the track pad. Adjusting this changes the play in the track pad 'click', though be careful since nothing stops it from being screwed too far in. It's not mentioned in the guide, but if you're replacing the upper case you will want to make sure the screw is installed and adjusted to your clicking taste!
netherby makes a good point about the tension screw for the trackpad!
This is a funny headless screw which goes in between the trackpad and the edge of the upper case. I pulled the trackpad from the old case without noticing this, reassembled to find the trackpad all weirdly loose. Tension screw fixed it.
The hard case is great for putting in my backpack and not worrying about the computer getting damaged. http://bestapplecases.com/best-macbook-a...
I recommend that one of the tools you obtain is a jeweler's loupe that mounts on your glasses. It makes things easier.
blairweaver - Reply
This is not correct. You need the pentalobe tool at this point.
Duane Hellums - Reply