
Mac Pro First Generation Power Supply Unit Replacement

What you need

  1. Mac Pro First Generation Power Supply Unit Replacement, Case Panel: step 1, image 1 of 1
    • Lift the lever to unlock the case.

  2. Mac Pro First Generation Power Supply Unit Replacement: step 2, image 1 of 1
    Tool used on this step:
    Anti-Static Wrist Strap
    $7.95
    Buy
    • Remove the side panel of the Mac Pro.

    • Discharge any static electricity by touching a grounded surface prior to working on any internal components. Touching the metal PCI slot covers works great, or any other grounded metal surface. You can also wear a anti-static wrist strap.

  3. Mac Pro First Generation Power Supply Unit Replacement, Removing the Disk Drive: step 3, image 1 of 3 Mac Pro First Generation Power Supply Unit Replacement, Removing the Disk Drive: step 3, image 2 of 3 Mac Pro First Generation Power Supply Unit Replacement, Removing the Disk Drive: step 3, image 3 of 3
    • The optical drive must be removed to access the power supply unit

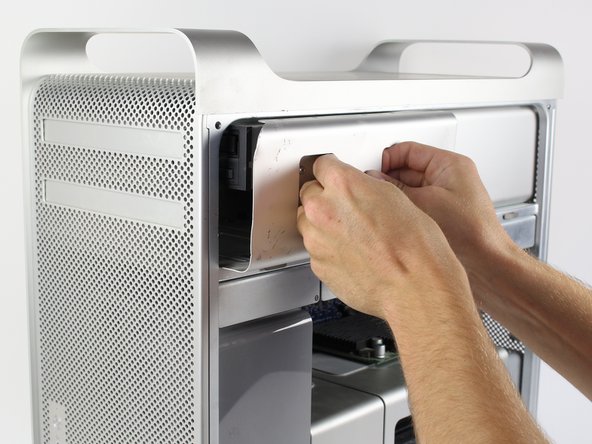
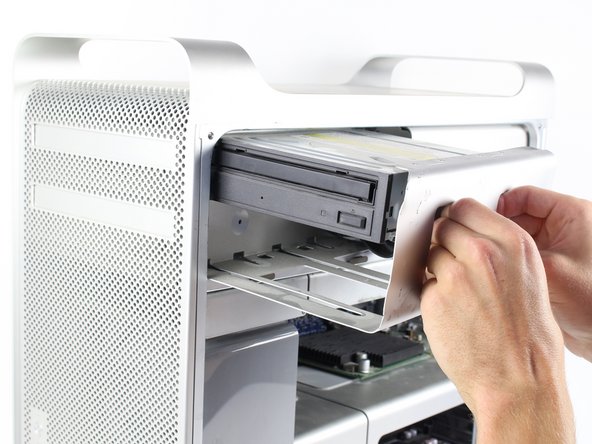
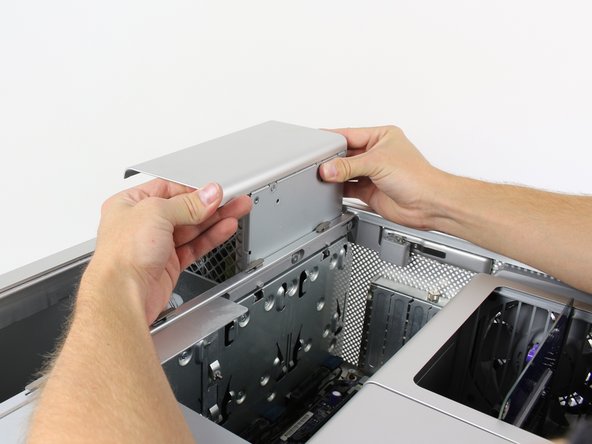
    • Firmly grasp the handles of the shown compartment and pull out firmly to remove the optical drive bay.

  4. Mac Pro First Generation Power Supply Unit Replacement, Unplugging the Disk Drive: step 4, image 1 of 2 Mac Pro First Generation Power Supply Unit Replacement, Unplugging the Disk Drive: step 4, image 2 of 2
    • Firmly hold each of the two connectors and pull them out of their respective sockets.

  5. Mac Pro First Generation Power Supply Unit Replacement, Un-Mounting the Power Supply Unit: step 5, image 1 of 2 Mac Pro First Generation Power Supply Unit Replacement, Un-Mounting the Power Supply Unit: step 5, image 2 of 2
    • Remove the 4 marked 6-32 hex screws with a 2mm Phillips hex screwdriver.

    • There are a number of Phillips head screws underneath. These don't need to be removed to remove the power supply.

    • Note the different PSU for Mac Pro 1,1 through 3,1 versus Mac Pro 4,1 and 5,1.

  6. Mac Pro First Generation Power Supply Unit Replacement, Removing the Power Supply: step 6, image 1 of 3 Mac Pro First Generation Power Supply Unit Replacement, Removing the Power Supply: step 6, image 2 of 3 Mac Pro First Generation Power Supply Unit Replacement, Removing the Power Supply: step 6, image 3 of 3
    • Be careful when pulling the power supply out, as it has several attached cables which don't have much slack.

    • Grip the handle on the left side of the power supply casing while gripping the right side of the power supply casing and pull upwards firmly to to take it out.

  7. Mac Pro First Generation Power Supply Unit Replacement, If power Supply only comes out a few Inches.: step 7, image 1 of 2 Mac Pro First Generation Power Supply Unit Replacement, If power Supply only comes out a few Inches.: step 7, image 2 of 2
    • For the Mac Pro (Early 2008/9), a.k.a. MacPro3,1 In the MacPro3,1, the power supply screws are 2.5mm hex, not T-10. Also, there is a cover plate behind the superdrive that has to be removed (2 phillips screws) to expose the power cable connections and those connectors must be detached and slid under fan before the power supply can be removed.

  8. Mac Pro First Generation Power Supply Unit Replacement, Disconnecting the Power Supply: step 8, image 1 of 2 Mac Pro First Generation Power Supply Unit Replacement, Disconnecting the Power Supply: step 8, image 2 of 2
    • Locate the four marked cables

    • Push down on the clip that is above each cable connector while firmly grasping each connector and pull each one back to remove each clip.

Eric Kuhta

Member since: 10/12/14

1,201 Reputation

1 Guide authored

Team

Cal Poly, Team 6-24, Maness Fall 2014 Member of Cal Poly, Team 6-24, Maness Fall 2014

CPSU-MANESS-F14S6G24

4 Members

13 Guides authored

View Statistics:

Past 24 Hours: 12

Past 7 Days: 69

Past 30 Days: 251

All Time: 81,107