Introduction
Welcome! This guide is designed to take you through the step-by-step process of replacing the battery in your MSI Thin GF63 12VE laptop. If you've noticed your laptop struggling to retain a charge or, worse, not charging at all, a battery replacement could be the solution to restore its power and functionality.
If your battery is punctured, it poses a risk of igniting a dangerous fire. Exercise necessary precautions if you observe swelling in the battery.
What you need
-
-
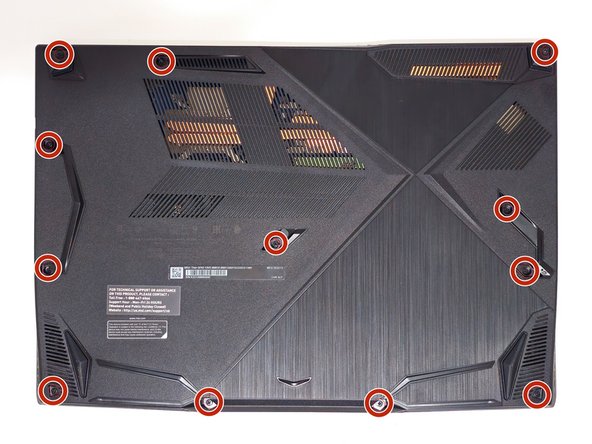
Unplug and shut down your laptop to prevent potential damage to electrical circuits during removal.
-
-
-
-
The housing is not yet ready for removal. Turn your laptop around, focusing on the HDMI port, and pry just above the port to release the final piece holding the housing together.
-
Pull the housing off from the bottom of the laptop when it is clear you have removed the housing piece above the HDMI port.
-
-
-
Remove the laptop housing and flip it over.
-
Use the prying tool to pry towards the top left of the battery, following a left-to-right motion for optimal removal.
-
Complete the second prying position as demonstrated; the battery should be entirely detached from the housing.
-
Disconnect the battery cable.
-


To reassemble your device, follow these instructions in reverse order.
If further issues arise, comment, and I will try to respond with assistance.
To reassemble your device, follow these instructions in reverse order.
If further issues arise, comment, and I will try to respond with assistance.
Cancel: I did not complete this guide.
2 other people completed this guide.

Team

CSU Los Angeles, Team 2-61, Briggs Fall 2023 Member of CSU Los Angeles, Team 2-61, Briggs Fall 2023
CSULA-BRIGGS-F23S2G61
1 Member
1 Guide authored