
Lenovo V14-ADA Back Panel Replacement

Last updated on Jun 25, 2024
Views: 622
View statistics:
- Past 24 Hours:
- 1
- Past 7 Days:
- 11
- Past 30 Days:
- 65
- All Time:
- 622
Comments: 0
No one has left comments on this guide. Will you be first?
Go to guide commentsCompleted: 0 1
No one has marked this guide "completed." Will you be the first?
1 person has marked this guide "completed." It's you — great job!
Favorites: 0 1
No one has favorited (and subscribed to) this guide. Will you be the first?
1 person has favorited (and subscribed to) this guide — and that's you!
Better Introduction
Improve this guide by completing or revising its introduction.
Missing Details
Some of this guide's details are missing. Help users by adding tools, difficulty, or time.
What you need
Tools


-
-
-
Turn off the laptop.
-
Disconnect the charging cable from the laptop.
-
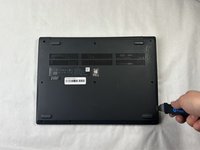
Flip the laptop upside down.
 Ask FixBot
-
-
-
-
Place the Jimmy in the small crack between the back panel and the keyboard and push down.
-
Repeat this until the panel pops off.
-
-


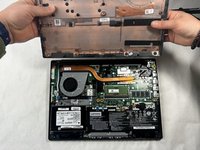
To reassemble your device, follow these instructions in reverse order.


