Introduction
If your Lenovo A285 ThinkPad appears to have slow or unresponsive performance, there may be a problem with the SSD card. Before getting into the replacement guide, take a look at our troubleshooting page for other possible solutions. Before you begin the replacement, make sure the device is entirely powered off and not connected to any power sources.
What you need
-
-
Flip your laptop over so the bottom panel is facing up.
-
Use a Phillips #0 to loosen the 5 screws holding the back panel to the laptop.
-
Lift the bottom of the panel to separate the back panel away from the device.
-
Remove the back panel.
-
-
-
-
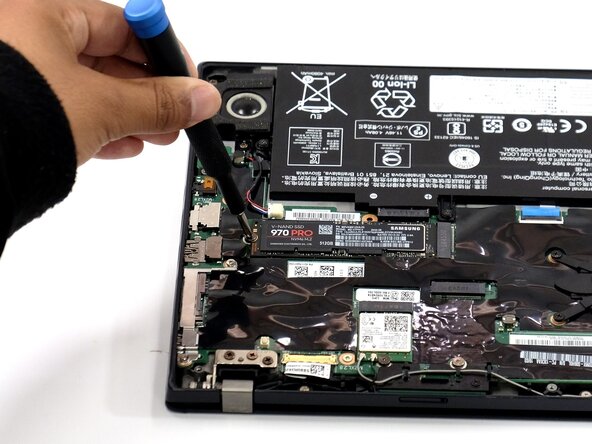
Use a Phillips #0 screwdriver to remove the 3 mm screw that secures the SSD to the motherboard.
-
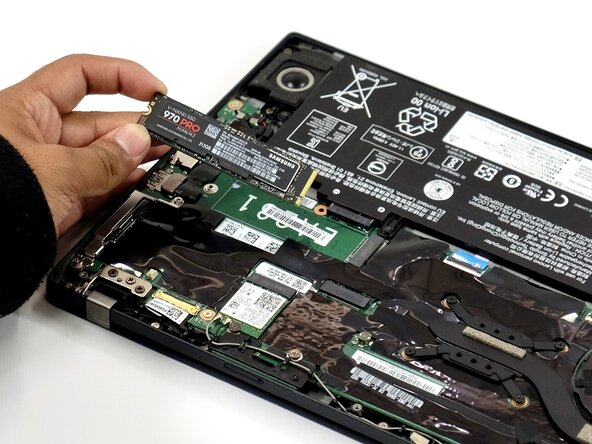
Carefully slide the SSD card from its socket to remove it.
-


To reassemble your device, follow these instructions in reverse order. Take your e-waste to an R2 or e-Stewards certified recycler.
Team

Linn Benton Community College, Team 1-4, Karnes Spring 2025 Member of Linn Benton Community College, Team 1-4, Karnes Spring 2025
LBCC-KARNES-S25S1G4
4 Members
6 Guides authored