What you need
-
-
Remove the back cover by inserting a fingernail or opening pick here and disengaging the plastic clips.
-
Lift battery up here
-
-
-
-
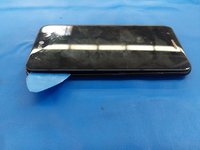
Use fingernails or insert an opening pick into the gap between the digitizer and the midframe and pull the midframe outwards to disengage the plastic clips.
-
Carefully disengage the clips on the bottom as the headphone jack goes through the midframe.
-
Once all the clips have been disengaged, move the midframe outwards and downwards to disengage it from the headphone jack.
-
-
Tool used on this step:Halberd Spudger$2.99
-
Use an opening pick or a Halberd spudger to disconnect the front camera flex from its socket on the motherboard.
-
The front camera is held in by adhesive. Carefully pry between the camera and its bracket on the frame of the phone to remove it.
-
If you're having difficulty removing the front-facing camera, remove the motherboard to make more room.
-
To reassemble your device, follow these instructions in reverse order.


