Introduction
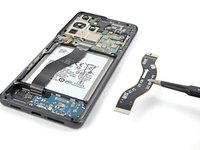
Use this guide to replace the interconnect cables on your Samsung Galaxy S21 Ultra.
This guide was performed on the SM-G998B/DS (international) model. Other models have an additional antenna cable sitting in the left edge of the midframe.
Use this guide to remove the interconnect cables on a Samsung Galaxy S21 Ultra.
What you need
-
-
-
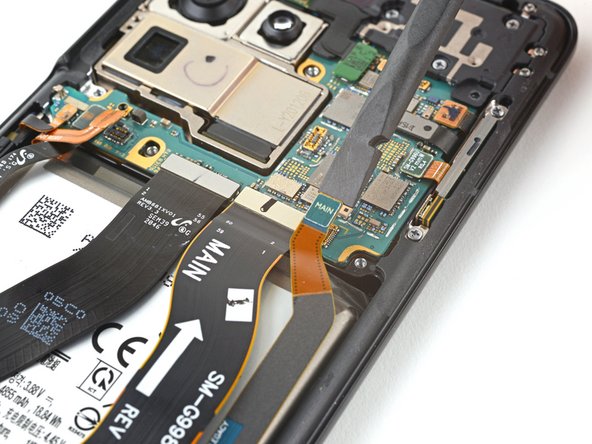
Use a spudger to pry up and disconnect the primary and secondary interconnect cables' press connectors on the motherboard.
 Ask FixBot
-
-
-
Tool used on this step:Tweezers$4.99
-
Use a spudger to disconnect the secondary interconnect cable from the daughterboard by prying its bottom connector straight up from its socket.
-
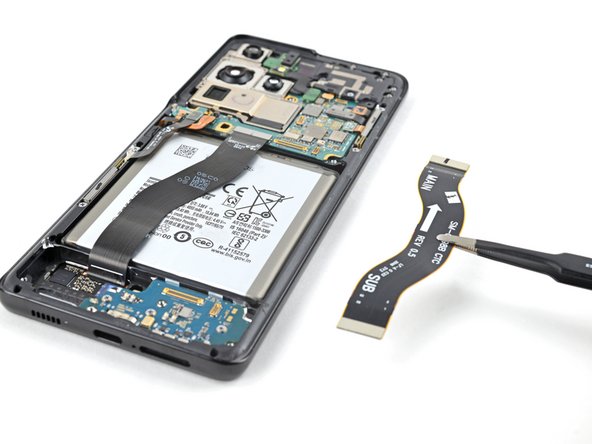
Use your fingers or a pair of tweezers to carefully remove the secondary interconnect cable.
-
-
-
Use a spudger to disconnect the primary interconnect cable from the daughterboard by prying its bottom connector straight up from its socket.
-
Use your fingers or a pair of tweezers to carefully remove the primary interconnect cable.
-
-



If possible, turn on your device and test your repair before installing new adhesive and resealing.
Compare your new replacement part to the original part—you may need to transfer remaining components or remove adhesive backings from the new part before installing.
To reassemble your device, follow these instructions in reverse order.
Take your e-waste to an R2 or e-Stewards certified recycler.
Repair didn’t go as planned? Try some basic troubleshooting, or ask our Answers community for help.


