Introduction
If your Insignia Flex 11.6 is not holding a charge or is not starting up, use this guide in replacing the battery.
What you need
-
-
Detach the keyboard from the screen in 2 different places by putting one hand on the keyboard while gently pulling up on the screen with the other hand.
-
-
-
-
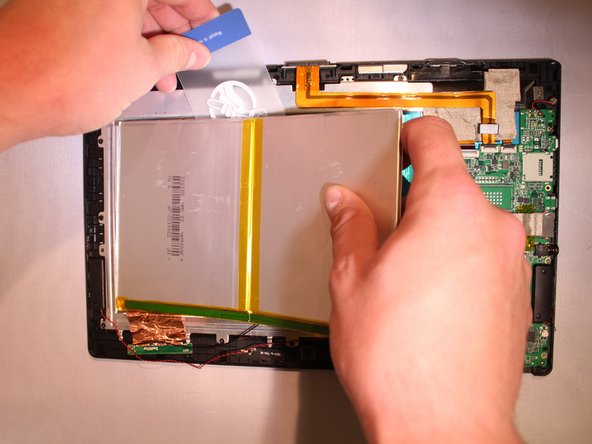
The battery is glued onto the device. To remove it, use a nylon spudger or plastic card to slide underneath the battery and scrape back and forth to remove the glue until the battery is removed from the device.
Hi, great tutorial - thanks! Just wondering where you sourced the replacement battery? I've looked high and low googling but can't seem to find anywhere that sells them.
-


To reassemble your device, follow these instructions in reverse order.
To reassemble your device, follow these instructions in reverse order.
Cancel: I did not complete this guide.
5 other people completed this guide.
Team

Eastern Washington University, Team 2-4, Mathisen Fall 2016 Member of Eastern Washington University, Team 2-4, Mathisen Fall 2016
EWU-MATHISEN-F16S2G4
4 Members
10 Guides authored
6 Comments
There are no screws on the bottom edge of my invicta model P11A8100. Can I bypass removing screws and proceed to removing the back?
There are no screws on the bottom of my model P11A8100. Can I bypass removal is said screws and proceed to opening the back?
Great instructions but I cant find a battery replacement. Battery number 3394122-2p
Great instructions but now I cant find the battery anywhere it is 3394122-2p
Saludos, necesito instalar el driver: Batería con método de control compatible con ACPI de microsoft, que me hace falta en mi tablet, flex 11.6 con w10 32 bits. mi correo: tnnaguiar@gmail.com