Introduction
Don't worry about repairing a simple button on your shirt, trousers or any other sport items. They can often break off - but they're very easy to fix it again and again. This guide will show you how to do it with a simple needle and thread.
➡️Before you get started, please check the safety disclaimer at the bottom of the page.
What you need
-
-
Identify where the button fell off. Clean up the area including removing any old thread which is still there.
-
Prepare the needle and thread, and the replacement button.
-
Tip: Many garments come with a spare button on the inside, sewn to the care label. Check there, before buying a new button.
 Ask FixBot
-
-
-
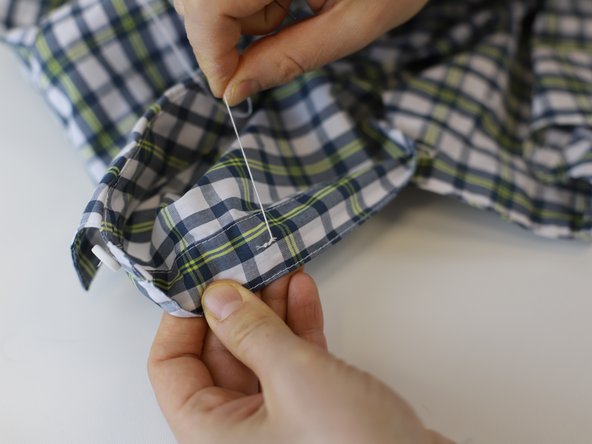
Start by threading the needle onto approximately 30cm of pre-cut thread. Next, tie both ends together to create a loop of thread with the needle on it.
-
Add a second or third knot over the first, to make it thicker. It should be large enough to not pull through the fabric.
-
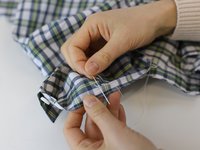
Push the needle through the fabric, from the backside of the fabric and pull tight. Thread the needle through one hole of the button, from the backside.
-
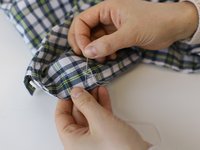
Next, thread the needle back through the other (opposite) hole in the button, and then push through the fabric in the same location as the thread coming from the backside.
-
Repeat the complete Step 2 again, to add extra strength.
-
Note: We have demonstrated on a 2-hole button. For a 4-hole button, simply repeat Step 2 for the other button holes.
-
-
-
-
Once the button is secure, it is time to finish the repair on the inside, with a knot.
-
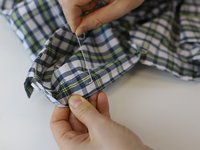
Carefully pass the needle through the loops of thread on the backside of the repair, taking care not to pass it through the fabric itself.
-
Careful: Do not pull tight! Leave a loop large enough to pass the needle through.
-
Pass the needle through the loop, and now pull tight to create the knot. Repeat this process once more to add a second knot, for extra security.
-
-
-
🛠️🏆👏 Congratulations! The repair is complete, and you're ready to go!
-


In need of another repair? Don't worry! Check out our other guides to find quick solutions for your favourite clothing, footwear and equipment!
----------------------------------------
🚨🛠️🩹 IMPORTANT SAFETY NOTICE:
The repair guides provided on this site are intended to help you repair products on your own. While we have put a lot of care into them, all repair work carries some risk:
- Safety Precautions: When repairing your product, take all necessary precautions to ensure your safety. Use appropriate tools and follow the instructions carefully.
- Product Condition: Once your product has been repaired, it may not meet original compliance guidelines anymore and could potentially have issues.
- Liability: We are not responsible for any damage or injury that may occur during the repair process or as a result of using a repaired product. You, as the repairer, assume all risks and responsibilities associated with the repair.
By using these repair guides, you fully acknowledge and accept the potential risks and responsibilities involved.

Team
