
How to disconnect the Logic Board in the iPhone SE 2022

Prerequisite Only
This is a prerequisite-only guide! This guide is part of another procedure and isn’t meant to be used alone.

What you need

  1. How to disconnect the Logic Board in the iPhone SE 2022, Disconnect the rear camera: step 1, image 1 of 2 How to disconnect the Logic Board in the iPhone SE 2022, Disconnect the rear camera: step 1, image 2 of 2
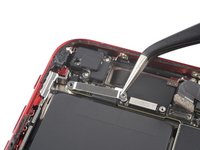
    • Use the pointed end of a spudger to disconnect the rear camera by prying the connector straight up from its socket.

  2. How to disconnect the Logic Board in the iPhone SE 2022, Unfasten the rear camera bracket screws: step 2, image 1 of 1
    Tool used on this step:
    Standoff Screwdriver for iPhones
    $5.49
    Buy
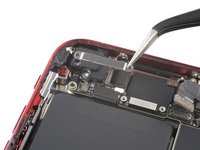
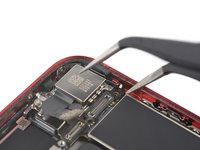
    • Remove the two screws securing the rear-facing camera bracket:

    • One 3.0 mm-long standoff screw

    • Standoff screws are best removed using a standoff screwdriver or bit.

    • In a pinch, a small flathead screwdriver will do the job—but use extra caution to ensure it doesn't slip and damage surrounding components.

    • One 3.1 mm-long Phillips screw

  3. How to disconnect the Logic Board in the iPhone SE 2022, Remove the rear camera bracket: step 3, image 1 of 2 How to disconnect the Logic Board in the iPhone SE 2022, Remove the rear camera bracket: step 3, image 2 of 2
    Tool used on this step:
    Tweezers
    $4.99
    Buy
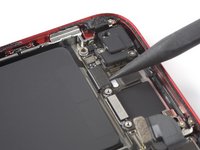
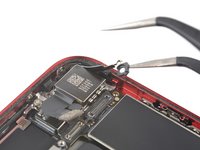
    • Use a pair of tweezers to remove the rear camera bracket.

  4. How to disconnect the Logic Board in the iPhone SE 2022, Disconnect the flash: step 4, image 1 of 2 How to disconnect the Logic Board in the iPhone SE 2022, Disconnect the flash: step 4, image 2 of 2
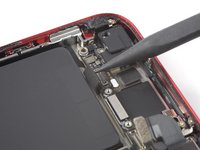
    • Use the pointed end of a spudger to disconnect the flash by prying the connector straight up from its socket.

  5. How to disconnect the Logic Board in the iPhone SE 2022, Unfasten the upper cable bracket screws: step 5, image 1 of 1
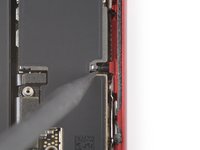
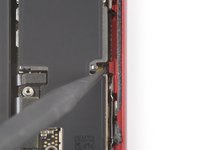
    • Remove the two screws securing the upper cable bracket:

    • One 2.8 mm-long Phillips screw

    • One 1.2 mm-long Phillips screw

  6. How to disconnect the Logic Board in the iPhone SE 2022, Remove the upper cable bracket: step 6, image 1 of 2 How to disconnect the Logic Board in the iPhone SE 2022, Remove the upper cable bracket: step 6, image 2 of 2
    • Use a pair of tweezers to remove the upper cable bracket.

  7. How to disconnect the Logic Board in the iPhone SE 2022, Disconnect the upper flex cable: step 7, image 1 of 2 How to disconnect the Logic Board in the iPhone SE 2022, Disconnect the upper flex cable: step 7, image 2 of 2
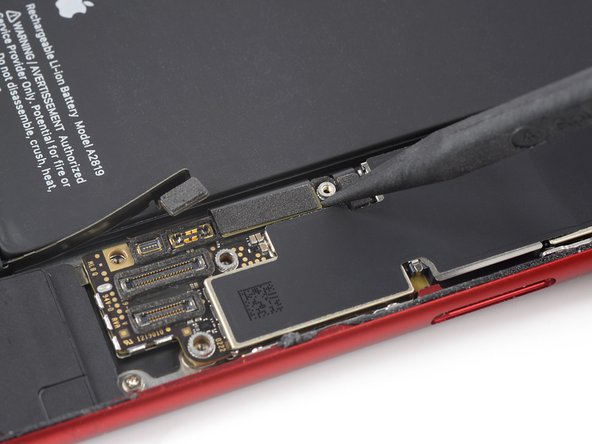
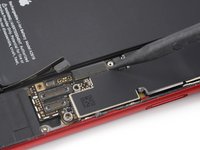
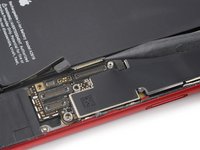
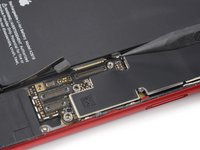
    • Use the pointed end of a spudger to disconnect the upper flex cable by prying the connector straight up from its socket.

  8. How to disconnect the Logic Board in the iPhone SE 2022, Unfasten the top left antenna component screws: step 8, image 1 of 1
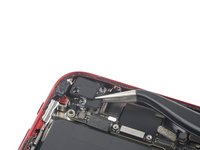
    • Unfasten the three 1.2 mm-long Phillips screws securing the top left antenna component.

    • Don't try to remove the antenna component yet. There's a fourth screw securing it to the rear case.

  9. How to disconnect the Logic Board in the iPhone SE 2022: step 9, image 1 of 1
    • Unfasten the 1.4 mm-long Phillips screw securing the antenna component to the top edge of the rear case.

  10. How to disconnect the Logic Board in the iPhone SE 2022, Remove the top left antenna component: step 10, image 1 of 2 How to disconnect the Logic Board in the iPhone SE 2022, Remove the top left antenna component: step 10, image 2 of 2
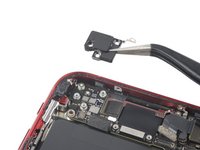
    • Use a pair of tweezers to remove the top left antenna component.

  11. How to disconnect the Logic Board in the iPhone SE 2022, Unfasten the grounding bracket screws: step 11, image 1 of 1
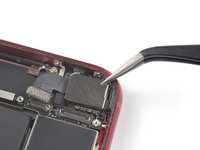
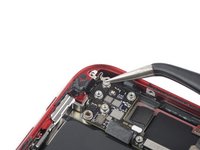
    • Unfasten the two screws securing the top left grounding bracket:

    • One 1.5 mm-long Phillips screw

    • One 1.2 mm-long Phillips screw

  12. How to disconnect the Logic Board in the iPhone SE 2022, Remove the top left grounding bracket: step 12, image 1 of 2 How to disconnect the Logic Board in the iPhone SE 2022, Remove the top left grounding bracket: step 12, image 2 of 2
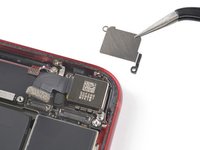
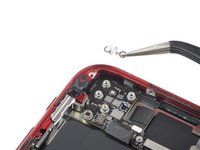
    • Use a pair of tweezers to remove the top left grounding bracket.

  13. How to disconnect the Logic Board in the iPhone SE 2022, Unfasten the logic board screws: step 13, image 1 of 1
    • Unfasten the four screws securing the logic board:

    • One 1.7 mm-long Phillips screw

    • One partially threaded 1.7 mm-long Phillips screw

    • This screw is covered by protective foam surrounding the rear camera connector. Use a pair of tweezers to peel just enough foam off to unfasten the screw.

    • One 2.5 mm-long standoff screw

    • One 2.2 mm-long standoff screw

  14. How to disconnect the Logic Board in the iPhone SE 2022, Pry up the logic board grounding bracket: step 14, image 1 of 2 How to disconnect the Logic Board in the iPhone SE 2022, Pry up the logic board grounding bracket: step 14, image 2 of 2
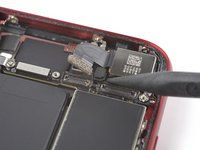
    • Use a pair of tweezers to carefully pry up the logic board grounding bracket in the top right corner of the rear case.

  15. How to disconnect the Logic Board in the iPhone SE 2022, Position the SIM card eject plunger: step 15, image 1 of 2 How to disconnect the Logic Board in the iPhone SE 2022, Position the SIM card eject plunger: step 15, image 2 of 2
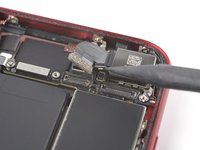
    • Use the pointed end of a spudger to move the SIM card eject plunger out of the logic board's way by pushing it to the right edge of the rear case.

  16. How to disconnect the Logic Board in the iPhone SE 2022, Disconnect the Lightning port and the wireless charging coil cable: step 16, image 1 of 3 How to disconnect the Logic Board in the iPhone SE 2022, Disconnect the Lightning port and the wireless charging coil cable: step 16, image 2 of 3 How to disconnect the Logic Board in the iPhone SE 2022, Disconnect the Lightning port and the wireless charging coil cable: step 16, image 3 of 3
    • Use the pointed end of a spudger to disconnect the Lightning port cable by prying the connector straight up from its socket.

    • Use the pointed end of a spudger to disconnect the wireless charging coil cable by prying the connector straight up from its socket.

Conclusion

To reassemble your device, follow these instructions in reverse order.

Dominik Schnabelrauch

Member since: 11/23/16

247,614 Reputation

682 Guides authored

Team

iFixit Member of iFixit

Staff

123 Members

23,758 Guides authored

0 Guide Comments

Add Comment

View Statistics:

Past 24 Hours: 0

Past 7 Days: 0

Past 30 Days: 1

All Time: 93