
How to Test and Replace the Rear Air Duct and Damper on your LG Refrigerator Model LFX25973

What you need

  1. How to Test and Replace the Rear Air Duct and Damper on your LG Refrigerator Model LFX25973, Unplug your refrigerator: step 1, image 1 of 1
    • Unplug your refrigerator before you begin your repair.

    • If you are testing or repairing the following items, you may also need to shut off and disconnect the water supply:

    • Condenser Fan Motor

    • Compressor Motor and Thermal Overload Device

    • Water Supply Valve Assembly

  2. How to Test and Replace the Rear Air Duct and Damper on your LG Refrigerator Model LFX25973, Open the doors: step 2, image 1 of 3 How to Test and Replace the Rear Air Duct and Damper on your LG Refrigerator Model LFX25973, Open the doors: step 2, image 2 of 3 How to Test and Replace the Rear Air Duct and Damper on your LG Refrigerator Model LFX25973, Open the doors: step 2, image 3 of 3
    • Open both refrigerator doors fully.

  3. How to Test and Replace the Rear Air Duct and Damper on your LG Refrigerator Model LFX25973, Remove the shelves: step 3, image 1 of 3 How to Test and Replace the Rear Air Duct and Damper on your LG Refrigerator Model LFX25973, Remove the shelves: step 3, image 2 of 3 How to Test and Replace the Rear Air Duct and Damper on your LG Refrigerator Model LFX25973, Remove the shelves: step 3, image 3 of 3
    • Lift up the front edge of the shelf to release it.

    • Unhook the shelf and remove it.

    • Repeat the last two steps for each shelf you wish to remove.

  4. How to Test and Replace the Rear Air Duct and Damper on your LG Refrigerator Model LFX25973, Remove the crisper drawers: step 4, image 1 of 3 How to Test and Replace the Rear Air Duct and Damper on your LG Refrigerator Model LFX25973, Remove the crisper drawers: step 4, image 2 of 3 How to Test and Replace the Rear Air Duct and Damper on your LG Refrigerator Model LFX25973, Remove the crisper drawers: step 4, image 3 of 3
    • Pull the crisper drawers toward you and tilt them up to remove them.

    • Pull the bottom drawer toward you and tilt it up to remove it.

  5. How to Test and Replace the Rear Air Duct and Damper on your LG Refrigerator Model LFX25973, Release the drawer frame: step 5, image 1 of 2 How to Test and Replace the Rear Air Duct and Damper on your LG Refrigerator Model LFX25973, Release the drawer frame: step 5, image 2 of 2
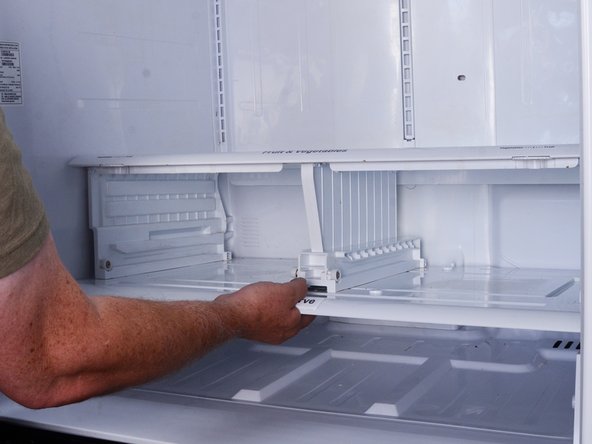
    • Lift the front edge of the drawer frame assembly to release it.

  6. How to Test and Replace the Rear Air Duct and Damper on your LG Refrigerator Model LFX25973, Remove the drawer frame: step 6, image 1 of 2 How to Test and Replace the Rear Air Duct and Damper on your LG Refrigerator Model LFX25973, Remove the drawer frame: step 6, image 2 of 2
    • Pull the drawer frame assembly toward you and remove it.

  7. How to Test and Replace the Rear Air Duct and Damper on your LG Refrigerator Model LFX25973, Remove the bracket screw covers: step 7, image 1 of 3 How to Test and Replace the Rear Air Duct and Damper on your LG Refrigerator Model LFX25973, Remove the bracket screw covers: step 7, image 2 of 3 How to Test and Replace the Rear Air Duct and Damper on your LG Refrigerator Model LFX25973, Remove the bracket screw covers: step 7, image 3 of 3
    • Use a spudger to pry out the two center shelf bracket screw covers.

  8. How to Test and Replace the Rear Air Duct and Damper on your LG Refrigerator Model LFX25973, Remove the shelf bracket screws: step 8, image 1 of 2 How to Test and Replace the Rear Air Duct and Damper on your LG Refrigerator Model LFX25973, Remove the shelf bracket screws: step 8, image 2 of 2
    • Use a Phillips screwdriver to remove the three screws securing the center shelf bracket and air duct:

    • Two 22.4 mm‑long screws

    • One 12 mm‑long screw

    • Remove the center shelf bracket.

  9. How to Test and Replace the Rear Air Duct and Damper on your LG Refrigerator Model LFX25973, Loosen the air duct: step 9, image 1 of 2 How to Test and Replace the Rear Air Duct and Damper on your LG Refrigerator Model LFX25973, Loosen the air duct: step 9, image 2 of 2
    • Use a spudger to loosen one edge of the air duct.

  10. How to Test and Replace the Rear Air Duct and Damper on your LG Refrigerator Model LFX25973, Reposition the air duct: step 10, image 1 of 3 How to Test and Replace the Rear Air Duct and Damper on your LG Refrigerator Model LFX25973, Reposition the air duct: step 10, image 2 of 3 How to Test and Replace the Rear Air Duct and Damper on your LG Refrigerator Model LFX25973, Reposition the air duct: step 10, image 3 of 3
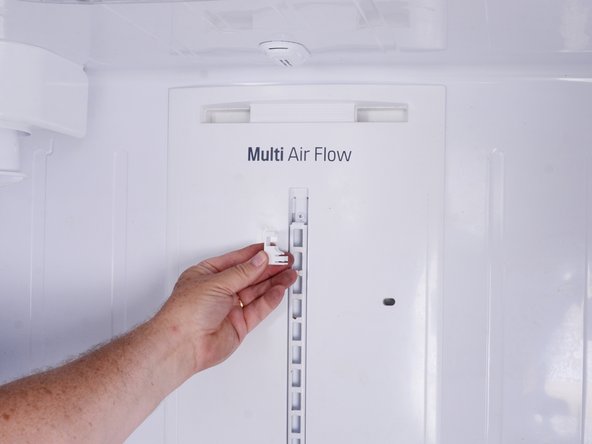
    • Grasp the air duct and swing it outward.

    • Don't try to remove the air duct fully as it is still connected to the fridge.

    • Move the air duct so that you can access the connector at the bottom.

  11. How to Test and Replace the Rear Air Duct and Damper on your LG Refrigerator Model LFX25973, Disconnect the damper motor connection: step 11, image 1 of 2 How to Test and Replace the Rear Air Duct and Damper on your LG Refrigerator Model LFX25973, Disconnect the damper motor connection: step 11, image 2 of 2
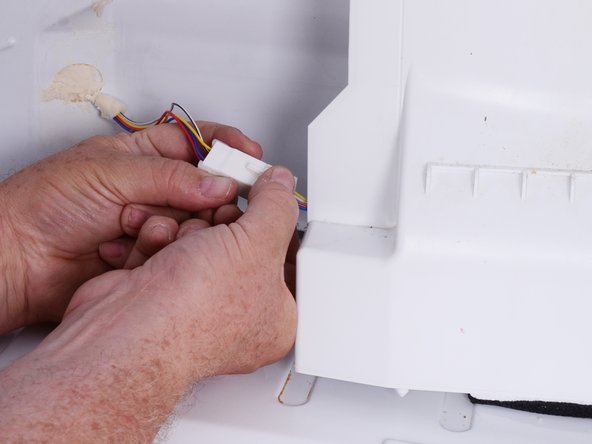
    • Squeeze the connector and pull it straight out to disconnect it.

  12. How to Test and Replace the Rear Air Duct and Damper on your LG Refrigerator Model LFX25973, Remove the air duct: step 12, image 1 of 1
    • Remove the air duct.

  13. How to Test and Replace the Rear Air Duct and Damper on your LG Refrigerator Model LFX25973, Test the damper motor resistance: step 13, image 1 of 3 How to Test and Replace the Rear Air Duct and Damper on your LG Refrigerator Model LFX25973, Test the damper motor resistance: step 13, image 2 of 3 How to Test and Replace the Rear Air Duct and Damper on your LG Refrigerator Model LFX25973, Test the damper motor resistance: step 13, image 3 of 3
    • If you have a multimeter, you can test the damper motor for proper resistance.

    • Set the multimeter to the ohm setting.

    • Measure the resistance between:

    • The blue and white wires

    • The yellow and red wires

    • The normal resistance value is 373-456Ω for each pair.

    • If the values are out of this range, you can replace the whole assembly. Alternatively, you can cut the tape that holds the styrofoam duct together, remove the damper assembly, and replace it.

Conclusion

To reassemble your device, follow these instructions in reverse order.

Take your e-waste to an R2 or e-Stewards certified recycler.

Repair didn’t go as planned? Try some basic troubleshooting, or ask our  Answers community for help.

Bill Gilbert

Member since: 06/30/22

30,238 Reputation

213 Guides authored

Team

iFixit Member of iFixit

Staff

137 Members

17,485 Guides authored

0 Comments

Add Comment

View Statistics:

Past 24 Hours: 4

Past 7 Days: 23

Past 30 Days: 102

All Time: 314