Free Shipping on Domestic Orders $75+

How to Replace the Thermal Paste in your Mac mini (2024)

What you need

    1. How to Replace the Thermal Paste in your Mac mini (2024), Before you begin: step 1, image 1 of 2 How to Replace the Thermal Paste in your Mac mini (2024), Before you begin: step 1, image 2 of 2
      • Fully shut down your Mac mini and unplug all cables from it.

      • Flip over your Mac mini and place it on a clean, flat surface to avoid scratching the chassis.

      Ask FixBot

      Add Comment

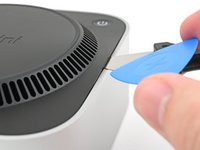
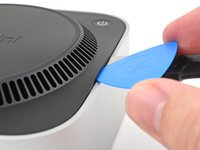
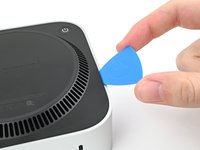
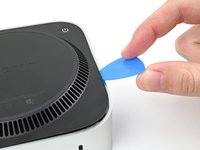
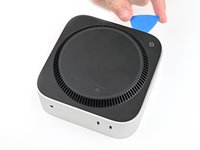
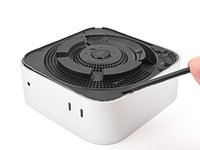
    1. How to Replace the Thermal Paste in your Mac mini (2024), Create a gap: step 2, image 1 of 3 How to Replace the Thermal Paste in your Mac mini (2024), Create a gap: step 2, image 2 of 3 How to Replace the Thermal Paste in your Mac mini (2024), Create a gap: step 2, image 3 of 3
      • Using the Jimmy or other metal tools during this step could scratch the aluminum chassis; however, it's the simplest way to perform this step. Follow the alternate instructions to avoid scratching the aluminum.

      • Insert a Jimmy into the gap between the bottom cover and the chassis.

      • Pry up the bottom cover to create a gap.

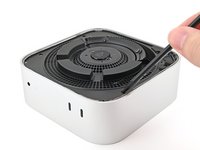
      • Alternatively, you can insert the point of a spudger into one of the plastic vent holes and pry up to create a gap big enough to insert an opening pick into.

      • Keep the Jimmy inserted under the bottom cover.

      Ask FixBot

      Add Comment

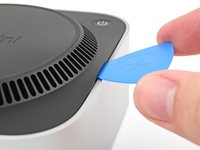
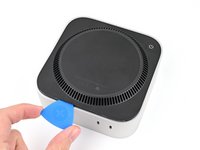
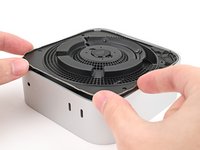
    2. How to Replace the Thermal Paste in your Mac mini (2024), Insert an opening pick: step 3, image 1 of 3 How to Replace the Thermal Paste in your Mac mini (2024), Insert an opening pick: step 3, image 2 of 3 How to Replace the Thermal Paste in your Mac mini (2024), Insert an opening pick: step 3, image 3 of 3
      • Insert an opening pick into the gap created by the Jimmy.

      • Remove the Jimmy.

      Ask FixBot

      Add Comment

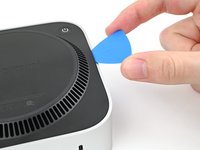
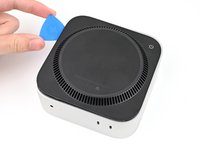
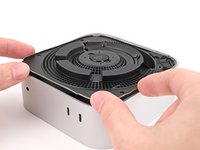
    3. How to Replace the Thermal Paste in your Mac mini (2024), Release the pins: step 4, image 1 of 3 How to Replace the Thermal Paste in your Mac mini (2024), Release the pins: step 4, image 2 of 3 How to Replace the Thermal Paste in your Mac mini (2024), Release the pins: step 4, image 3 of 3
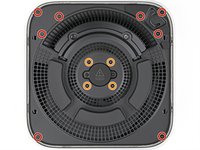
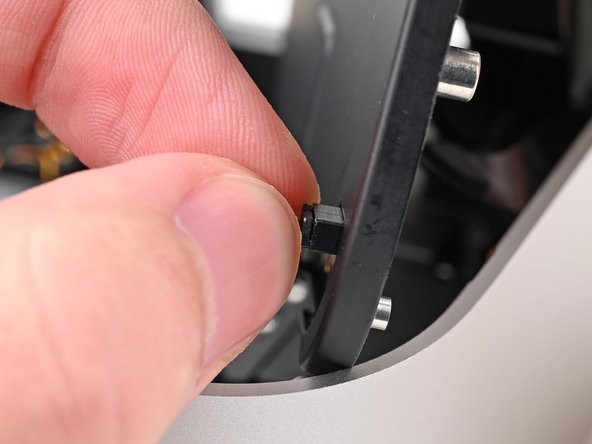
      • Slide the opening pick along the bottom cover until you feel it snag on a pin.

      • There are four pins total—one at each corner of the bottom cover.

      • Twist the pick to lift the pin out of its slot.

      Ask FixBot

      Add Comment

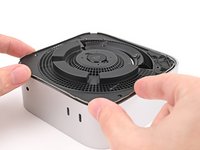
    4. How to Replace the Thermal Paste in your Mac mini (2024): step 5, image 1 of 3 How to Replace the Thermal Paste in your Mac mini (2024): step 5, image 2 of 3 How to Replace the Thermal Paste in your Mac mini (2024): step 5, image 3 of 3
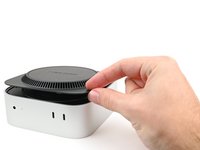
      • Continue sliding and prying with the pick along the perimeter of the bottom cover to release the remaining pins.

      • Don't insert the pick more than an inch when sliding near the power button, as you risk damaging the cable.

      • During reassembly, press along the perimeter of the bottom until you hear and feel all four pins click back into place.

      Ask FixBot

      Add Comment

    5. How to Replace the Thermal Paste in your Mac mini (2024): step 6, image 1 of 2 How to Replace the Thermal Paste in your Mac mini (2024): step 6, image 2 of 2
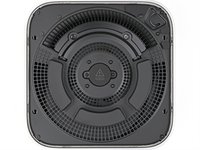
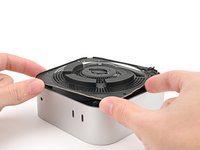
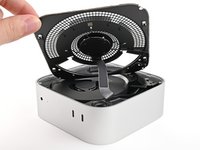
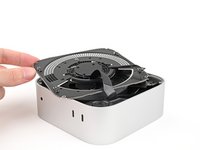
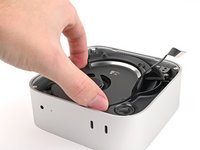
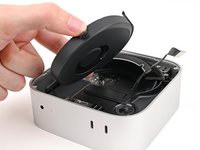
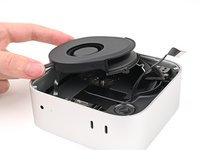
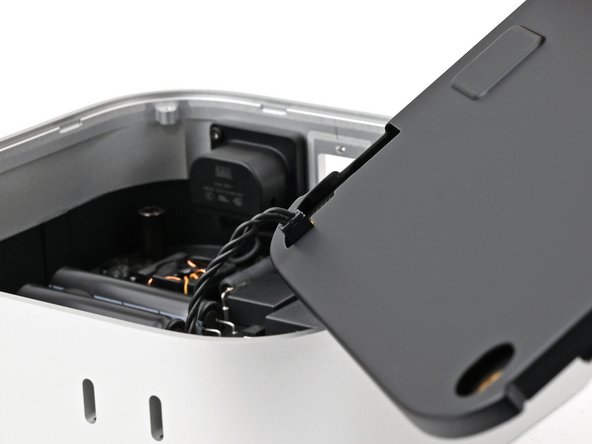
      • Don't remove the bottom cover, as it's still connected to the Mac mini with a cable.

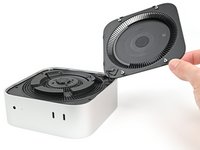
      • Lift the edge of the bottom cover opposite the power button and flip it over to expose the power button cable.

      Ask FixBot

      Add Comment

    6. How to Replace the Thermal Paste in your Mac mini (2024), Disconnect the power button: step 7, image 1 of 2 How to Replace the Thermal Paste in your Mac mini (2024), Disconnect the power button: step 7, image 2 of 2
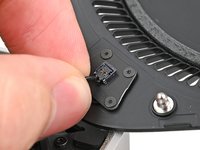
      • The power button cable is very fragile! You don't have to disconnect it to access the internals— but it will require you to keep the bottom cover propped up.

      • To disconnect the cable and remove the bottom cover, follow the next two steps.

      • If you don't disconnect the cable, prop up the bottom cover to prevent straining the cable and skip the next two steps.

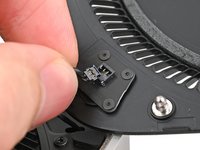
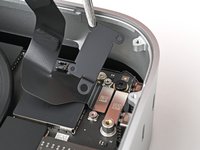
      • Grip the power button cable close to the head and pull it away from its socket to disconnect it.

      Ask FixBot

      Add Comment

    7. How to Replace the Thermal Paste in your Mac mini (2024), Remove the bottom cover: step 8, image 1 of 1
      • Remove the bottom cover.

      Ask FixBot

      Add Comment

    1. How to Replace the Thermal Paste in your Mac mini (2024), Remove the inner plate screws: step 9, image 1 of 2 How to Replace the Thermal Paste in your Mac mini (2024), Remove the inner plate screws: step 9, image 2 of 2
      Tool used on this step:
      FixMat
      $36.95
      Buy
      • Throughout this repair, keep track of each screw and make sure it goes back exactly where it came from.

      • While the Mac mini uses Torx Plus screws, standard Torx bits work. Make sure to apply constant, downward force to prevent stripping.

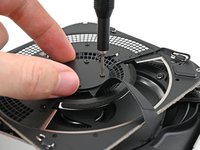
      • Use a T5 Torx screwdriver to remove the twelve screws securing the inner plate:

      • Eight 3.4 mm‑long screws

      • Four 2.4 mm‑long screws

      Ask FixBot

      Add Comment

    2. How to Replace the Thermal Paste in your Mac mini (2024), Separate the inner plate: step 10, image 1 of 3 How to Replace the Thermal Paste in your Mac mini (2024), Separate the inner plate: step 10, image 2 of 3 How to Replace the Thermal Paste in your Mac mini (2024), Separate the inner plate: step 10, image 3 of 3
      • Insert the point of a spudger into one of the clips' slots on the inner plate.

      • Pry up the inner plate enough so you can grip the edge along the same side as the headphone jack.

      Ask FixBot

      Add Comment

    3. How to Replace the Thermal Paste in your Mac mini (2024): step 11, image 1 of 2 How to Replace the Thermal Paste in your Mac mini (2024): step 11, image 2 of 2
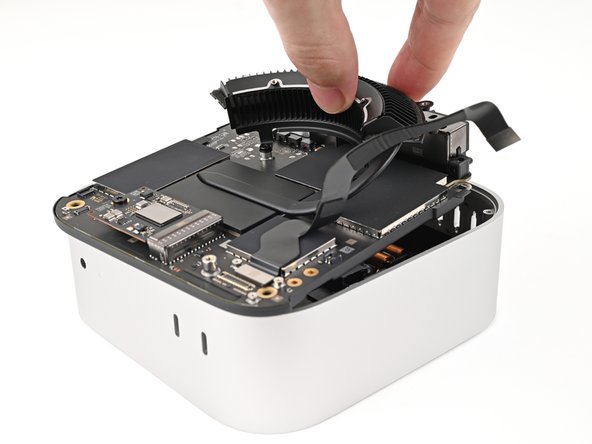
      • Pull the inner plate away from the chassis to slide it out from under the lip on the heat sink.

      • During reassembly, slide the inner plate back under the heat sink and press along its edges to secure it in the chassis.

      Ask FixBot

      Add Comment

    4. How to Replace the Thermal Paste in your Mac mini (2024): step 12, image 1 of 3 How to Replace the Thermal Paste in your Mac mini (2024): step 12, image 2 of 3 How to Replace the Thermal Paste in your Mac mini (2024): step 12, image 3 of 3
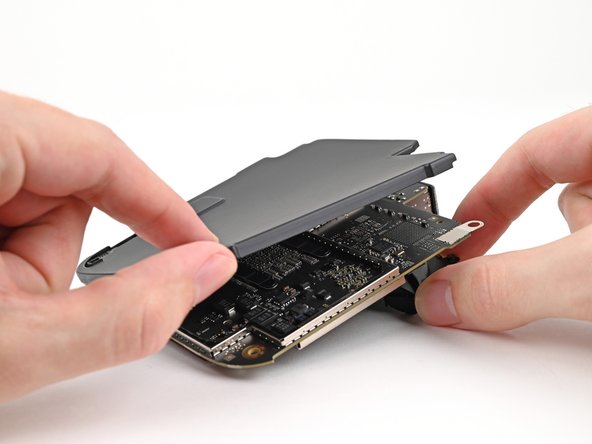
      • Don't remove the inner plate yet, as it's still connected to the Mac mini by a cable.

      • Lift the inner plate and flip it over to expose the wireless module cable.

      Ask FixBot

      Add Comment

    5. How to Replace the Thermal Paste in your Mac mini (2024), Remove the wireless module cover: step 13, image 1 of 3 How to Replace the Thermal Paste in your Mac mini (2024), Remove the wireless module cover: step 13, image 2 of 3 How to Replace the Thermal Paste in your Mac mini (2024), Remove the wireless module cover: step 13, image 3 of 3
      • Use one hand to secure the wireless module during this step.

      • Use a Torx Plus 5IP screwdriver to remove the four 2.5 mm‑long screws securing the wireless module cover.

      Ask FixBot

      Add Comment

    6. How to Replace the Thermal Paste in your Mac mini (2024), Remove the cover: step 14, image 1 of 2 How to Replace the Thermal Paste in your Mac mini (2024), Remove the cover: step 14, image 2 of 2
      • Remove the wireless module cover.

      • During reassembly, look the bottom of the cover to find the foam rectangle. Align the foam rectangle over the wireless module press connector to find the proper orientation for the cover.

      Ask FixBot

      Add Comment

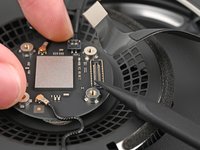
    7. How to Replace the Thermal Paste in your Mac mini (2024), Disconnect the wireless module: step 15, image 1 of 2 How to Replace the Thermal Paste in your Mac mini (2024), Disconnect the wireless module: step 15, image 2 of 2
      • Use one hand to secure the wireless module during this step.

      • Insert the point of a spudger under one of the short edges of the wireless module press connector.

      • Don't insert your spudger anywhere else, as you risk dislodging surface-mounted components.

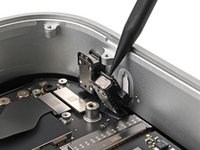
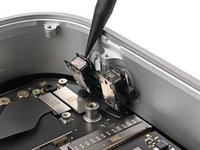
      • Pry up to disconnect the wireless module.

      Ask FixBot

      Add Comment

    8. How to Replace the Thermal Paste in your Mac mini (2024), Remove the inner plate: step 16, image 1 of 1
      • Remove the inner plate.

      Ask FixBot

      Add Comment

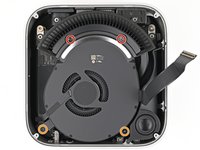
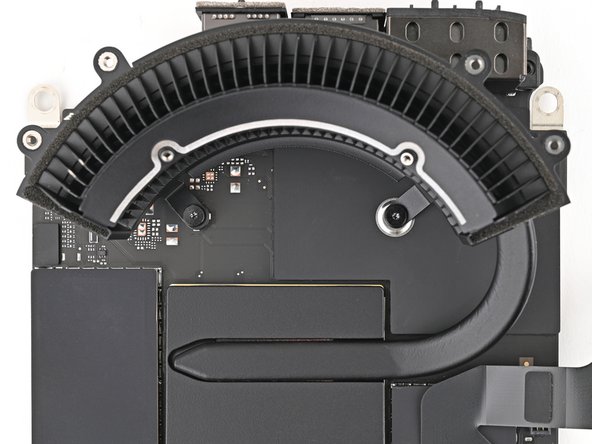
    1. How to Replace the Thermal Paste in your Mac mini (2024), Remove the fan screws: step 17, image 1 of 2 How to Replace the Thermal Paste in your Mac mini (2024), Remove the fan screws: step 17, image 2 of 2
      • If you're following this guide to clean your fan, this is a good time to do so.

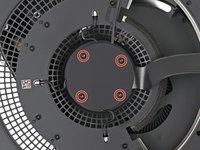
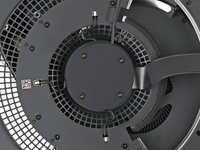
      • Remove the four screws securing the fan:

      • Two 2.4 mm‑long Torx Plus 3IP screws

      • Two 7.9 mm‑long Torx Plus 5IP screws

      Ask FixBot

      Add Comment

    2. How to Replace the Thermal Paste in your Mac mini (2024), Reposition the fan: step 18, image 1 of 3 How to Replace the Thermal Paste in your Mac mini (2024), Reposition the fan: step 18, image 2 of 3 How to Replace the Thermal Paste in your Mac mini (2024), Reposition the fan: step 18, image 3 of 3
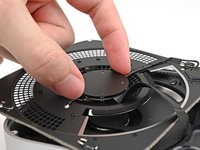
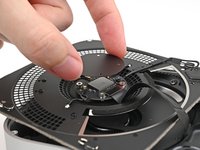
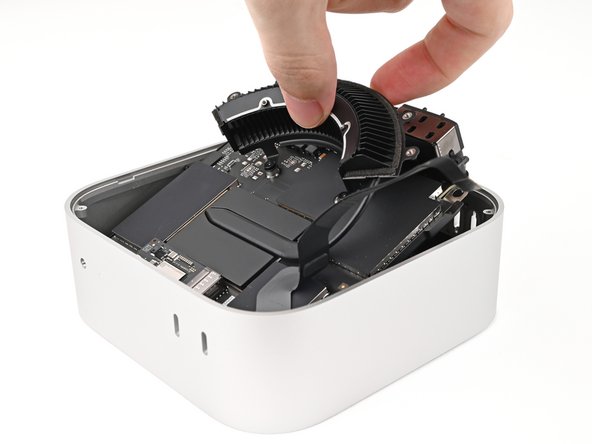
      • Lift the fan out of its recess in the chassis and flip it over to expose its wire and connector.

      • Let the fan rest on the chassis and heat sink.

      Ask FixBot

      Add Comment

    3. How to Replace the Thermal Paste in your Mac mini (2024), Disconnect the fan: step 19, image 1 of 3 How to Replace the Thermal Paste in your Mac mini (2024), Disconnect the fan: step 19, image 2 of 3 How to Replace the Thermal Paste in your Mac mini (2024), Disconnect the fan: step 19, image 3 of 3
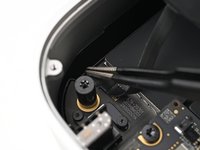
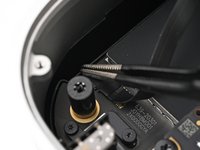
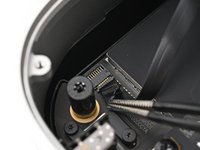
      • Use tweezers to peel back the tape covering the fan ZIF connector.

      Ask FixBot

      Add Comment

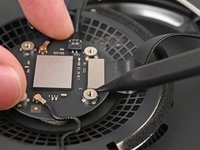
    4. How to Replace the Thermal Paste in your Mac mini (2024): step 20, image 1 of 2 How to Replace the Thermal Paste in your Mac mini (2024): step 20, image 2 of 2
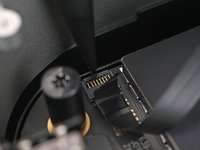
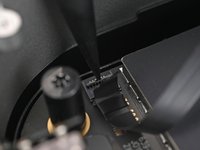
      • Use the point of a spudger, or your fingernail, to flip up the locking tab on the fan ZIF connector.

      Ask FixBot

      Add Comment

    5. How to Replace the Thermal Paste in your Mac mini (2024): step 21, image 1 of 2 How to Replace the Thermal Paste in your Mac mini (2024): step 21, image 2 of 2
      • Use tweezers, or your fingers, to slide the ZIF connector straight out of its socket.

      Ask FixBot

      Add Comment

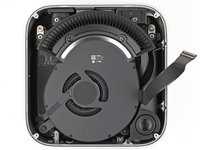
    6. How to Replace the Thermal Paste in your Mac mini (2024), Remove the fan: step 22, image 1 of 1
      • Remove the fan.

      Ask FixBot

      Add Comment

    1. How to Replace the Thermal Paste in your Mac mini (2024), Remove the headphone jack cover screws: step 23, image 1 of 2 How to Replace the Thermal Paste in your Mac mini (2024), Remove the headphone jack cover screws: step 23, image 2 of 2
      • Use a Torx Plus 3IP screwdriver to remove the two 2.2 mm‑long screws securing the headphone jack cover.

      Ask FixBot

      Add Comment

    2. How to Replace the Thermal Paste in your Mac mini (2024), Remove the cover: step 24, image 1 of 2 How to Replace the Thermal Paste in your Mac mini (2024), Remove the cover: step 24, image 2 of 2
      • Use tweezers, or your fingers, to remove the headphone jack cover.

      Ask FixBot

      Add Comment

    3. How to Replace the Thermal Paste in your Mac mini (2024), Disconnect the headphone jack: step 25, image 1 of 2 How to Replace the Thermal Paste in your Mac mini (2024), Disconnect the headphone jack: step 25, image 2 of 2
      • Use the point of a spudger to pry up and disconnect the headphone jack press connector.

      Ask FixBot

      Add Comment

    4. How to Replace the Thermal Paste in your Mac mini (2024), Remove the headphone jack screws: step 26, image 1 of 3 How to Replace the Thermal Paste in your Mac mini (2024), Remove the headphone jack screws: step 26, image 2 of 3 How to Replace the Thermal Paste in your Mac mini (2024), Remove the headphone jack screws: step 26, image 3 of 3
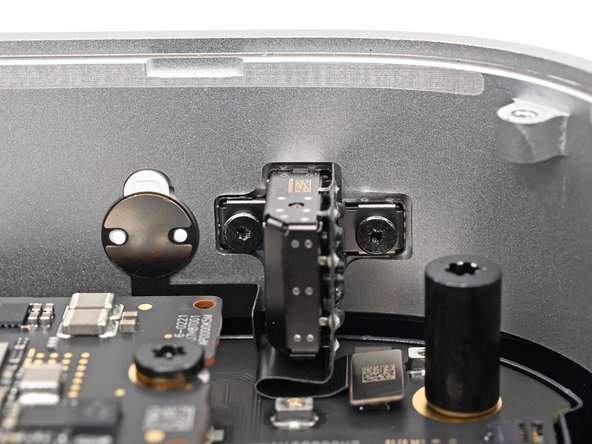
      • Use a Torx Plus 3IP screwdriver to remove the two 4.0 mm‑long screws securing the headphone jack.

      • If you aren't using a flexible adapter, make sure your screwdriver is as parallel with the screw as possible. Apply constant force against the screw to avoid stripping.

      Ask FixBot

      Add Comment

    5. How to Replace the Thermal Paste in your Mac mini (2024), Apply isopropyl alcohol: step 27, image 1 of 1
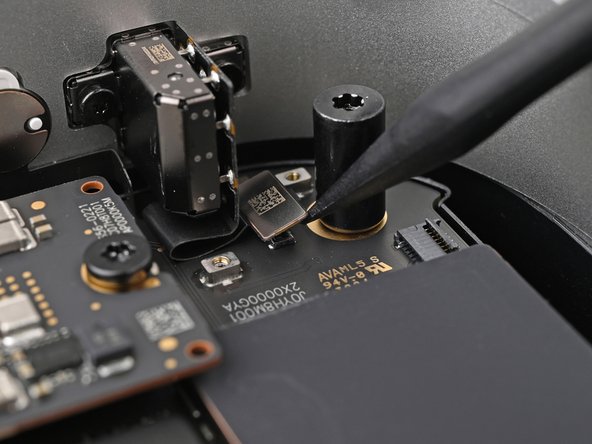
      • The power indicator light is connected to the headphone jack and requires separating its adhesive to continue.

      • Apply a few drops of isopropyl alcohol (>90%) to the top of the power indicator's silver plate.

      • Wait one minute for the alcohol to flow behind the power indicator and for the adhesive to loosen.

      Ask FixBot

      Add Comment

    6. How to Replace the Thermal Paste in your Mac mini (2024), Separate the power indicator: step 28, image 1 of 2 How to Replace the Thermal Paste in your Mac mini (2024), Separate the power indicator: step 28, image 2 of 2
      Tool used on this step:
      Tesa 61395 Tape
      $8.95
      Buy
      • Slide a Jimmy between the top of the power indicator and the chassis to separate the adhesive.

      • During reassembly, align the power indicator's holes over the white pegs in the chassis. If the old adhesive isn't sticky anymore, use a thin double-sided tape like Tesa Tape to replace it.

      Ask FixBot

      Add Comment

    7. How to Replace the Thermal Paste in your Mac mini (2024): step 29, image 1 of 2 How to Replace the Thermal Paste in your Mac mini (2024): step 29, image 2 of 2
      • Lightly grip the power indicator with tweezers and pull it away from the chassis to separate the adhesive securing its cable.

      Ask FixBot

      Add Comment

    8. How to Replace the Thermal Paste in your Mac mini (2024), Remove the headphone jack: step 30, image 1 of 2 How to Replace the Thermal Paste in your Mac mini (2024), Remove the headphone jack: step 30, image 2 of 2
      • Lift the headphone jack out of the chassis and remove it.

      Ask FixBot

      Add Comment

    1. How to Replace the Thermal Paste in your Mac mini (2024), Remove the speaker screws: step 31, image 1 of 2 How to Replace the Thermal Paste in your Mac mini (2024), Remove the speaker screws: step 31, image 2 of 2
      • Use a Torx Plus 5IP screwdriver to remove the three screws securing the speaker:

      • Two 4.1 mm‑long screws

      • One 3.7 mm‑long screw

      Ask FixBot

      Add Comment

    2. How to Replace the Thermal Paste in your Mac mini (2024), Reposition the speaker: step 32, image 1 of 3 How to Replace the Thermal Paste in your Mac mini (2024), Reposition the speaker: step 32, image 2 of 3 How to Replace the Thermal Paste in your Mac mini (2024), Reposition the speaker: step 32, image 3 of 3
      Ask FixBot

      Add Comment

    3. How to Replace the Thermal Paste in your Mac mini (2024): step 33, image 1 of 2 How to Replace the Thermal Paste in your Mac mini (2024): step 33, image 2 of 2
      • Pull the speaker over the edge of the chassis to expose its cable and its connector.

      • Rest the speaker on the edge of the chassis.

      Ask FixBot

      Add Comment

    4. How to Replace the Thermal Paste in your Mac mini (2024), Disconnect the speaker: step 34, image 1 of 3 How to Replace the Thermal Paste in your Mac mini (2024), Disconnect the speaker: step 34, image 2 of 3 How to Replace the Thermal Paste in your Mac mini (2024), Disconnect the speaker: step 34, image 3 of 3
      • Grip the speaker cable close to the head and pull it away from its socket to disconnect it.

      Ask FixBot

      Add Comment

    5. How to Replace the Thermal Paste in your Mac mini (2024), Remove the speaker: step 35, image 1 of 1
      • Remove the speaker.

      Ask FixBot

      Add Comment

    1. How to Replace the Thermal Paste in your Mac mini (2024), Remove the front USB-C port cover screws: step 36, image 1 of 2 How to Replace the Thermal Paste in your Mac mini (2024), Remove the front USB-C port cover screws: step 36, image 2 of 2
      • Remove the four screws securing the USB-C port cover:

      • Three 2.2 mm‑long Torx Plus 3IP screws

      • One 9.2 mm‑long Torx Plus 8IP screw

      Ask FixBot

      Add Comment

    2. How to Replace the Thermal Paste in your Mac mini (2024), Remove the cover: step 37, image 1 of 2 How to Replace the Thermal Paste in your Mac mini (2024), Remove the cover: step 37, image 2 of 2
      • Use tweezers, or your fingers, to remove the front USB-C port cover.

      Ask FixBot

      Add Comment

    3. How to Replace the Thermal Paste in your Mac mini (2024), Disconnect the front USB-C ports: step 38, image 1 of 2 How to Replace the Thermal Paste in your Mac mini (2024), Disconnect the front USB-C ports: step 38, image 2 of 2
      • Use the point of a spudger to pry up and disconnect the front USB-C ports press connector.

      Ask FixBot

      Add Comment

    4. How to Replace the Thermal Paste in your Mac mini (2024), Remove the front USB-C port screws: step 39, image 1 of 3 How to Replace the Thermal Paste in your Mac mini (2024), Remove the front USB-C port screws: step 39, image 2 of 3 How to Replace the Thermal Paste in your Mac mini (2024), Remove the front USB-C port screws: step 39, image 3 of 3
      • Use a Torx Plus 3IP screwdriver to remove the four 4.7 mm‑long screws securing the two front USB-C ports.

      • If you aren't using a flexible adapter, make sure your screwdriver is as parallel with the screw as possible. Apply constant force against the screw to avoid stripping.

      Ask FixBot

      Add Comment

    5. How to Replace the Thermal Paste in your Mac mini (2024), Remove the front USB-C ports: step 40, image 1 of 3 How to Replace the Thermal Paste in your Mac mini (2024), Remove the front USB-C ports: step 40, image 2 of 3 How to Replace the Thermal Paste in your Mac mini (2024), Remove the front USB-C ports: step 40, image 3 of 3
      • Use the point of a spudger to pry the front USB-C ports from their recesses in the chassis.

      • During reassembly, gently press the USB-C ports into their recesses until they click into place.

      Ask FixBot

      Add Comment

    6. How to Replace the Thermal Paste in your Mac mini (2024): step 41, image 1 of 2 How to Replace the Thermal Paste in your Mac mini (2024): step 41, image 2 of 2
      • Pull the front USB-C ports out of the chassis and remove it.

      Ask FixBot

      Add Comment

    1. How to Replace the Thermal Paste in your Mac mini (2024), Remove the logic board screws: step 42, image 1 of 2 How to Replace the Thermal Paste in your Mac mini (2024), Remove the logic board screws: step 42, image 2 of 2
      • Remove the six screws securing the logic board:

      • Three 6.8 mm‑long T8 Torx screws

      • One 16.2 mm‑long T8 Torx screw

      • Two 4.2 mm‑long T5 Torx screws

      Ask FixBot

      Add Comment

    2. How to Replace the Thermal Paste in your Mac mini (2024), Release the logic board: step 43, image 1 of 2 How to Replace the Thermal Paste in your Mac mini (2024), Release the logic board: step 43, image 2 of 2
      • Grip the heat sink and pull it away from the edge of the chassis to release the pegs in the rear ports.

      Ask FixBot

      Add Comment

    3. How to Replace the Thermal Paste in your Mac mini (2024): step 44, image 1 of 3 How to Replace the Thermal Paste in your Mac mini (2024): step 44, image 2 of 3 How to Replace the Thermal Paste in your Mac mini (2024): step 44, image 3 of 3
      • Don't fully remove the logic board from the chassis yet, as it's still attached by a cable.

      • Lift the rear port side of the logic board out of the chassis before sliding the opposite end out.

      • During reassembly, insert the edge of the logic board opposite the rear ports into the chassis before pressing it down flat.

      Ask FixBot

      Add Comment

    4. How to Replace the Thermal Paste in your Mac mini (2024): step 45, image 1 of 3 How to Replace the Thermal Paste in your Mac mini (2024): step 45, image 2 of 3 How to Replace the Thermal Paste in your Mac mini (2024): step 45, image 3 of 3
      • Turn the logic board over to expose the power supply cable connector.

      Ask FixBot

      Add Comment

    5. How to Replace the Thermal Paste in your Mac mini (2024), Disconnect the power supply: step 46, image 1 of 2 How to Replace the Thermal Paste in your Mac mini (2024), Disconnect the power supply: step 46, image 2 of 2
      • Use your fingers to grip the power supply cable connector and pull it straight out of its socket to disconnect it.

      Ask FixBot

      Add Comment

    6. How to Replace the Thermal Paste in your Mac mini (2024), Remove the logic board: step 47, image 1 of 1
      • Remove the logic board.

      Ask FixBot

      Add Comment

    7. How to Replace the Thermal Paste in your Mac mini (2024), Remove the logic board cover: step 48, image 1 of 3 How to Replace the Thermal Paste in your Mac mini (2024), Remove the logic board cover: step 48, image 2 of 3 How to Replace the Thermal Paste in your Mac mini (2024), Remove the logic board cover: step 48, image 3 of 3
      • The rubber cover on the bottom of the logic board is secured with adhesive along its copper pads.

      • Flip over the logic board.

      • While securing the logic board with one hand, use the other to peel off the rubber cover.

      • If pieces of the copper rip and stick to the logic board, don't worry! Keep the copper in place, as it'll fill in the gaps on the rubber cover during reassembly.

      Ask FixBot

      Add Comment

    8. How to Replace the Thermal Paste in your Mac mini (2024), Remove the heat sink bracket screws: step 49, image 1 of 3 How to Replace the Thermal Paste in your Mac mini (2024), Remove the heat sink bracket screws: step 49, image 2 of 3 How to Replace the Thermal Paste in your Mac mini (2024), Remove the heat sink bracket screws: step 49, image 3 of 3
      • Use one hand to secure the logic board during this step to prevent damaging it.

      • Use a Torx Plus 5IP screwdriver to remove the four 4.4 mm‑long screws securing the heat sink bracket.

      • The brackets will bend up as you loosen the screws.

      • During reassembly, tighten the heat sink bracket screws in an "X" pattern.

      Ask FixBot

      Add Comment

    9. How to Replace the Thermal Paste in your Mac mini (2024), Remove the brackets: step 50, image 1 of 3 How to Replace the Thermal Paste in your Mac mini (2024), Remove the brackets: step 50, image 2 of 3 How to Replace the Thermal Paste in your Mac mini (2024), Remove the brackets: step 50, image 3 of 3
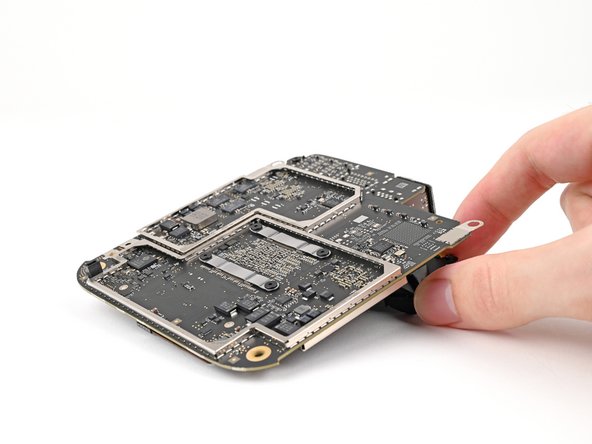
      • Use tweezers, or your fingers, to remove the heat sink brackets.

      Ask FixBot

      Add Comment

    10. How to Replace the Thermal Paste in your Mac mini (2024), Remove the heat sink screws: step 51, image 1 of 2 How to Replace the Thermal Paste in your Mac mini (2024), Remove the heat sink screws: step 51, image 2 of 2
      • Flip over the logic board.

      • Use a Torx Plus 5IP screwdriver to remove the two 4.0 mm‑long screws securing the heat sink.

      Ask FixBot

      Add Comment

    11. How to Replace the Thermal Paste in your Mac mini (2024), Remove the heat sink: step 52, image 1 of 2 How to Replace the Thermal Paste in your Mac mini (2024), Remove the heat sink: step 52, image 2 of 2
      • Lift the heat sink off the logic board and remove it.

      • You might feel a little resistance from the thermal paste bonded to the heat sink.

      Ask FixBot

      Add Comment

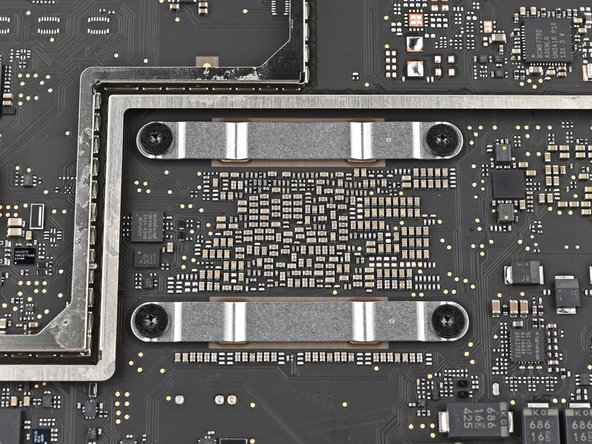
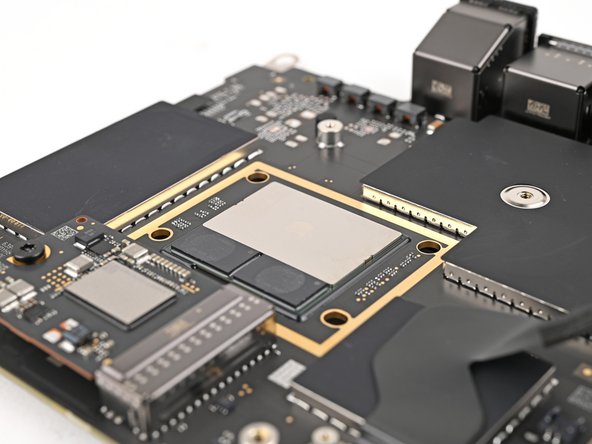
    12. How to Replace the Thermal Paste in your Mac mini (2024), Remove the old thermal paste: step 53, image 1 of 3 How to Replace the Thermal Paste in your Mac mini (2024), Remove the old thermal paste: step 53, image 2 of 3 How to Replace the Thermal Paste in your Mac mini (2024), Remove the old thermal paste: step 53, image 3 of 3
      • Use the flat end of a spudger to scrape off the old thermal paste from the processor.

      • Apply a few drops of isopropyl alcohol (>90%) to the processor and use a coffee filter or a lint-free cloth to wipe away any residue.

      • Repeat this step for the thermal paste on the heat sink.

      Ask FixBot

      Add Comment

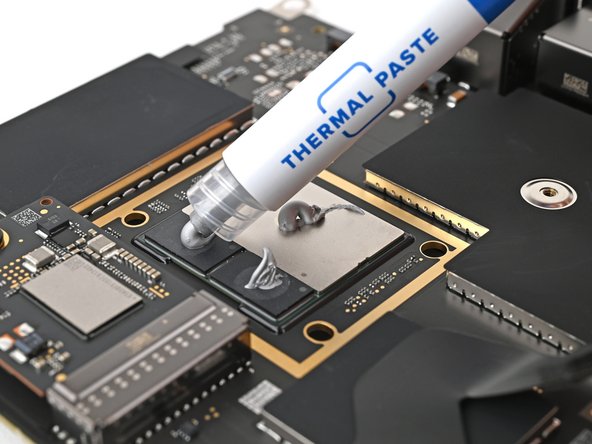
    13. How to Replace the Thermal Paste in your Mac mini (2024), Apply the new thermal paste: step 54, image 1 of 3 How to Replace the Thermal Paste in your Mac mini (2024), Apply the new thermal paste: step 54, image 2 of 3 How to Replace the Thermal Paste in your Mac mini (2024), Apply the new thermal paste: step 54, image 3 of 3
      • Apply a small bead of thermal paste to the each of the three locations on the processor.

      • Follow this guide in reverse order starting with this step to reattach the heat sink. Placing the heat sink back on the processor will evenly spread the thermal paste and bond both parts together.

      Ask FixBot

      Add Comment

Conclusion

To reassemble your device, follow these instructions in reverse order, starting with this step.

Repair didn’t go as planned? Try some basic troubleshooting, or ask our Mac mini (2024) Answers Community for help.

Cancel: I did not complete this guide.

2 other people completed this guide.

Alex Diaz-Kokaisl

Member since: 01/16/22

247,153 Reputation

1,203 Guides authored

Team

iFixit Member of iFixit

Staff

123 Members

62,622 Guides authored

1 Guide Comment

Given the work involved, I'd very much recommend using PTM7950 instead of paste — sure it's a bit pricey, but you're unlikely to ever need to replace it again, and it outperforms most pastes. You can probably just cut one pad over the whole processor, but I used one big one and two small ones so there was still a little separation (not sure if that matters).

What I don't understand is how Apple looked at the old Mac Mini designs and decided this new one needed even more tiny little ultra fragile wires. The power button for example doesn't need to be on the outer case at all, it could easily just be on the inner plate with a button thick enough to align with the hole in base. Likewise the inner plate and most other components could use pins rather than cables, since these are all custom components anyway and most are just sitting right on the board (and screwed into place), there's just no advantage to any of the cables here.

Haravikk - Reply Share

Add Comment

View Statistics:

Past 24 Hours: 4

Past 7 Days: 36

Past 30 Days: 247

All Time: 6,346