
HTC Vive Pro All-In-One Cable Replacement

Sam Omiotek and one other contributor
Last updated on Jan 31, 2025
Views: 4.6K
View statistics:
- Past 24 Hours:
- 5
- Past 7 Days:
- 34
- Past 30 Days:
- 142
- All Time:
- 4,568
Comments: 0
No one has left comments on this guide. Will you be first?
Go to guide commentsCompleted: 0 1
No one has marked this guide "completed." Will you be the first?
1 person has marked this guide "completed." It's you — great job!
Favorites: 0 1
No one has favorited (and subscribed to) this guide. Will you be the first?
1 person has favorited (and subscribed to) this guide — and that's you!
Introduction
Go to step 1 ↓Follow this guide to replace the All-In-One cable on you HTC Vive Pro.
Power off and unplug your headset before you begin your repair.
What you need
Parts

-
-
-
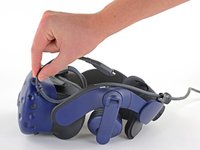
Rotate the head strap forward as far as it will go.
 Ask FixBot
-
-
-
-
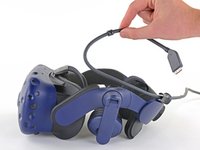
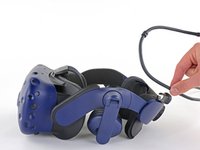
Remove the All-In-One Cable from the cable guides along the left side of the head strap.
-
-


Compare your new replacement part to the original part—you may need to transfer remaining components or remove adhesive backings from the new part before installing.
To reassemble your device, follow the above steps in reverse order.
Take your e-waste to an R2 or e-Stewards certified recycler.
Repair didn’t go as planned? Try some basic troubleshooting, or ask our Answers community for help.

