HTC Vive Outer Sheath Replacement

What you need

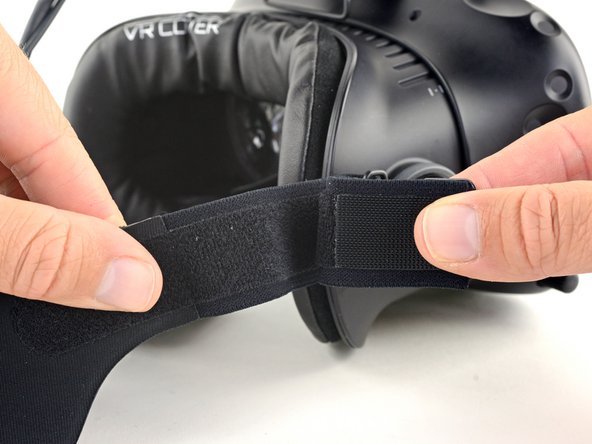
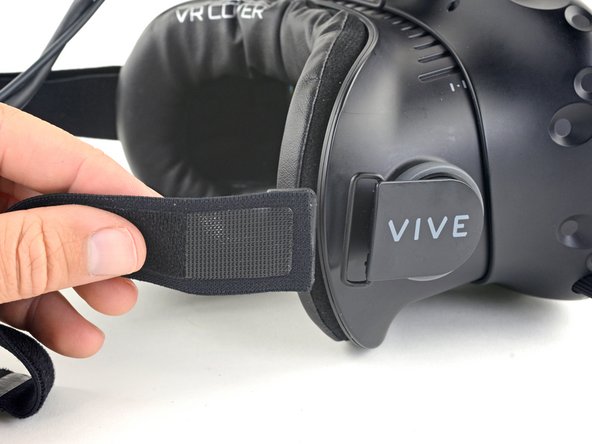
  1. HTC Vive Outer Sheath Replacement, Release the upper head strap: step 1, image 1 of 2 HTC Vive Outer Sheath Replacement, Release the upper head strap: step 1, image 2 of 2
    • Be sure to power down and disconnect your Vive before beginning.

    • Pull the hook-and-loop (Velcro) closure at the top of the head strap apart to release the top of the head strap.

  2. HTC Vive Outer Sheath Replacement, Remove the upper head strap: step 2, image 1 of 2 HTC Vive Outer Sheath Replacement, Remove the upper head strap: step 2, image 2 of 2
    • Slide the top part of the head strap through its metal loop on the headset to remove it.

  3. HTC Vive Outer Sheath Replacement, Remove the right side of the head strap: step 3, image 1 of 3 HTC Vive Outer Sheath Replacement, Remove the right side of the head strap: step 3, image 2 of 3 HTC Vive Outer Sheath Replacement, Remove the right side of the head strap: step 3, image 3 of 3
    • Pull the hook-and-loop closure at the right side of the head strap apart to release the right side of the head strap.

    • Slide the right side of the head strap through its metal loop to remove it.

  4. HTC Vive Outer Sheath Replacement, Remove the left side of the head strap: step 4, image 1 of 3 HTC Vive Outer Sheath Replacement, Remove the left side of the head strap: step 4, image 2 of 3 HTC Vive Outer Sheath Replacement, Remove the left side of the head strap: step 4, image 3 of 3
    • Pull the hook-and-loop closure at the left side of the head strap apart to release the left side of the head strap.

    • Slide the left side of the head strap through its metal loop to remove it.

  5. HTC Vive Outer Sheath Replacement, Remove the head strap: step 5, image 1 of 3 HTC Vive Outer Sheath Replacement, Remove the head strap: step 5, image 2 of 3 HTC Vive Outer Sheath Replacement, Remove the head strap: step 5, image 3 of 3
    • Slide the head strap along the cable, away from the Vive.

    • When the head strap comes to the end of the cable, gently slide it over the plugs and remove it.

  6. HTC Vive Outer Sheath Replacement, Unscrew the head strap mounts: step 6, image 1 of 2 HTC Vive Outer Sheath Replacement, Unscrew the head strap mounts: step 6, image 2 of 2
    • Be sure to power down and disconnect your Vive before beginning.

    • Use a T5 Torx driver to remove the two 12 mm-long screws securing the head strap mounts on either side of the headset.

    • For some devices, a T6 Torx driver may work better.

    • The mounts may fall off when the screws are removed, so be careful not to lose any parts.

  7. HTC Vive Outer Sheath Replacement, Remove the head strap mounts: step 7, image 1 of 3 HTC Vive Outer Sheath Replacement, Remove the head strap mounts: step 7, image 2 of 3 HTC Vive Outer Sheath Replacement, Remove the head strap mounts: step 7, image 3 of 3
    • Remove both head strap mounts.

  8. HTC Vive Outer Sheath Replacement, Remove the facerest: step 8, image 1 of 2 HTC Vive Outer Sheath Replacement, Remove the facerest: step 8, image 2 of 2
    • Slide the facerest straight away from the headset to remove it.

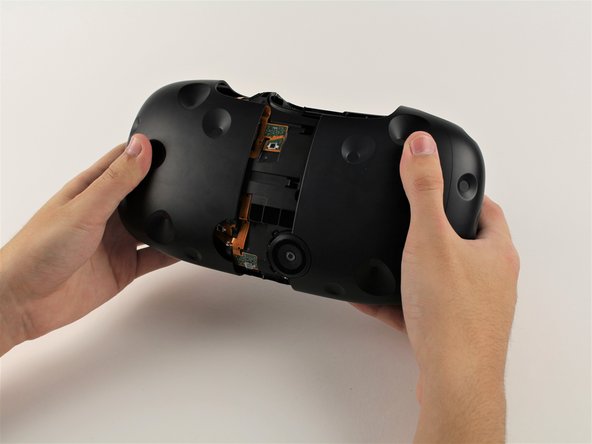
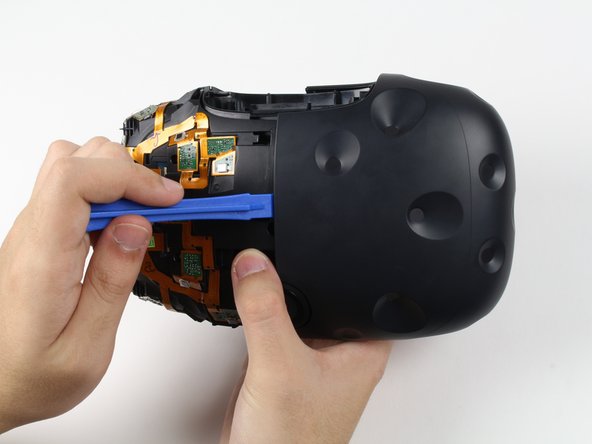
  9. HTC Vive Outer Sheath Replacement, Outer Shell: step 9, image 1 of 3 HTC Vive Outer Sheath Replacement, Outer Shell: step 9, image 2 of 3 HTC Vive Outer Sheath Replacement, Outer Shell: step 9, image 3 of 3
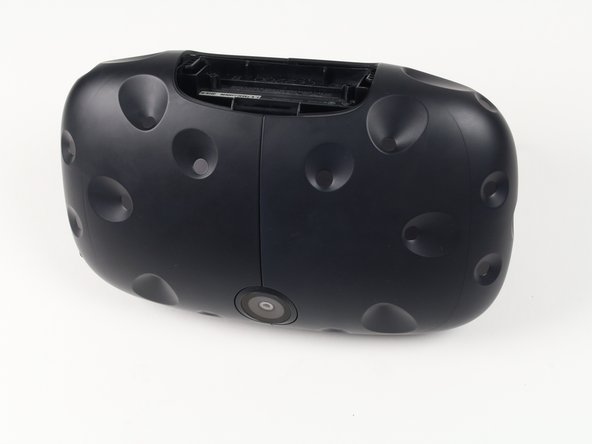
    • Orient the Vive so that the camera is facing towards you and the connector ports are facing upwards.

    • There are four screws you need to remove that are covered with small black stickers (two on top, two on bottom).

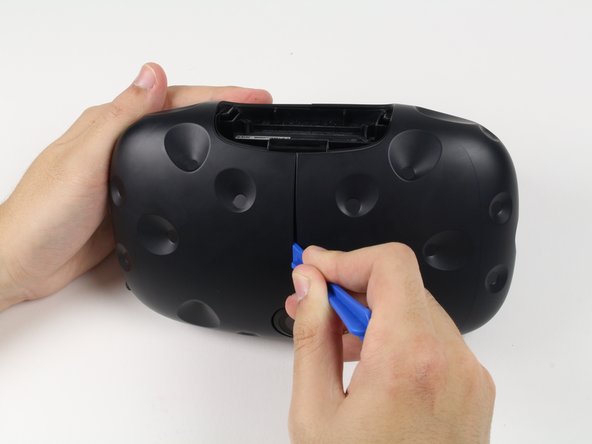
    • Use a plastic opening tool to gently pry up the left side of the outer sheath.

    • If the left sheath is glued down, slide your plastic opening tool along the middle seam to break the bond.

    • Slide the left side of the sheath outwards.

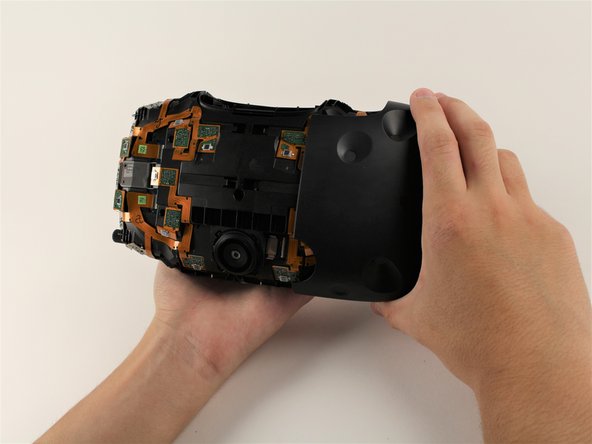
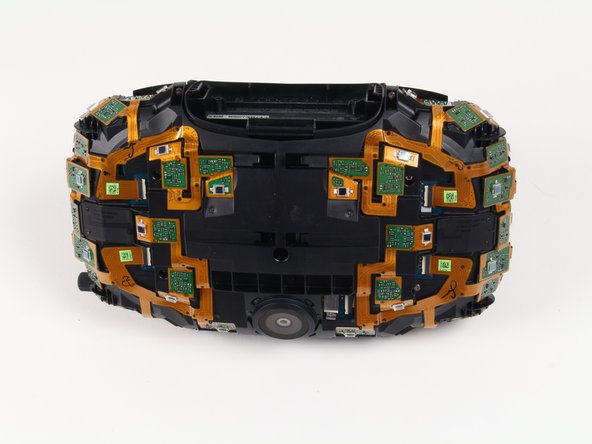
  10. HTC Vive Outer Sheath Replacement: step 10, image 1 of 3 HTC Vive Outer Sheath Replacement: step 10, image 2 of 3 HTC Vive Outer Sheath Replacement: step 10, image 3 of 3
    • Slide a plastic opening tool underneath the right side of the sheath to remove any remaining glue.

    • Using the plastic opening tool, pry the right side of the sheath upwards slightly.

    • Using your hands, slide the right side of the sheath outwards.

Caleb Watts

Member since: 09/25/17

2,427 Reputation

11 Guides authored

Team

Cal Poly, Team S18-G1, Forte Fall 2017 Member of Cal Poly, Team S18-G1, Forte Fall 2017

CPSU-FORTE-F17S18G1

5 Members

11 Guides authored

View Statistics:

Past 24 Hours: 0

Past 7 Days: 4

Past 30 Days: 15

All Time: 3,319