Free Shipping on Domestic Orders $75+

HTC One M8 Rear Case Replacement

What you need

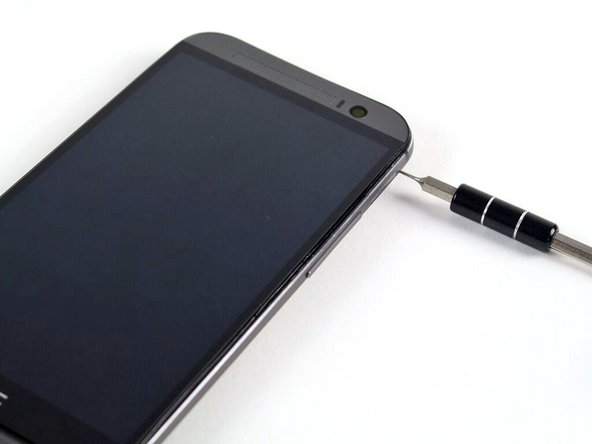
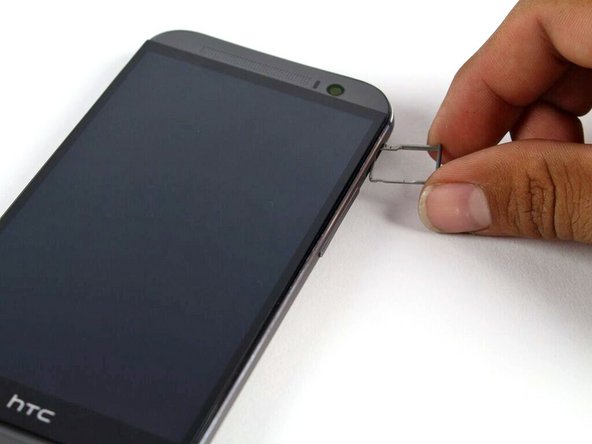
    1. HTC One M8 Rear Case Replacement, SIM Card: step 1, image 1 of 2 HTC One M8 Rear Case Replacement, SIM Card: step 1, image 2 of 2
      • Insert a SIM card eject tool or a paperclip into the small hole in the SIM card tray, located on the upper left hand side of the phone.

      • Press to eject the tray.

      • This may require a significant amount of force.

      Ask FixBot

      Add Comment

    2. HTC One M8 Rear Case Replacement: step 2, image 1 of 1
      • Remove the SIM card tray assembly from the HTC One M8.

      • When reinserting the SIM card, ensure that it is in the proper orientation relative to the tray.

      Ask FixBot

      Add Comment

    1. HTC One M8 Rear Case Replacement, MicroSD Card: step 3, image 1 of 2 HTC One M8 Rear Case Replacement, MicroSD Card: step 3, image 2 of 2
      • Insert a SIM card eject tool or a paperclip into the small hole in the microSD card tray, located on the upper right hand side of the phone.

      • Press to eject the tray.

      • This may require a significant amount of force.

      Ask FixBot

      Add Comment

    2. HTC One M8 Rear Case Replacement: step 4, image 1 of 1
      • Remove the microSD card tray assembly from the HTC One M8.

      • When reinserting the microSD card, ensure that it is in the proper orientation relative to the tray.

      Ask FixBot

      Add Comment

    1. HTC One M8 Rear Case Replacement, Rear Case: step 5, image 1 of 2 HTC One M8 Rear Case Replacement, Rear Case: step 5, image 2 of 2
      • Use an iOpener or heat gun to loosen the adhesive on the upper and lower speaker grilles.

      • Refer to the iOpener guide for info on how to use the iOpener.

      Ask FixBot

      Add Comment

    2. HTC One M8 Rear Case Replacement: step 6, image 1 of 3 HTC One M8 Rear Case Replacement: step 6, image 2 of 3 HTC One M8 Rear Case Replacement: step 6, image 3 of 3
      • Use a plastic opening tool to gently peel up the lower speaker grille.

      • The adhesive is messy, and can be removed using Goo-gone.

      Ask FixBot

      Add Comment

    3. HTC One M8 Rear Case Replacement: step 7, image 1 of 2 HTC One M8 Rear Case Replacement: step 7, image 2 of 2
      • Use a plastic opening tool to gently peel up the upper speaker grille.

      Ask FixBot

      Add Comment

    4. HTC One M8 Rear Case Replacement: step 8, image 1 of 1
      • Remove the two silver 3 mm Phillips #00 screws from the top.

      • Remove the four black 4 mm T5 Torx screws from the bottom.

      Ask FixBot

      Add Comment

    5. HTC One M8 Rear Case Replacement: step 9, image 1 of 3 HTC One M8 Rear Case Replacement: step 9, image 2 of 3 HTC One M8 Rear Case Replacement: step 9, image 3 of 3
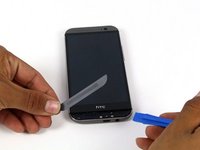
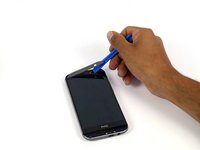
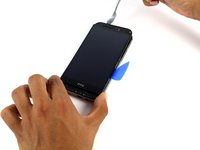
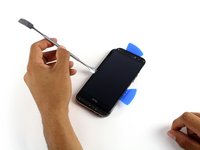
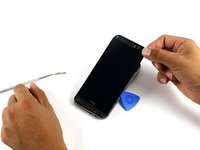
      • Work your way around the perimeter of the phone with a spudger and plastic opening picks to free the clips that secure the rear case to the display assembly.

      • A metal spudger is pictured, but it is best to use a nylon spudger to prevent marring the device.

      • Be careful not to lose the power button: it sits loosely in the top of the lower chassis.

      • Significant force may be required to pry the casing apart.

      Ask FixBot

      Add Comment

Conclusion

To reassemble your device, follow these instructions in reverse order.

Cancel: I did not complete this guide.

12 other people completed this guide.

Michael Gonzalez

Member since: 04/14/15

4,448 Reputation

5 Guides authored

Team

Cal Poly, Team 5-9, Maness Spring 2015 Member of Cal Poly, Team 5-9, Maness Spring 2015

CPSU-MANESS-S15S5G9

4 Members

30 Guides authored

0 Guide Comments

Add Comment

View Statistics:

Past 24 Hours: 0

Past 7 Days: 8

Past 30 Days: 43

All Time: 7,499