Introduction
This guide includes laptop disassembly to gain access to the internal components and motherboard replacement.
What you need
-
-
Flip the laptop over so the bottom is facing up.
-
Use your Phillips #0 screwdriver to remove the eleven visible 5 mm screws on the back of the laptop.
-
Unscrew the two remaining 2.5mm screws. Keep these screws separate from the first eleven 5mm screws.
-
-
-
Using a spudger, separate the keyboard surface from the bottom of the laptop.
-
While lifting the keyboard surface from the bottom, you will notice three cables still attaching them together. Gently unplug each of these cables from the motherboard.
-
Remove the keyboard assembly.
-
-
-
Use the Phillips #0 to remove four screws from the top of the battery labeled A.
-
Use the Phillips #0 screwdriver to remove four screws labeled holding the battery to the case.
-
-
-
-
Coming from the upper middle of the battery, there are cables which connect the battery to the motherboard. Gently remove this group of cables from the socket that it is in on the motherboard.
-
Lift the battery out.
-
-
-
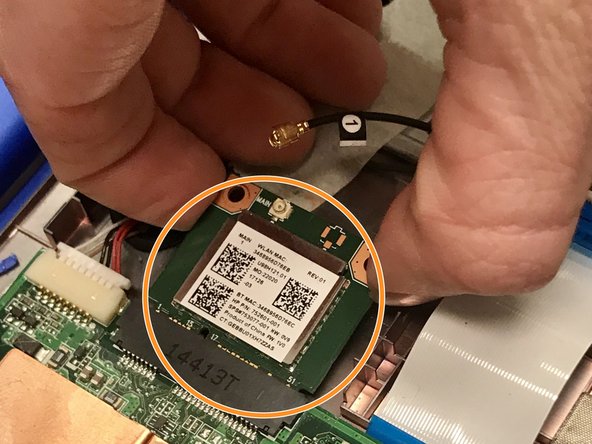
Inside the laptop you will notice the wireless card located in the upper middle. This will be what you are replacing.
-
Attached to the Wi-Fi card is a black wire that must be removed. Using your hand, lift gently on the wire as close as you can to where it connects to the Wi-Fi card.
-
Once the wire is removed, set it aside so it does not get damaged.
-
-
-
Remove the screw holding the wireless card in place.
-
With the screw removed, gently pull back the Wi-Fi card and then lift it out of the laptop. You are now ready to insert the new wireless card.
-
-
-
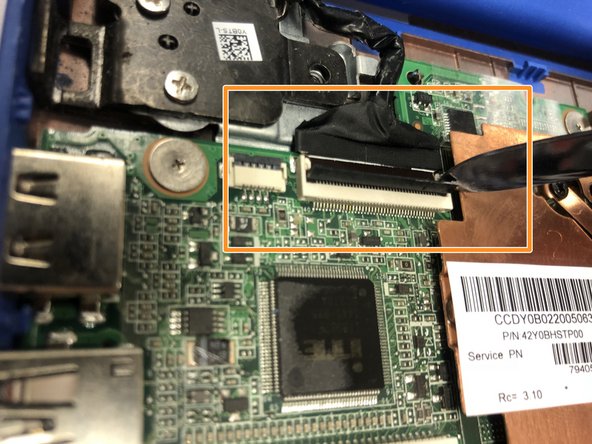
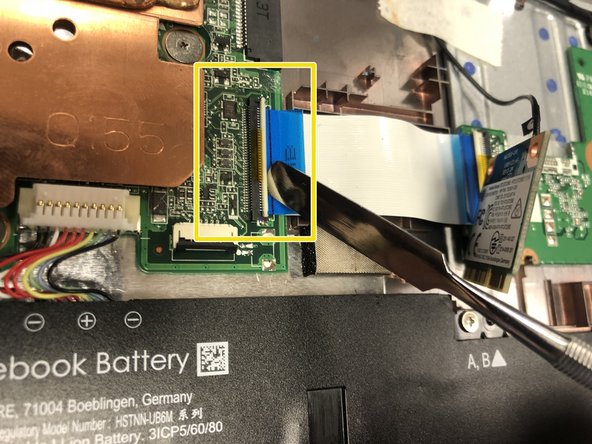
Once you have access to the internals, remove the wires and wifi card connected to the motherboard.
-
To remove the upper wire connection, flip the tab holding it into the motherboard, then remove the wire gently.
-
To remove the wire strand connection, flip the tab shown and then remove the wire strand.
-
-
-
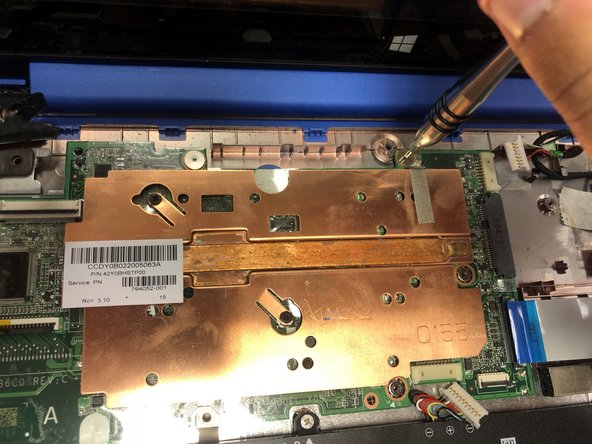
With all the wired connections removed, now unscrew the screws holding the motherboard in place.
-
-
-
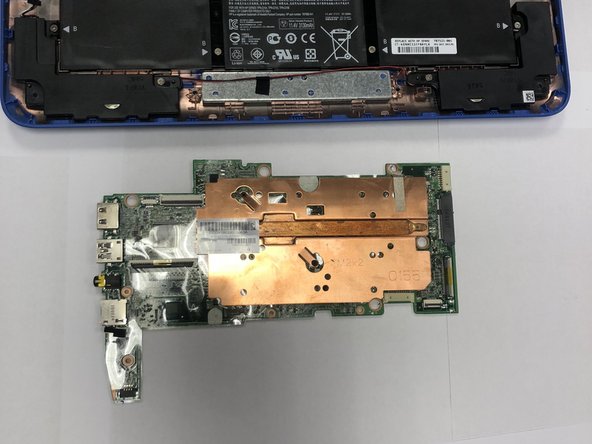
Now, once gently pry up on the right side of the motherboard and then lift the motherboard out. You are now ready to replace the motherboard.
-


Team

Western Carolina University, Team S1-G1, Virtue Spring 2018 Member of Western Carolina University, Team S1-G1, Virtue Spring 2018
WCU-VIRTUE-S18S1G1
4 Members
11 Guides authored