HP Star Wars Special Edition 15-an051dx Screen Replacement

What you need

  1. HP Star Wars Special Edition 15-an051dx Screen Replacement, Screen: step 1, image 1 of 3 HP Star Wars Special Edition 15-an051dx Screen Replacement, Screen: step 1, image 2 of 3 HP Star Wars Special Edition 15-an051dx Screen Replacement, Screen: step 1, image 3 of 3
    • Make sure the laptop is fully powered down and unplugged before you start.

    • Remove the two circular plastic screw covers, then remove the two 4.5 mm screws in the using a Phillips #1 screwdriver.

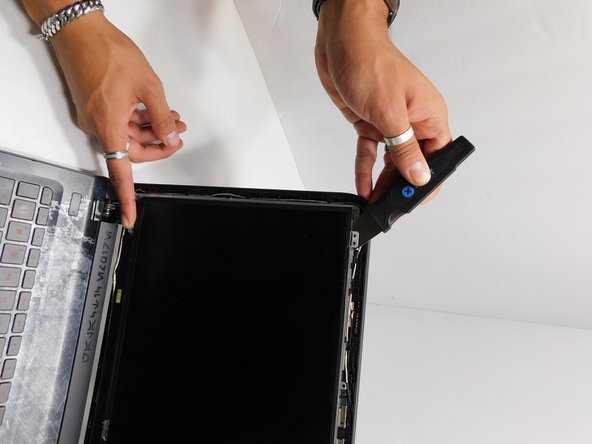
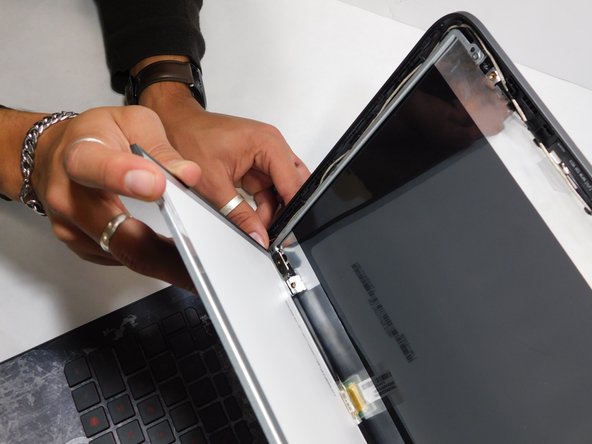
  2. HP Star Wars Special Edition 15-an051dx Screen Replacement: step 2, image 1 of 3 HP Star Wars Special Edition 15-an051dx Screen Replacement: step 2, image 2 of 3 HP Star Wars Special Edition 15-an051dx Screen Replacement: step 2, image 3 of 3
    • Insert a spudger in between the bezel and display, at the top.

    • Move the tool around all sides of the bezel.

    • With your finger, lift the inside part of the bezel.

    • Pull the bezel back; it will pop-off.

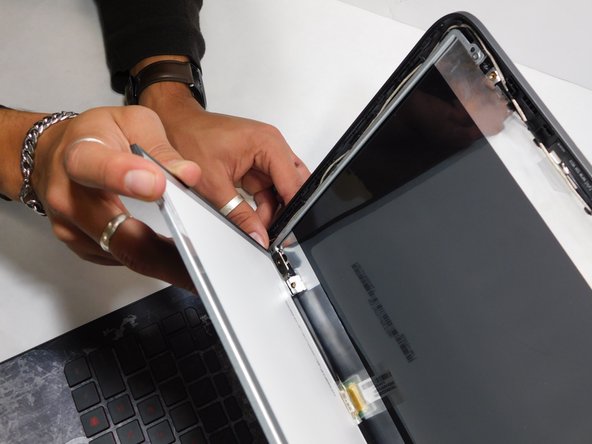
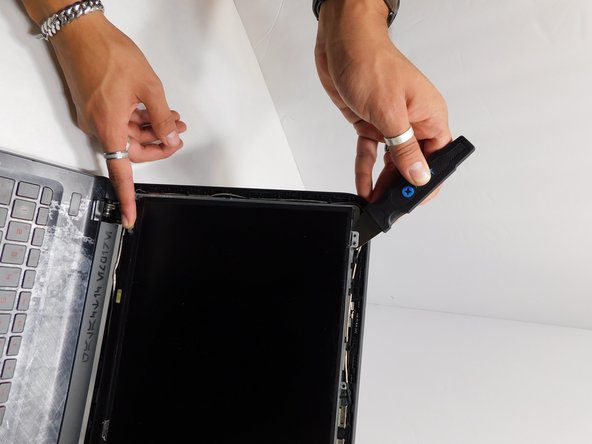
  3. HP Star Wars Special Edition 15-an051dx Screen Replacement: step 3, image 1 of 3 HP Star Wars Special Edition 15-an051dx Screen Replacement: step 3, image 2 of 3 HP Star Wars Special Edition 15-an051dx Screen Replacement: step 3, image 3 of 3
    • Remove the four 2.75 mm screws using a Phillips #1 screwdriver

    • Lift the screen using a spudger.

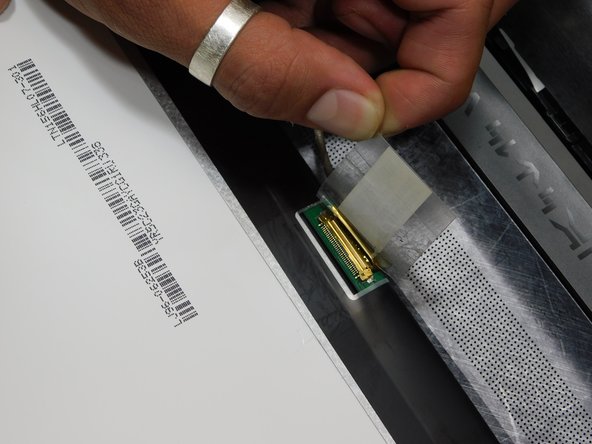
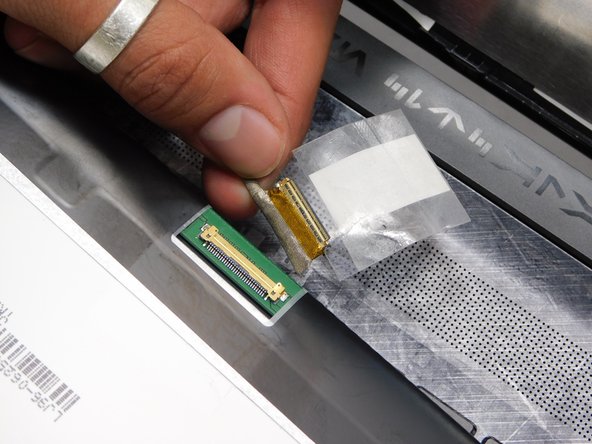
  4. HP Star Wars Special Edition 15-an051dx Screen Replacement: step 4, image 1 of 3 HP Star Wars Special Edition 15-an051dx Screen Replacement: step 4, image 2 of 3 HP Star Wars Special Edition 15-an051dx Screen Replacement: step 4, image 3 of 3
    • Lifting the tape on the back of the screen and peel it off.

    • Remove the connection.

  5. HP Star Wars Special Edition 15-an051dx Screen Replacement: step 5, image 1 of 3 HP Star Wars Special Edition 15-an051dx Screen Replacement: step 5, image 2 of 3 HP Star Wars Special Edition 15-an051dx Screen Replacement: step 5, image 3 of 3
    • Connect the new screen using the 30 pin cable.

    • Put the screen in place.

Conclusion

Enjoy your new screen!


Take your e-waste to an R2 or e-Stewards certified recycler.

2 other people completed this guide.

Fernando Mendez

Member since: 08/25/22

643 Reputation

5 Guides authored

Team

Gateway, Team 1-2, Pee Fall 2022 Member of Gateway, Team 1-2, Pee Fall 2022

GCC-PEE-F22S1G2

4 Members

5 Guides authored

0 Comments

Add Comment

View Statistics:

Past 24 Hours: 0

Past 7 Days: 0

Past 30 Days: 6

All Time: 201