Introduction
This guide shows the steps on how to remove and replace the RAM in an HP Pavilion 15-eg0021nr laptop computer if the system is experiencing frequent shutdowns, stuttering, slow performance, or could benefit from a memory upgrade. Before continuing with this guide, it is recommended to run built-in diagnostics to check the battery health, and ensure the power adapter is functioning properly to confirm that the issue is not related to power delivery. It battery needs to be replaced please see the Battery Replacement guide.
Over time, insufficient or failing RAM can lead to reduced system performance, lag, and instability, especially when running multiple applications or memory-intensive programs. If diagnostics or performance monitoring indicate that memory is the limiting factor, upgrading or replacing the RAM can significantly improve responsiveness and overall functionality. This guide will walk through the necessary preparation and safety considerations before accessing internal components, followed by the steps required to safely remove and install a new RAM module.
Before proceeding with these steps please be sure to completely power down the laptop.
What you need
-
-
-
Close the display and flip the laptop upside-down.
-
Remove the two rubber feet on the lower case.
 Ask FixBot
-
-
-
Remove the following screws securing the lower case with a Phillips #1 screwdriver:
-
Four 6 mm-long
-
Two 5.5 mm-long
-
-
-
-
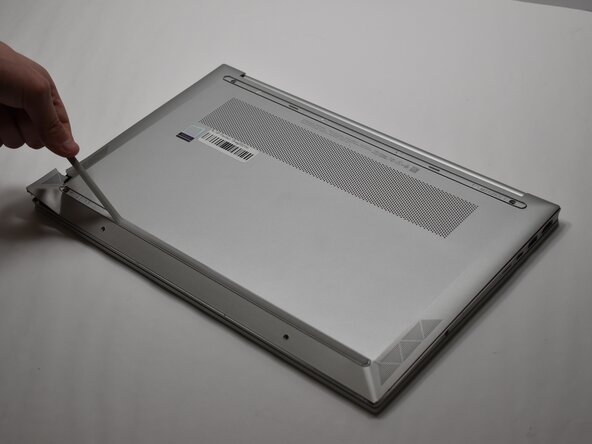
Insert an opening pick into the seam between the lower case and chassis,
-
Pry around the entire perimeter until the lower case fully releases.
-
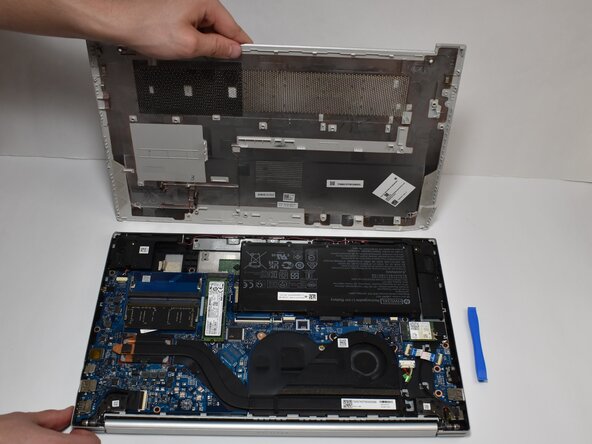
Remove the lower case.
-
-
-
-
-
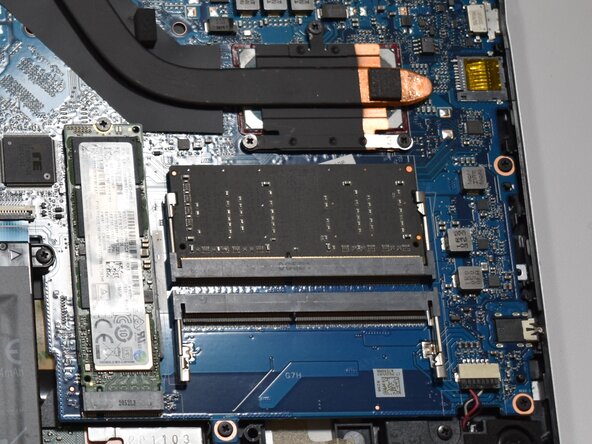
Two clips secure the RAM module in place, one on each side. Using your fingers, spread the clips away from the RAM module.
-
Remove the RAM module.
-
-
-
To insert the new one slide it in.
-
Press down on the RAM stick and you will hear a click. This ensures that the metal clips have reclipped onto the new RAM stick.
-
-






To reassemble your device, follow the above steps in reverse order.
Take your e-waste to an R2 or e-Stewards certified recycler.
Repair didn’t go as planned? Try some basic troubleshooting or ask our Answers community for help.

Team

Purdue University Northwest, Team 8-14, Dieterle Spring 2026 Member of Purdue University Northwest, Team 8-14, Dieterle Spring 2026
PNW-DIETERLE-S26S8G14
3 Members
55 Guides authored
