Introduction
This guide demonstrates how to access and replace or upgrade the RAM. Accessing the internal memory is a key step for improving system performance, resolving memory-related issues, or increasing multitasking capabilities. Before beginning, ensure the laptop is completely powered off and disconnected from any external power sources. Working on a clean, static-free surface and using proper tools is recommended to prevent damage to internal components. This guide is intended for beginners and assumes no prior disassembly experience. Follow each step carefully to safely access the RAM without damaging the back cover or surrounding hardware.
What you need
-
-
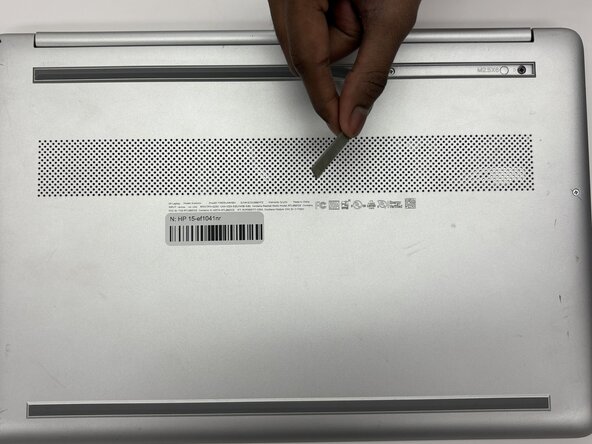
Use an opening tool to remove the two rubber feet on the lower case.
-
Place the rubber strips off to the side with the stickey side up.
 Ask FixBot
-
-
-
Use a Phillips #1 screwdriver to remove the following screws securing the lower case:
-
Six 2 mm x 6mm screws
-
Two 2.5 mm x 6 mm screws
-
-
-
-
Insert an iFixit opening tool into the seam betwen the keyboard area and bottom cover.
-
Using another iFixit opening tool, slide along the seam to unhook the clips.
-
Remove the lower case.
-
-
-
Remove the five 2 mm x 3 mm screws that secures the battery.
-
Use an opening tool to carefully lift the battery up.
-
At a 45 degree angle, pull the battery away from the motherboard.
-
-
-
Two clips secure the RAM module in place, one on each side. Using your fingers, spread the clips away from the RAM module.
-
At a 45 degree angle pull the RAM out and replace it.
-


To reassemble your device, follow the above steps in reverse order.
Take your e-waste to an R2 or e-Stewards certified recycler.
Repair didn’t go as planned? Try some basic troubleshooting or ask our Answers community for help.
Team

Purdue University Northwest, Team 8-12, Dieterle Spring 2026 Member of Purdue University Northwest, Team 8-12, Dieterle Spring 2026
PNW-DIETERLE-S26S8G12
4 Members
6 Guides authored