What you need
-
-
Turn off your laptop and flip it upside down onto a flat surface.
-
Slide the battery lock tabs towards each other to unlock the battery.
-
Lift the battery from the center and remove.
 Ask FixBot
-
-
-
Align the new battery with the cut-out in the laptop.
-
Insert the battery into it slot until you hear a "click" indicating the battery is fully seated.
-
-
-
-
Use your Phillips screwdriver to remove the 10 screws in the bottom cover.
-
-
-
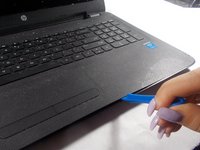
Flip the computer back over and use an opening tool to pry the keyboard up from the bottom of the computer.
-
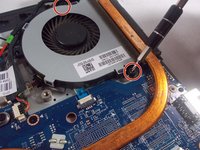
Once the keyboard is removed, locate the fan.
-
-
-
Use your Phillips screwdriver to remove the two screws on either side of the fan.
-
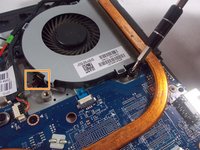
Unplug the wire that is connected to the fan.
-
Remove the fan.
-


To reassemble your device, follow these instructions in reverse order.
Take your e-waste to an R2 or e-Stewards certified recycler.
Repair didn’t go as planned? Try some basic troubleshooting, or ask our Answers community for help.
Cancel: I did not complete this guide.
One other person completed this guide.

Team

UMass Dartmouth, Team S2-G4, Bernier Spring 2018 Member of UMass Dartmouth, Team S2-G4, Bernier Spring 2018
UMASSD-BERNIER-S18S2G4
3 Members
5 Guides authored