Introduction
This guide will teach you how to replace the battery on your Google Pixel XL if yours is damaged or broken.
Before disassembling your phone, discharge the battery below 25%. A charged lithium-ion battery can catch fire and/or explode if accidentally punctured.
If your battery is swollen, take appropriate precautions. Do not heat your phone. If needed, you can use a dropper or syringe to inject isopropyl alcohol (90+%) around the edges of the back cover to weaken the adhesive. Swollen batteries can be very dangerous, so wear eye protection and exercise due caution, or take it to a professional if you're not sure how to proceed.
What you need
-
-
Power off your device.
-
Eject the SIM card tray by inserting a SIM card tool (or the end of a paperclip) into the hole in the SIM tray. Press firmly to eject the tray.
-
Slide the SIM card tray out of the phone.
-
-
-
Heat the perimeter of the display using an iOpener, hair dryer, or heat gun.
-
Use a suction cup to lift one edge of the screen just slightly, creating a small gap between the display and the frame of the phone.
-
Insert an opening pick into the gap.
-
Carefully slide the opening pick around the perimeter of the phone to separate the adhesive.
-
Gently lift the display, but don't try to fully detach it yet—it is still connected by a ribbon cable lying underneath.
-
-
-
-
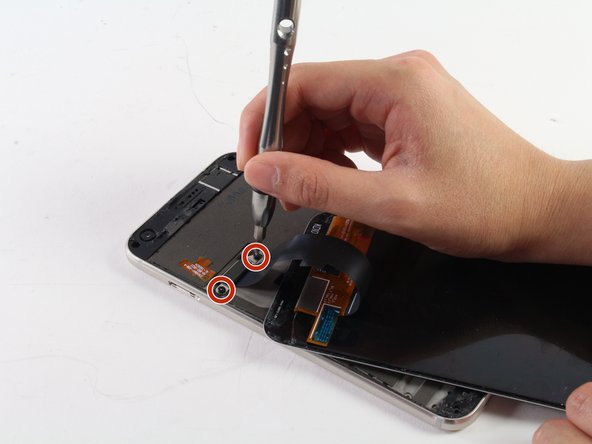
Use the spudger or your fingernail to lift off the connector that holds the screen in place.
-
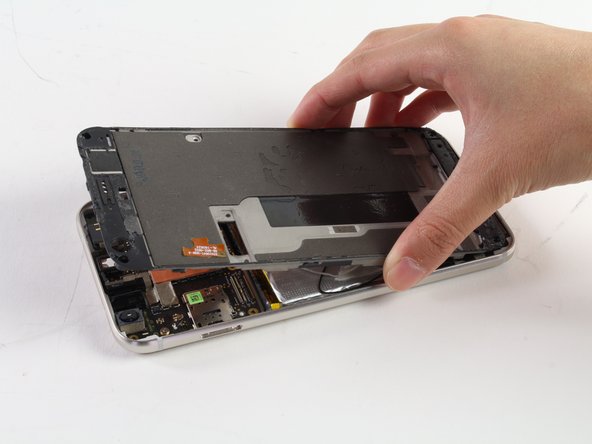
Lift off the display assembly completely and place it off to the side.
-
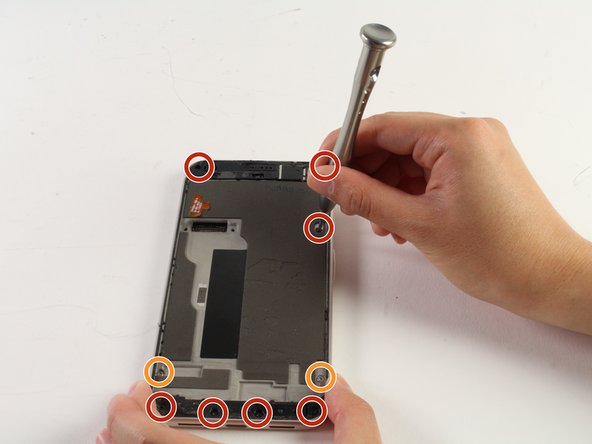
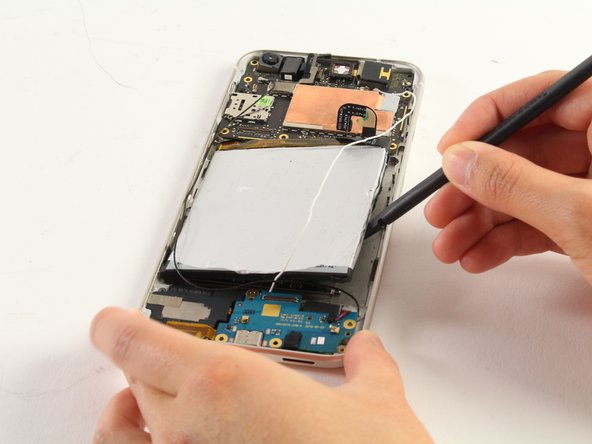
To remove the unnecessary center section of the adhesive strip, carefully peel away the perforated rectangle in middle of the white backing. At the same time, peel up the black adhesive underneath the white backing.
-
-
-
Disconnect the battery by using a spudger to pry up the battery connector.
-
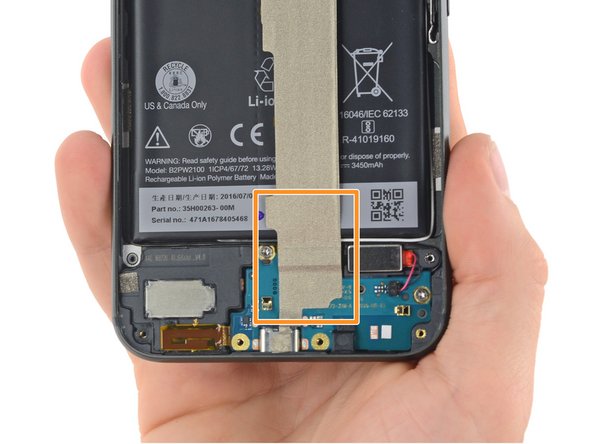
Peel back the tape covering the lower end of the cable to reveal where it connects to the daughterboard. Then, use your spudger to pry up the cable and disconnect it.
-
If desired, you can do the same at the top end of the cable to detach and remove it completely, or you may simply bend the cable gently out of the way while you remove the battery.
-
-
-
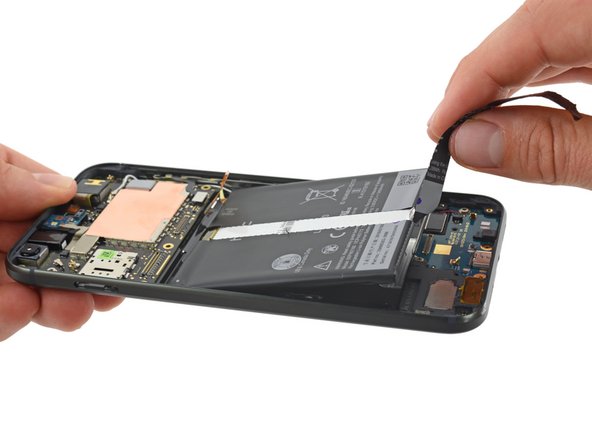
Pull on the perforated tab at the top of the battery and peel it down the center of the phone.
-
Grab the tab firmly and pull with firm, steady pressure. Slowly, the adhesive securing the battery will give way and the battery should come free.
-
To install a new battery:
-
Remove any remaining adhesive from the phone, and clean the glued areas with isopropyl alcohol and a lint-free cloth.
-
Secure the new battery with pre-cut adhesive or double-sided adhesive tape. In order to position it correctly, apply the new adhesive into the phone, not directly onto the battery. The adhesive should go around the perimeter of the battery compartment, but not in the rectangular cutout in the center (which is actually the back side of the display).
-
Press the battery firmly into place for 5-10 seconds.
-


To reassemble your device, follow these instructions in reverse order.
To reassemble your device, follow these instructions in reverse order.
Team

Cal Poly, Team S13-G4, Forte Spring 2017 Member of Cal Poly, Team S13-G4, Forte Spring 2017
CPSU-FORTE-S17S13G4
4 Members
4 Guides authored