Google Pixel 2 XL Charging Assembly Replacement

What you need

  1. Google Pixel 2 XL Charging Assembly Replacement, SIM Card: step 1, image 1 of 2 Google Pixel 2 XL Charging Assembly Replacement, SIM Card: step 1, image 2 of 2
    • Insert a SIM card eject tool or a paperclip into the small hole in the SIM card tray, located on the left edge of the phone, opposite of the power and volume buttons.

    • Press firmly to eject the tray.

  2. Google Pixel 2 XL Charging Assembly Replacement: step 2, image 1 of 1
    • Remove the SIM card tray from the phone.

    • The SIM card will fall out of the tray easily.

    • When reinserting the SIM card, ensure that it is in the proper orientation relative to the tray.

  3. Google Pixel 2 XL Charging Assembly Replacement, Screen: step 3, image 1 of 3 Google Pixel 2 XL Charging Assembly Replacement, Screen: step 3, image 2 of 3 Google Pixel 2 XL Charging Assembly Replacement, Screen: step 3, image 3 of 3
    Tool used on this step:
    Tweezers
    $4.99
    Buy
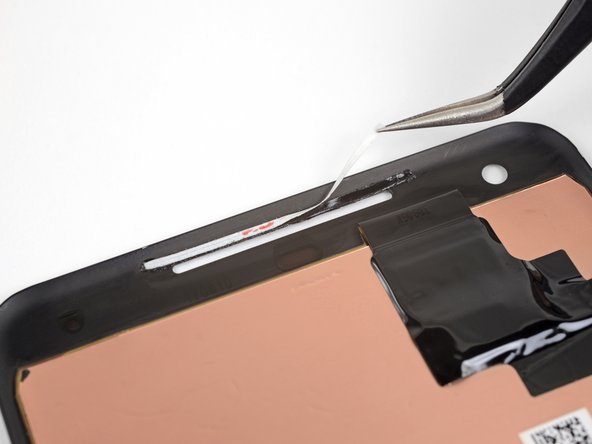
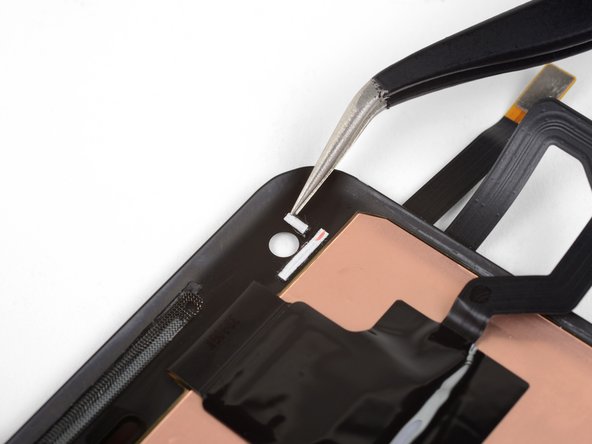
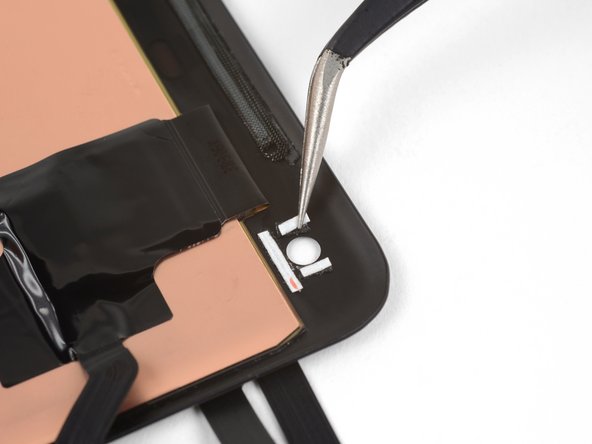
    • Your replacement display may not come with pre-installed speaker grilles or a front-facing camera gasket. If that is the case, use tweezers to carefully remove these parts from your old display and follow the rest of the guide to install them on a new display.

    • Clean any adhesive residue off of the parts before reinstalling them.

    • Make sure to install the grilles and gasket before applying display adhesive.

    • Cut a strip of 1 mm wide double-sided tape to be about 3 cm (1.25 inches) long.

    • Lay the adhesive strip along the upper edge of the earpiece speaker slot in your new display so that it's centered over the slot and touching the upper edge.

    • The adhesive strip needs to be as close as possible to the edge of the slot without overlapping. Otherwise, it can interfere with the display adhesive.

    • Gently press the adhesive strip into place on the display with your finger or a spudger.

    • Peel the white backing away from the adhesive strip.

  4. Google Pixel 2 XL Charging Assembly Replacement: step 4, image 1 of 3 Google Pixel 2 XL Charging Assembly Replacement: step 4, image 2 of 3 Google Pixel 2 XL Charging Assembly Replacement: step 4, image 3 of 3
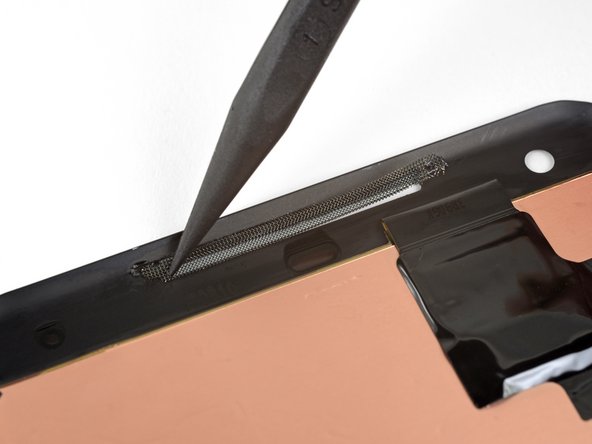
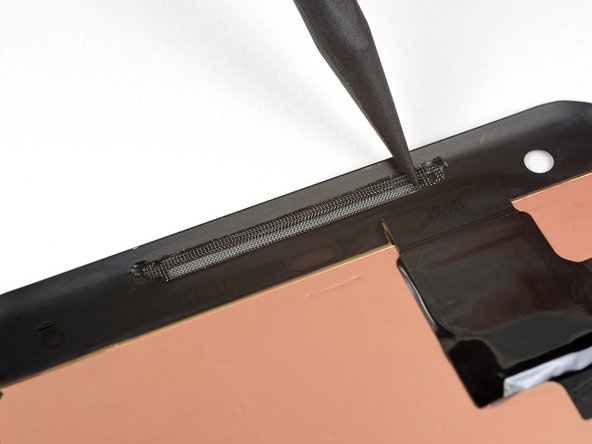
    • Lightly set the speaker grille into its slot so that the indented half of the grille sits inside the slot, and the flat, unindented half of the grille is above the slot on top of the adhesive. Do not push it onto the adhesive yet.

    • Use the point of a spudger to gently push the edges of the grille against the edges of the slot, centering the grille in the slot.

  5. Google Pixel 2 XL Charging Assembly Replacement: step 5, image 1 of 2 Google Pixel 2 XL Charging Assembly Replacement: step 5, image 2 of 2
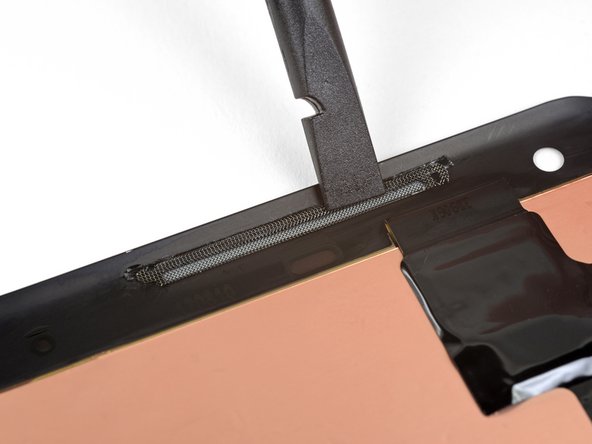
    • Use the flat end of a spudger to push the top of the grille down against the adhesive strip.

    • Repeat the last three steps to install the lower speaker grille.

    • When installing the lower speaker grille, apply the adhesive strip to the lower edge of the speaker slot, and position the grille with the flat half below the slot.

  6. Google Pixel 2 XL Charging Assembly Replacement: step 6, image 1 of 3 Google Pixel 2 XL Charging Assembly Replacement: step 6, image 2 of 3 Google Pixel 2 XL Charging Assembly Replacement: step 6, image 3 of 3
    • If you're reusing the camera gasket from your old screen, the old adhesive may have stuck to the gasket when you removed it. If this is the case, and the adhesive is still sticky, skip to the last step.

    • Cut one strip of 1 mm wide adhesive to be 6 mm (1/4") long.

    • Place the adhesive underneath the front-facing camera hole, parallel to the top edge of the display.

    • Cut two 3 mm (1/8") strips of 1 mm wide adhesive.

    • Place the adhesive strips to the left and right of the camera hole, perpendicular to the bottom adhesive strip.

    • Gently press the adhesive strips into place on the display with your finger or a spudger.

    • Make sure all three strips are as close as possible to the camera hole, without overlapping the hole.

  7. Google Pixel 2 XL Charging Assembly Replacement: step 7, image 1 of 1
    • Peel the white backing off of all three adhesive strips.

  8. Google Pixel 2 XL Charging Assembly Replacement: step 8, image 1 of 1
    • Carefully place the front-facing camera gasket down on top of the adhesive.

    • Make sure that the gasket is centered around the camera hole. If it overlaps the hole at all, it will disrupt the function of the camera.

    • Press the gasket down against the adhesive with your finger or a spudger.

    • During the boot-up process after reassembly, the screen will go through a calibration sequence. Do not touch the screen during this process, as it could result in improper touch calibration and create touch issues.

  9. Google Pixel 2 XL Charging Assembly Replacement, Midframe: step 9, image 1 of 1
    Tool used on this step:
    Magnetic Project Mat
    $19.95
    Buy
    • Remove eleven 3.8 mm Phillips screws securing the midframe.

    • Throughout this repair, keep track of each screw and make sure it goes back exactly where it came from.

  10. Google Pixel 2 XL Charging Assembly Replacement: step 10, image 1 of 3 Google Pixel 2 XL Charging Assembly Replacement: step 10, image 2 of 3 Google Pixel 2 XL Charging Assembly Replacement: step 10, image 3 of 3
    • Insert an opening tool into the notch in the midframe near the volume buttons and pry the midframe up and away from the rest of the phone.

    • Remove the midframe.

  11. Google Pixel 2 XL Charging Assembly Replacement, Battery Connector: step 11, image 1 of 2 Google Pixel 2 XL Charging Assembly Replacement, Battery Connector: step 11, image 2 of 2
    • Use the flat end of a spudger to disconnect the battery connector.

  12. Google Pixel 2 XL Charging Assembly Replacement, Motherboard: step 12, image 1 of 2 Google Pixel 2 XL Charging Assembly Replacement, Motherboard: step 12, image 2 of 2
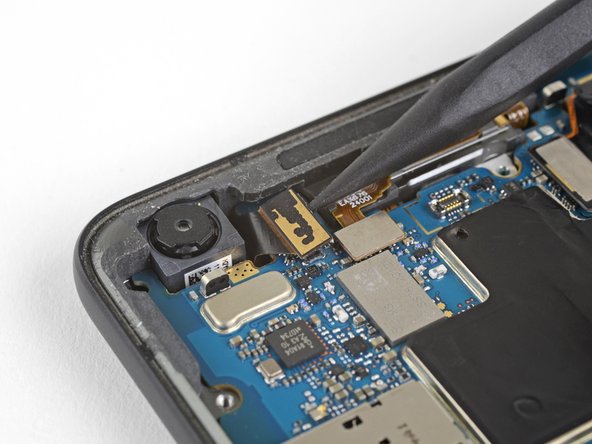
    • Use the point of a spudger to disconnect the front-facing camera connector.

    • During reassembly, it's easiest to attach the front camera to the motherboard, then insert the motherboard.

  13. Google Pixel 2 XL Charging Assembly Replacement: step 13, image 1 of 3 Google Pixel 2 XL Charging Assembly Replacement: step 13, image 2 of 3 Google Pixel 2 XL Charging Assembly Replacement: step 13, image 3 of 3
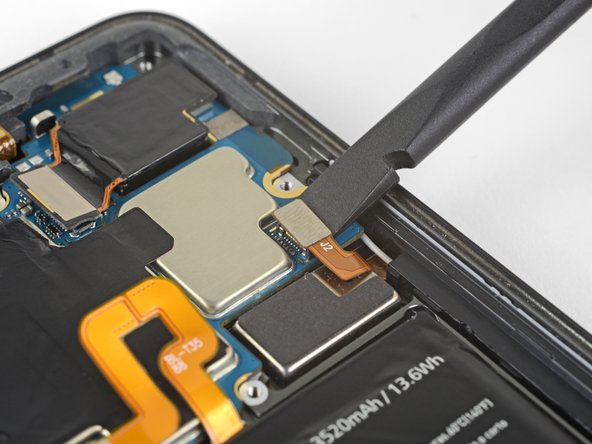
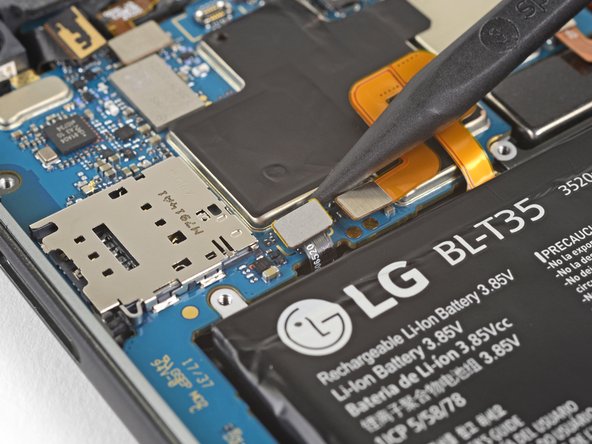
    • Use the flat end of a spudger to disconnect the right Active Edge sensor connector.

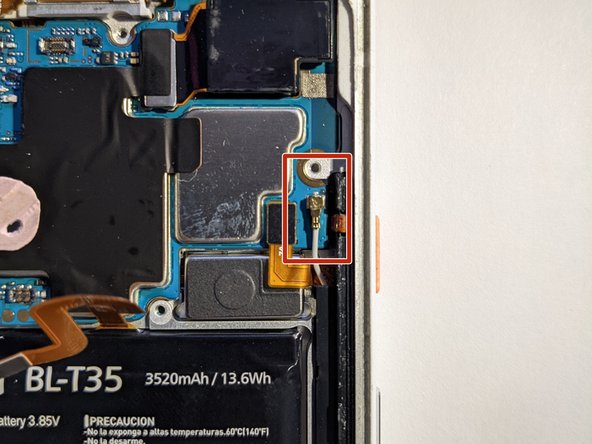
    • Disconnect the antenna cable.

  14. Google Pixel 2 XL Charging Assembly Replacement: step 14, image 1 of 2 Google Pixel 2 XL Charging Assembly Replacement: step 14, image 2 of 2
    • Use the point of a spudger to disconnect the fingerprint sensor connector.

  15. Google Pixel 2 XL Charging Assembly Replacement: step 15, image 1 of 2 Google Pixel 2 XL Charging Assembly Replacement: step 15, image 2 of 2
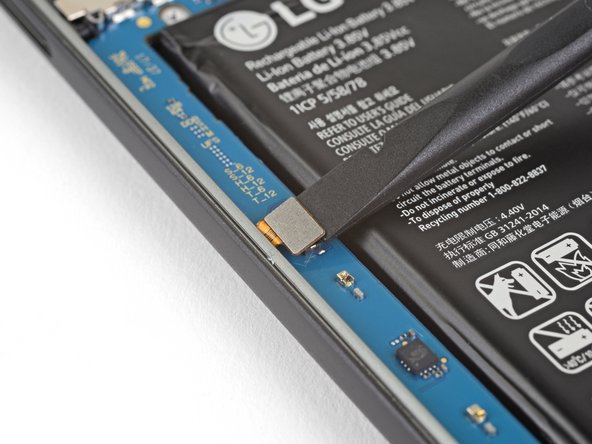
    • Use the flat end of a spudger to disconnect the left Active Edge sensor connector.

  16. Google Pixel 2 XL Charging Assembly Replacement: step 16, image 1 of 2 Google Pixel 2 XL Charging Assembly Replacement: step 16, image 2 of 2
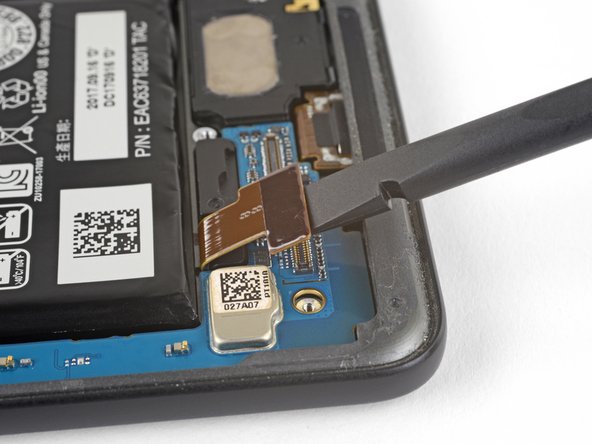
    • Use the flat end of a spudger to disconnect the charging assembly connector.

  17. Google Pixel 2 XL Charging Assembly Replacement: step 17, image 1 of 2 Google Pixel 2 XL Charging Assembly Replacement: step 17, image 2 of 2
    • Use the point of a spudger to disconnect the front-facing sensor assembly connector.

  18. Google Pixel 2 XL Charging Assembly Replacement: step 18, image 1 of 3 Google Pixel 2 XL Charging Assembly Replacement: step 18, image 2 of 3 Google Pixel 2 XL Charging Assembly Replacement: step 18, image 3 of 3
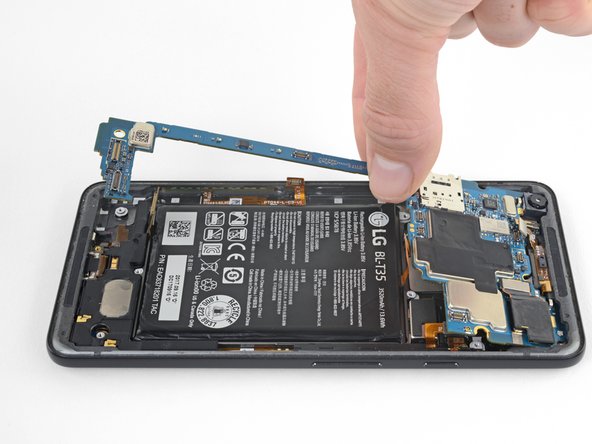
    • Make sure all the cables and connectors are clear of the board, and use the flat edge of a spudger to gently lift the bottom of the motherboard.

    • The narrow part of the motherboard is very fragile. If it starts to bend when you lift, stop and make sure there isn't anything holding the board down. The board should lift up without any resistance.

    • Holding the wide part of the motherboard near the SIM card slot, carefully slide the board toward the bottom of the phone while lifting it out of the phone.

    • Remove the motherboard.

    • Try to keep the phone flat with the battery facing up after you remove the motherboard, as the front-facing camera can fall out of the phone case very easily.

    • When reinstalling the motherboard, move all the cables and connectors out of the way of the board and make sure all connectors are aligned with their respective sockets.

  19. Google Pixel 2 XL Charging Assembly Replacement, Loudspeaker: step 19, image 1 of 3 Google Pixel 2 XL Charging Assembly Replacement, Loudspeaker: step 19, image 2 of 3 Google Pixel 2 XL Charging Assembly Replacement, Loudspeaker: step 19, image 3 of 3
    • Slide the point of a spudger under the lower left side of the loudspeaker and slowly pry the speaker assembly up from the phone.

    • If you're having trouble, try inserting the flat end of a spudger into the gap at the base of the phone and slowly pry up.

  20. Google Pixel 2 XL Charging Assembly Replacement: step 20, image 1 of 1
    • Remove the loudspeaker from the phone.

  21. Google Pixel 2 XL Charging Assembly Replacement, Charging Assembly: step 21, image 1 of 2 Google Pixel 2 XL Charging Assembly Replacement, Charging Assembly: step 21, image 2 of 2
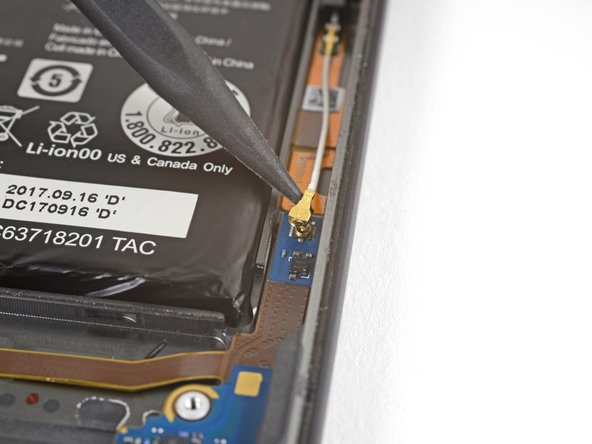
    • Use the point of a spudger to disconnect the white antenna cable to the right of the battery.

  22. Google Pixel 2 XL Charging Assembly Replacement: step 22, image 1 of 1
    • Use a hairdryer or heat gun, or prepare an iOpener and apply it to the bottom of the back of the phone for about a minute, in order to soften the adhesive securing the charging assembly.

  23. Google Pixel 2 XL Charging Assembly Replacement: step 23, image 1 of 3 Google Pixel 2 XL Charging Assembly Replacement: step 23, image 2 of 3 Google Pixel 2 XL Charging Assembly Replacement: step 23, image 3 of 3
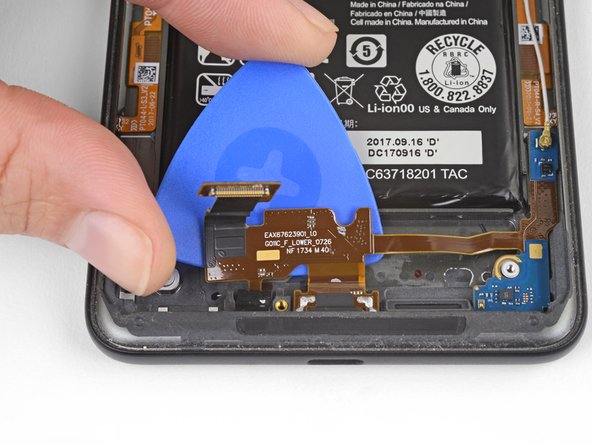
    • Starting from the left side, slide an opening pick under the charging assembly flex cable to separate it from the phone case.

  24. Google Pixel 2 XL Charging Assembly Replacement: step 24, image 1 of 2 Google Pixel 2 XL Charging Assembly Replacement: step 24, image 2 of 2
    • Gently pull the USB-C port out of its recess in the phone case.

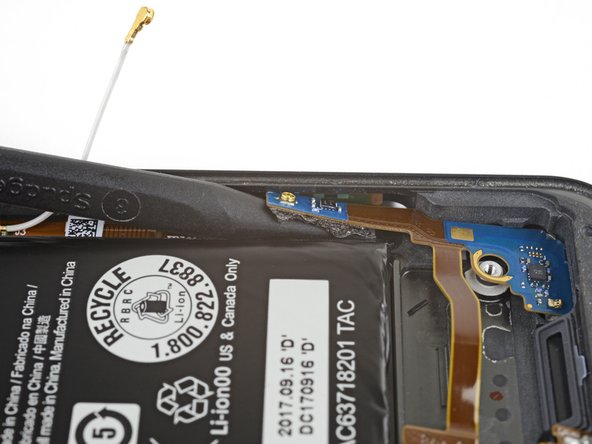
    • The antenna board is still adhered to the phone case. Do not remove the charging assembly or strain the flex cable connecting the antenna board and the USB-C port.

  25. Google Pixel 2 XL Charging Assembly Replacement: step 25, image 1 of 2 Google Pixel 2 XL Charging Assembly Replacement: step 25, image 2 of 2
    • Slowly slide the point of a spudger underneath the antenna board to separate the adhesive tape under the board.

    • Pry slowly and carefully to avoid putting too much strain on the board.

  26. Google Pixel 2 XL Charging Assembly Replacement: step 26, image 1 of 1
    • Lift the charging assembly out of the phone case.

Adam O'Camb

Member since: 04/11/15

196,940 Reputation

416 Guides authored

View Statistics:

Past 24 Hours: 5

Past 7 Days: 18

Past 30 Days: 108

All Time: 22,477