Free Shipping on Domestic Orders $75+

Google Pixel 10a Battery Removal

Prerequisite Only
This is a prerequisite-only guide! This guide is part of another procedure and isn’t meant to be used alone.

What you need

    1. Google Pixel 10a Battery Removal, Move the side button cable: step 1, image 1 of 3 Google Pixel 10a Battery Removal, Move the side button cable: step 1, image 2 of 3 Google Pixel 10a Battery Removal, Move the side button cable: step 1, image 3 of 3
      • Use your fingernail or a spudger to peel up the left-side button cable and flip it over the side of your phone.

      • Be careful not to poke the battery.

      Ask FixBot

      Add Comment

    2. Google Pixel 10a Battery Removal, Peel the pull tabs: step 2, image 1 of 3 Google Pixel 10a Battery Removal, Peel the pull tabs: step 2, image 2 of 3 Google Pixel 10a Battery Removal, Peel the pull tabs: step 2, image 3 of 3
      • Use your fingers or an opening pick to peel up a corner of the battery pull tab labeled "2".

      • Grab the tab with your fingers and peel it off the top of the battery.

      • Peel the pull tab labeled "1" completely off the top of the battery.

      Ask FixBot

      Add Comment

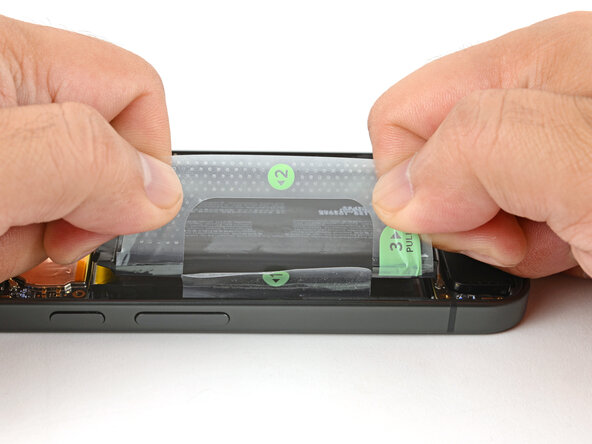
    3. Google Pixel 10a Battery Removal, Separate the battery: step 3, image 1 of 2 Google Pixel 10a Battery Removal, Separate the battery: step 3, image 2 of 2
      • With both hands, firmly grab the pull tab labeled "2" as close to the left edge as possible. Brace your hands against the rest of the phone frame.

      • Pull up with firm, steady force until the battery separates.

      • The battery adhesive is strong and may require multiple attempts before it separates.

      • If you can't loosen the battery, follow the next step for an alternate method.

      Ask FixBot

      Add Comment

    4. Google Pixel 10a Battery Removal, Loosen the battery (alternate method): step 4, image 1 of 3 Google Pixel 10a Battery Removal, Loosen the battery (alternate method): step 4, image 2 of 3 Google Pixel 10a Battery Removal, Loosen the battery (alternate method): step 4, image 3 of 3
      • Skip this step if you separated the battery in the previous step.

      • Apply two or three drops of high-concentration (>90%) isopropyl alcohol to the left edge of the battery.

      • Tilt the left edge of the phone up to help the alcohol flow under the battery.

      • Wait one minute to allow the alcohol to soften the adhesive.

      • Use the flat edge of an opening pick to pry up the left edge of the battery until it separates.

      Ask FixBot

      Add Comment

    5. Google Pixel 10a Battery Removal, Remove the battery and liner: step 5, image 1 of 2 Google Pixel 10a Battery Removal, Remove the battery and liner: step 5, image 2 of 2
      • Peel and remove the battery and its plastic liner from the phone.

      Ask FixBot

      Add Comment

Conclusion

To reassemble your device, follow these instructions in reverse order.

Cancel: I did not complete this guide.

Arthur Shi

Member since: 01/03/18

350,787 Reputation

938 Guides authored

0 Guide Comments

Add Comment

View Statistics:

Past 24 Hours: 1

Past 7 Days: 2

Past 30 Days: 8

All Time: 95