Free Shipping on Domestic Orders $75+

Google Pixel 10a Battery Installation

Prerequisite Only
This is a prerequisite-only guide! This guide is part of another procedure and isn’t meant to be used alone.

What you need

    1. Google Pixel 10a Battery Installation, Clean the frame: step 1, image 1 of 1
      • Use high‑concentration (>90%) isopropyl alcohol and a lint‑free cloth (or coffee filters) to remove any adhesive residue from the battery well.

      Ask FixBot

      Add Comment

    2. Google Pixel 10a Battery Installation, Remove the thin battery liner: step 2, image 1 of 1
      • Remove the thin liner from the top edge of the back of the battery.

      Ask FixBot

      Add Comment

    3. Google Pixel 10a Battery Installation, Move the left button cable out of the way: step 3, image 1 of 1
      • Bend the left button cable over the edge so it'll be out of the battery's way.

      Ask FixBot

      Add Comment

    4. Google Pixel 10a Battery Installation, Connect the battery: step 4, image 1 of 1
      • Hold the battery above its recess and use your finger to press and connect the battery press connector.

      • This will help align the battery when you stick it in place.

      • Don't try to force the connector into place. If you're having trouble, reposition it and try again.

      Ask FixBot

      Add Comment

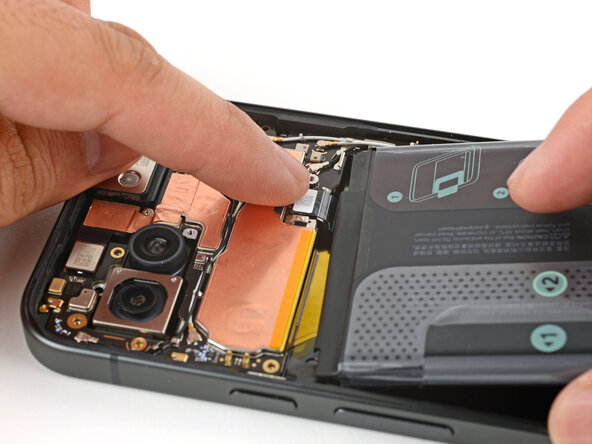
    5. Google Pixel 10a Battery Installation, Install the battery: step 5, image 1 of 3 Google Pixel 10a Battery Installation, Install the battery: step 5, image 2 of 3 Google Pixel 10a Battery Installation, Install the battery: step 5, image 3 of 3
      • With one hand, steady the battery over its recess.

      • With the other hand, pull the liner from the underside of the battery to expose the adhesive.

      • Carefully lay the battery in its recess.

      Ask FixBot

      Add Comment

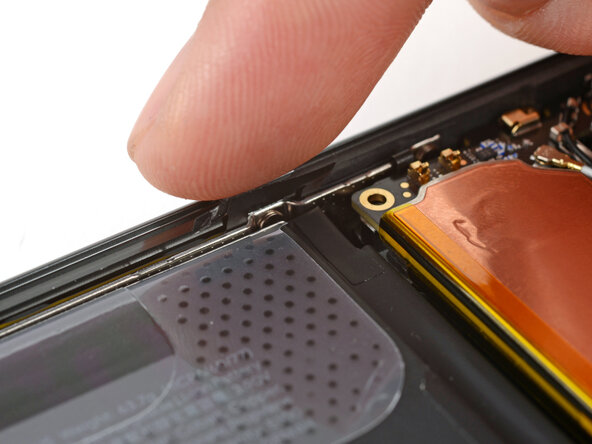
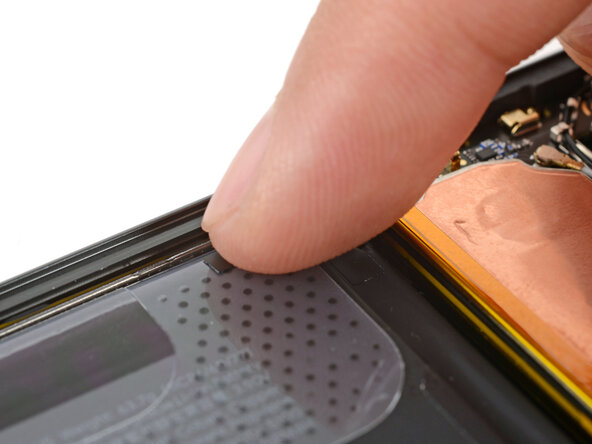
    6. Google Pixel 10a Battery Installation: step 6, image 1 of 2 Google Pixel 10a Battery Installation: step 6, image 2 of 2
      • Use your fingers to firmly press on the battery to secure it with the adhesive.

      Ask FixBot

      Add Comment

    7. Google Pixel 10a Battery Installation, Install the battery connector cover: step 7, image 1 of 2 Google Pixel 10a Battery Installation, Install the battery connector cover: step 7, image 2 of 2
      • Hook the left edge of the battery connector cover in place, then lay the cover down flat.

      Ask FixBot

      Add Comment

    8. Google Pixel 10a Battery Installation: step 8, image 1 of 1
      • Use a Torx Plus 3IP screwdriver to install the 1.9 mm‑long battery connector cover screw.

      Ask FixBot

      Add Comment

    9. Google Pixel 10a Battery Installation, Fold the left button cable down: step 9, image 1 of 2 Google Pixel 10a Battery Installation, Fold the left button cable down: step 9, image 2 of 2
      • Use your finger to fold the left button cable onto the battery and press it in place.

      Ask FixBot

      Add Comment

Conclusion

To reassemble your device, follow these instructions in reverse order.

Cancel: I did not complete this guide.

Arthur Shi

Member since: 01/03/18

350,741 Reputation

938 Guides authored

0 Guide Comments

Add Comment

View Statistics:

Past 24 Hours: 0

Past 7 Days: 1

Past 30 Days: 11

All Time: 73