Introduction
This guide shows how to replace the USB-C cable in a GameSir X2 Pro controller. The USB-C cable provides the wired connection between the controller and your phone, enabling device control, compatibility, and passthrough charging.
Over time, the cable or connector may wear out from repeated use, bending, or stress on the port. A damaged cable can cause connection issues, intermittent disconnections, charging problems, or input lag. Replacing the cable can help restore reliable operation.
What you need
-
-
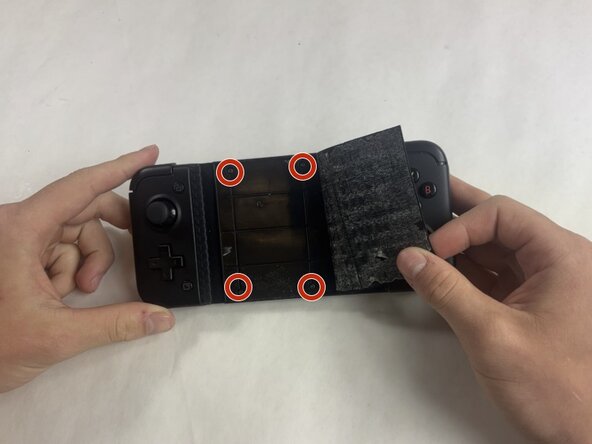
Insert the tip of the Jimmy between the rubber pad and the back of the controller, then slide it along the edge to loosen the adhesive and lift the pad away.
-
Gently remove the rubber pad.
 Ask FixBot
-
-
-
Use a Phillips #000 screwdriver to remove the four 4.5 mm screws under the rubber pad.
-
-
-
Flip the controller over so the back is facing up.
-
Remove the eight 6.0 mm T6 Torx screws from the back of the device.
-
-
-
-
Remove the two 6.0 mm Phillips #000 screws from the bracket near the end of the back panel.
-
-
-
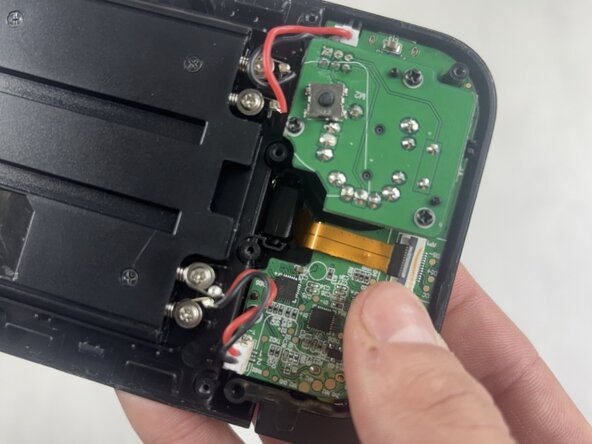
Use a spudger or a clean fingernail to flip up the black locking flap.
-
Use tweezers or your fingers to gently pull the cable out of its socket.
-
-
-
Gently pull the USB-C plug out of the device.
-
Be careful when removing the USB-C port to avoid damaging the ribbon cable.
-


To reassemble your device, follow these instructions in reverse order. Take your e-waste to an R2 or e-Stewards certified recycler.
Cancel: I did not complete this guide.
One other person completed this guide.

Team

UMass Dartmouth, Team 5-2, Rioux Spring 2026 Member of UMass Dartmouth, Team 5-2, Rioux Spring 2026
UMASSD-RIOUX-S26S5G2
3 Members
5 Guides authored