
15% Off Selected iFixit Tools — Limited Time
Free Shipping on Domestic Orders $75+

GameSir X2 Pro Trigger Replacement

What you need

  1. GameSir X2 Pro Trigger Replacement, Trigger: step 1, image 1 of 1
    • Insert the tip of the Jimmy between the rubber pad and the back of the controller, then slide it along the edge to loosen the adhesive and lift the pad away.

    • Gently remove the rubber pad.

    Ask FixBot

    Add Comment

  2. GameSir X2 Pro Trigger Replacement: step 2, image 1 of 2 GameSir X2 Pro Trigger Replacement: step 2, image 2 of 2
    • Use a Phillips #000 screwdriver to remove the four 4.5 mm screws under the rubber pad.

    Ask FixBot

    Add Comment

  3. GameSir X2 Pro Trigger Replacement: step 3, image 1 of 2 GameSir X2 Pro Trigger Replacement: step 3, image 2 of 2
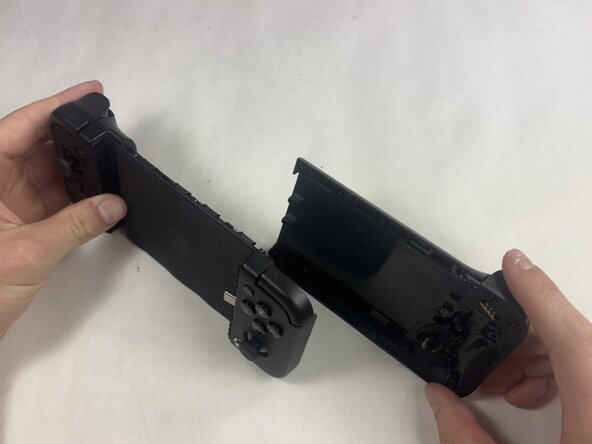
    • Flip the controller over so the back is facing up.

    • Remove the eight 6.0 mm T6 Torx screws from the back of the device.

    Ask FixBot

    Add Comment

  4. GameSir X2 Pro Trigger Replacement: step 4, image 1 of 3 GameSir X2 Pro Trigger Replacement: step 4, image 2 of 3 GameSir X2 Pro Trigger Replacement: step 4, image 3 of 3
    • Use the Jimmy to pry the back cover of the controller, following the seam.

    • Some force is necessary, but be careful not to damage any of the clips holding the controller together.

    Ask FixBot

    Add Comment

  5. GameSir X2 Pro Trigger Replacement: step 5, image 1 of 3 GameSir X2 Pro Trigger Replacement: step 5, image 2 of 3 GameSir X2 Pro Trigger Replacement: step 5, image 3 of 3
    • Remove the six 4.5 mm screws from under the back panel with a Phillips #000 screwdriver.

    Ask FixBot

    Add Comment

  6. GameSir X2 Pro Trigger Replacement: step 6, image 1 of 3 GameSir X2 Pro Trigger Replacement: step 6, image 2 of 3 GameSir X2 Pro Trigger Replacement: step 6, image 3 of 3
    • Use a Phillips #000 screwdriver to remove the three 4.5 mm screws securing the joystick board in the corner.

    Ask FixBot

    Add Comment

  7. GameSir X2 Pro Trigger Replacement: step 7, image 1 of 3 GameSir X2 Pro Trigger Replacement: step 7, image 2 of 3 GameSir X2 Pro Trigger Replacement: step 7, image 3 of 3
    • Remove the four 4.5 mm Phillips #000 screws securing the circuit board behind the joystick board that was just removed.

    • Remove the board from the frame.

    Ask FixBot

    Add Comment

  8. GameSir X2 Pro Trigger Replacement: step 8, image 1 of 1
    • Remove the trigger from the corner above the action buttons.

    Ask FixBot

    Add Comment

Conclusion

To reassemble your device, follow these instructions in reverse order. Take your e-waste to an R2 or e-Stewards certified recycler.

Cancel: I did not complete this guide.

Sean Brady

Member since: 03/04/26

653 Reputation

4 Guides authored

Team

0 Guide Comments

Add Comment

View Statistics:

Past 24 Hours: 1

Past 7 Days: 7

Past 30 Days: 7

All Time: 25