Free Shipping on Domestic Orders $75+

Framework Laptop 16" Numpad Replacement

Archived Guide
This guide is retained solely for historical purposes. Use the updated version of the guide to perform your repair.
    1. Framework Laptop 16" Numpad Replacement, Before you begin: step 1, image 1 of 2 Framework Laptop 16" Numpad Replacement, Before you begin: step 1, image 2 of 2
      • Unplug all cables and fully shut down your laptop.

      • If your repair requires a spudger, a T5 Torx, or a Phillips screwdriver, you can use the included Framework screwdriver. Whichever works best for you!

      Ask FixBot

      Add Comment

    1. Framework Laptop 16" Numpad Replacement, Unlock the Input Modules: step 2, image 1 of 3 Framework Laptop 16" Numpad Replacement, Unlock the Input Modules: step 2, image 2 of 3 Framework Laptop 16" Numpad Replacement, Unlock the Input Modules: step 2, image 3 of 3
      • Use your fingernail to pull out the two Input Module latches and unlock them.

      • The latch will show red if it's unlocked.

      Ask FixBot

      Add Comment

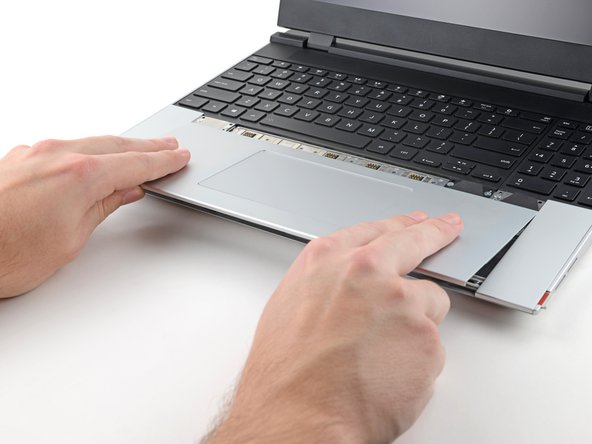
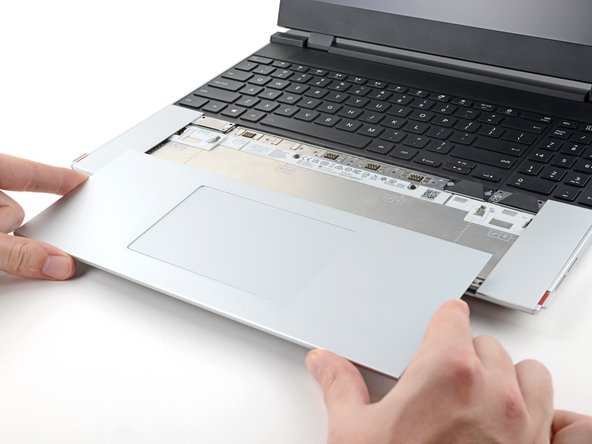
    1. Framework Laptop 16" Numpad Replacement, Remove the touchpad spacers: step 3, image 1 of 3 Framework Laptop 16" Numpad Replacement, Remove the touchpad spacers: step 3, image 2 of 3 Framework Laptop 16" Numpad Replacement, Remove the touchpad spacers: step 3, image 3 of 3
      • Use your fingers to slide the touchpad spacer toward the bottom edge of the laptop and unclip it.

      • If you're having trouble, check if the corresponding Input Module latch is properly unlocked.

      • Lift the touchpad spacer off the laptop and remove it.

      Ask FixBot

      Add Comment

    2. Framework Laptop 16" Numpad Replacement: step 4, image 1 of 1
      • Repeat the same procedure for the other touchpad spacer.

      Ask FixBot

      Add Comment

    1. Framework Laptop 16" Numpad Replacement, Remove the touchpad: step 5, image 1 of 3 Framework Laptop 16" Numpad Replacement, Remove the touchpad: step 5, image 2 of 3 Framework Laptop 16" Numpad Replacement, Remove the touchpad: step 5, image 3 of 3
      • Use your fingers to slide the touchpad toward the bottom edge of the laptop and disconnect it.

      • If you're having trouble, check if the Input Module latches are properly unlocked.

      • Lift the touchpad and remove it.

      • During reassembly, perform the following:

      • Place the touchpad flat on its cutout so its clips are properly aligned.

      • Press the touchpad down and slide it into place so it lines up evenly with the bottom edge of the laptop.

      Ask FixBot

      Add Comment

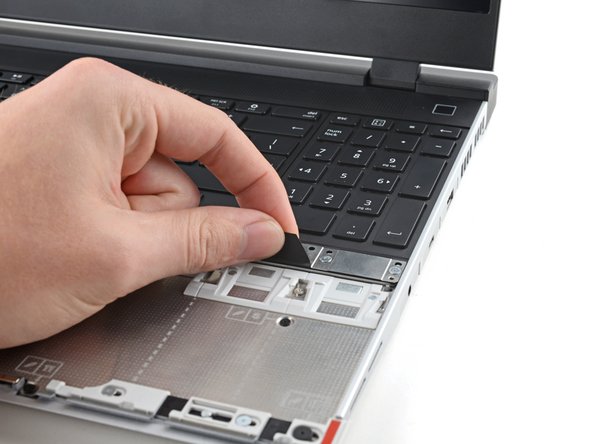
    1. Framework Laptop 16" Numpad Replacement, Remove the numpad: step 6, image 1 of 3 Framework Laptop 16" Numpad Replacement, Remove the numpad: step 6, image 2 of 3 Framework Laptop 16" Numpad Replacement, Remove the numpad: step 6, image 3 of 3
      • The numpad is held in place with strong magnets. Apply gradually increasing force to avoid having the numpad violently eject.

      • Grip the pull tab at the bottom of the numpad.

      • Lift the pull tab until the numpad magnets release.

      • Remove the numpad.

      • During reassembly, make sure the numpad is seated properly on its alignment pegs and sits flush with the edges of the laptop.

      Ask FixBot

      Add Comment

Conclusion

To reassemble your device, follow these instructions in reverse order.

Take your e-waste to an R2 or e-Stewards certified recycler.

Repair didn’t go as planned? Try some basic troubleshooting, or ask our Answers Community for help.

Cancel: I did not complete this guide.

One other person completed this guide.

Alex Diaz-Kokaisl

Member since: 01/16/22

249,976 Reputation

1,203 Guides authored

Team

Guide Team Member of Guide Team

Staff

10 Members

61,630 Guides authored

0 Guide Comments

Add Comment

View Statistics:

Past 24 Hours: 0

Past 7 Days: 6

Past 30 Days: 21

All Time: 532