
Free Shipping on Domestic Orders $75+

Framework Laptop 16 eDP Cable Replacement

What you need

  1. Framework Laptop 16 eDP Cable Replacement, Before you begin: step 1, image 1 of 1
    • Unplug all cables and fully shut down your laptop.

  2. Framework Laptop 16 eDP Cable Replacement, Unlock the Input Modules: step 2, image 1 of 3 Framework Laptop 16 eDP Cable Replacement, Unlock the Input Modules: step 2, image 2 of 3 Framework Laptop 16 eDP Cable Replacement, Unlock the Input Modules: step 2, image 3 of 3
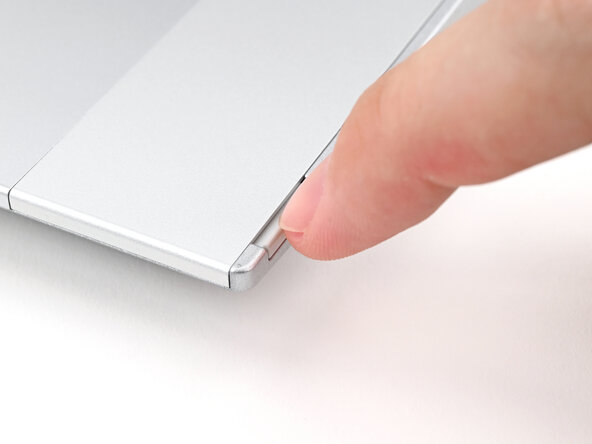
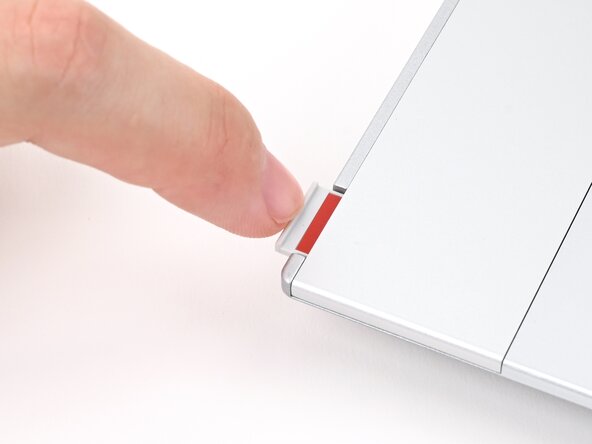
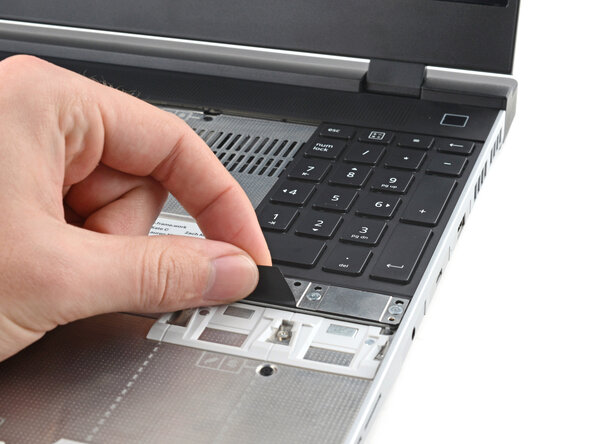
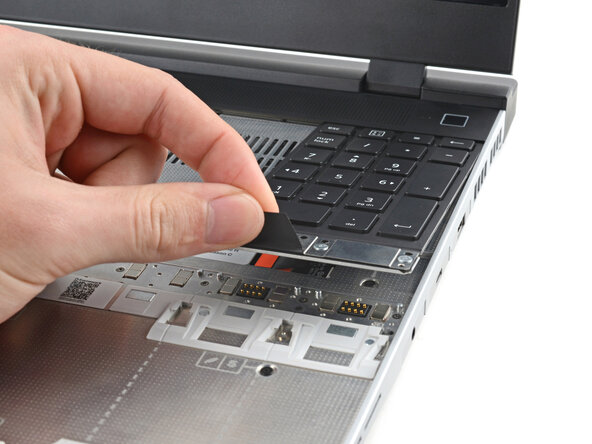
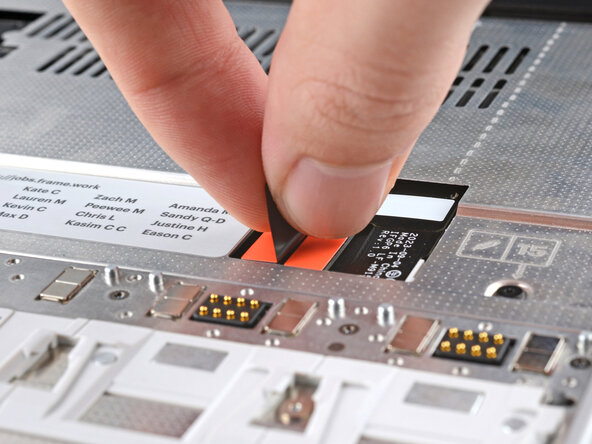
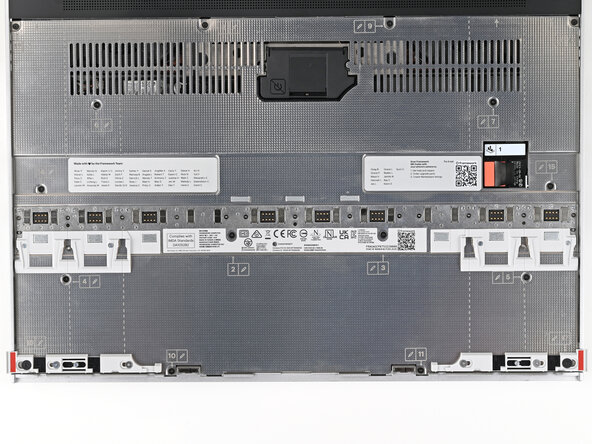
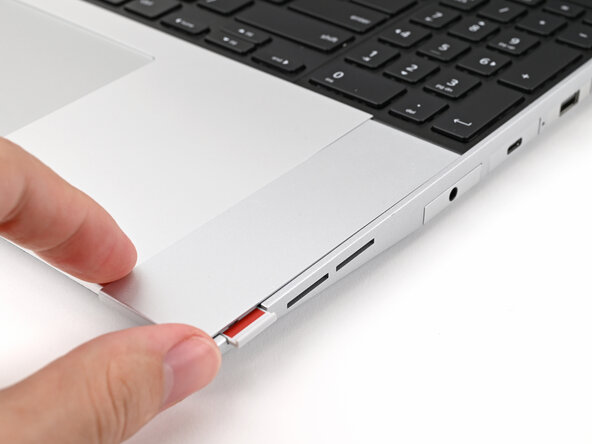
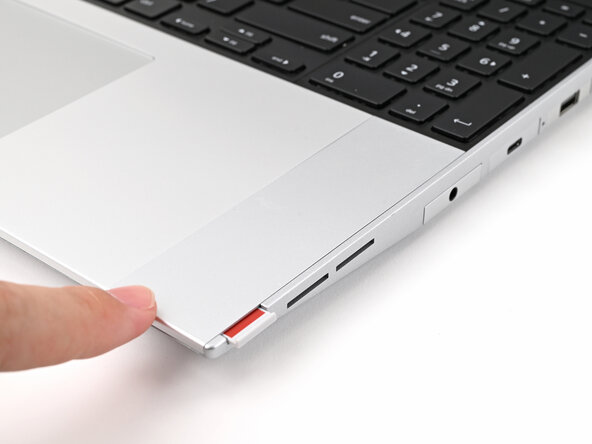
    • Use your fingernail to pull out the two Input Module latches and unlock them.

    • The latch will show red if it's unlocked.

  3. Framework Laptop 16 eDP Cable Replacement, Remove the Touchpad Spacers: step 3, image 1 of 3 Framework Laptop 16 eDP Cable Replacement, Remove the Touchpad Spacers: step 3, image 2 of 3 Framework Laptop 16 eDP Cable Replacement, Remove the Touchpad Spacers: step 3, image 3 of 3
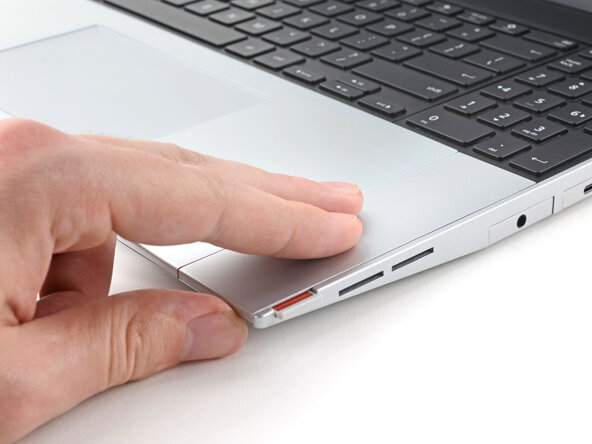
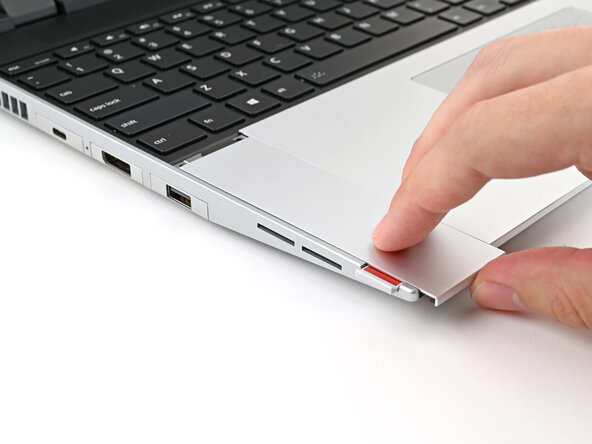
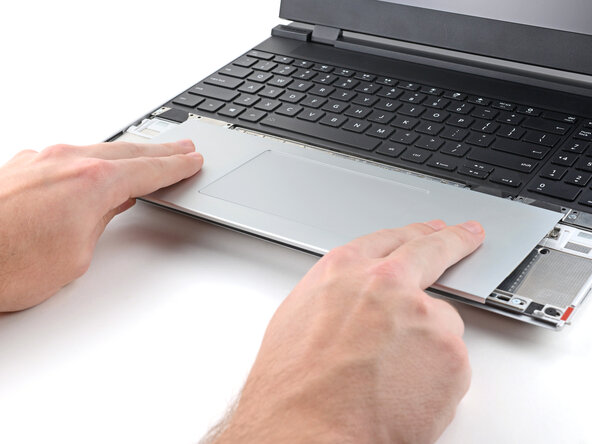
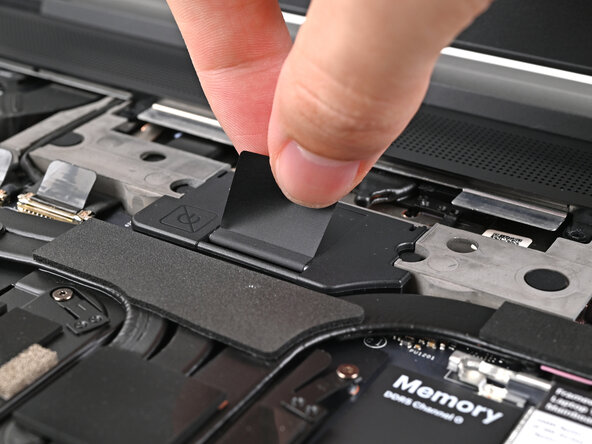
    • Use your fingers to slide the Touchpad Spacer toward the bottom edge of the laptop and unclip it.

    • If you're having trouble, check if the corresponding Input Module latch is properly unlocked.

    • Lift the Touchpad Spacer off the laptop and remove it.

  4. Framework Laptop 16 eDP Cable Replacement: step 4, image 1 of 3 Framework Laptop 16 eDP Cable Replacement: step 4, image 2 of 3 Framework Laptop 16 eDP Cable Replacement: step 4, image 3 of 3
    • Repeat the same procedure for the other touchpad spacer.

  5. Framework Laptop 16 eDP Cable Replacement, Remove the Touchpad Module: step 5, image 1 of 3 Framework Laptop 16 eDP Cable Replacement, Remove the Touchpad Module: step 5, image 2 of 3 Framework Laptop 16 eDP Cable Replacement, Remove the Touchpad Module: step 5, image 3 of 3
    • Use your fingers to slide the Touchpad Module toward the bottom edge of the laptop and disconnect it.

    • If you're having trouble, check if the Input Module latches are properly unlocked.

    • Lift the Touchpad Module and remove it.

  6. Framework Laptop 16 eDP Cable Replacement, Remove the keyboard: step 6, image 1 of 3 Framework Laptop 16 eDP Cable Replacement, Remove the keyboard: step 6, image 2 of 3 Framework Laptop 16 eDP Cable Replacement, Remove the keyboard: step 6, image 3 of 3
    • The keyboard is held in place with strong magnets. Apply gradually increasing force to avoid having the keyboard violently eject.

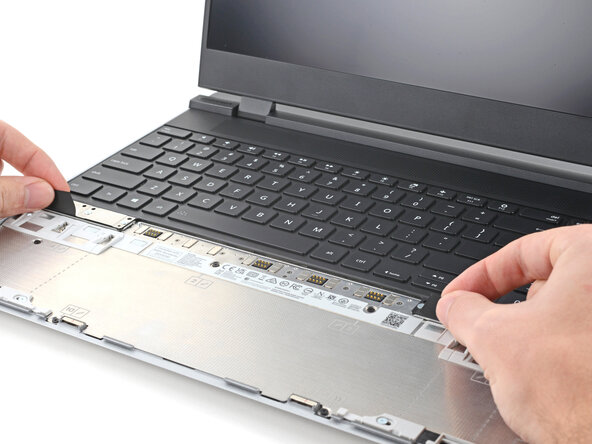
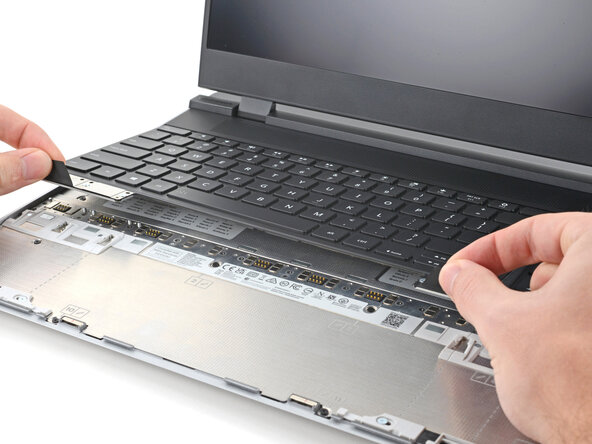
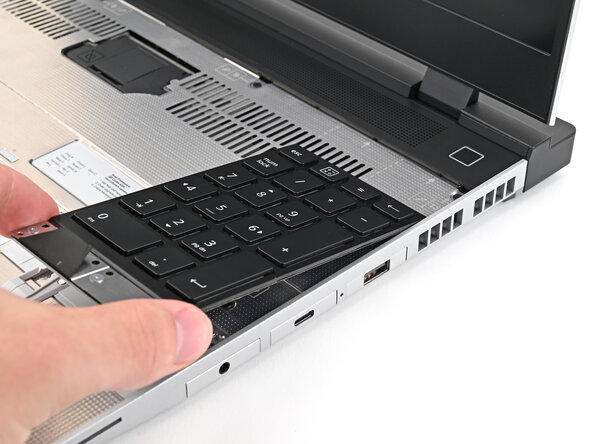
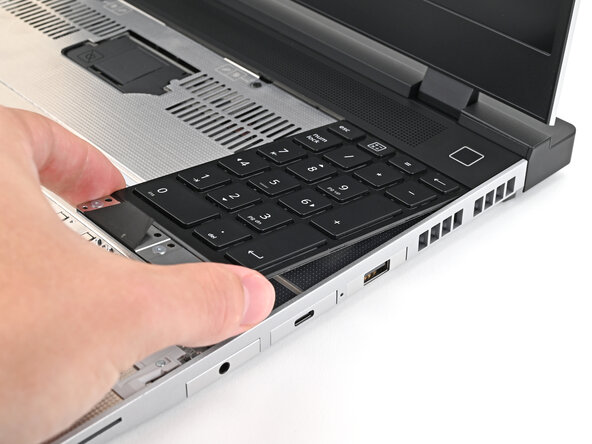
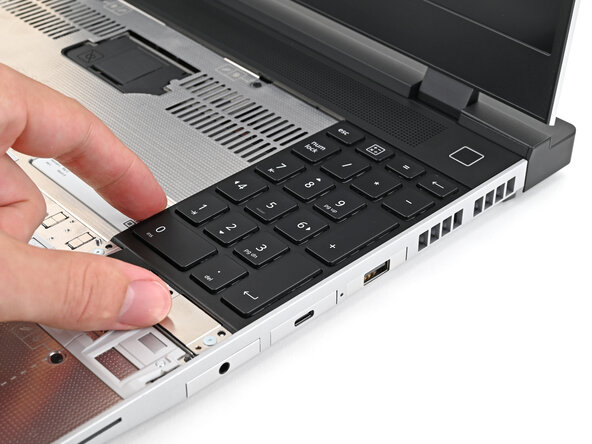
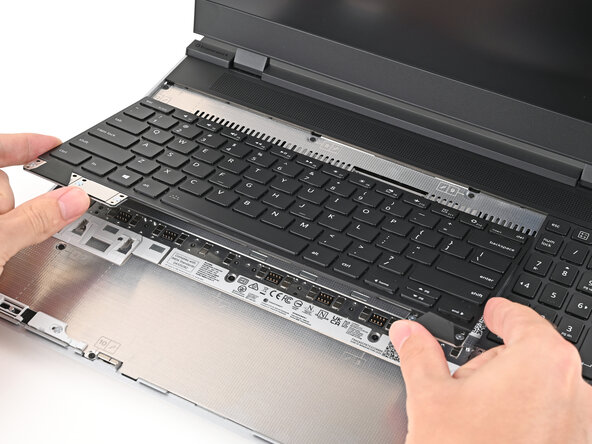
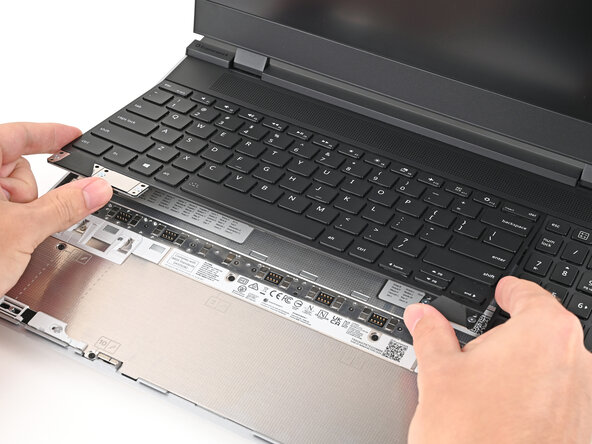
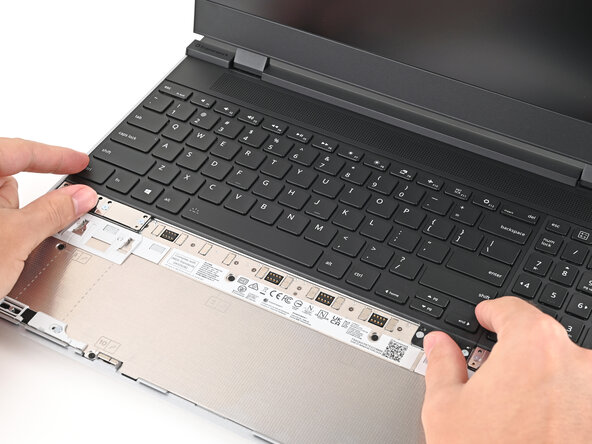
    • Grip the two pull tabs along the bottom of the keyboard and lift until its magnets release.

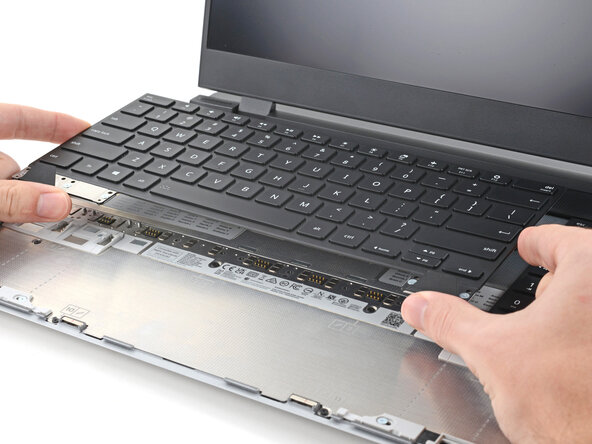
    • Remove the keyboard.

  7. Framework Laptop 16 eDP Cable Replacement, Remove the Input Modules: step 7, image 1 of 3 Framework Laptop 16 eDP Cable Replacement, Remove the Input Modules: step 7, image 2 of 3 Framework Laptop 16 eDP Cable Replacement, Remove the Input Modules: step 7, image 3 of 3
    • Your Input Module(s) might be different, but the procedure to remove them is the same.

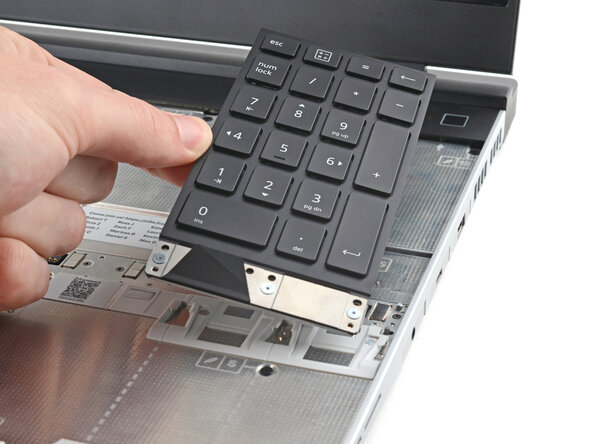
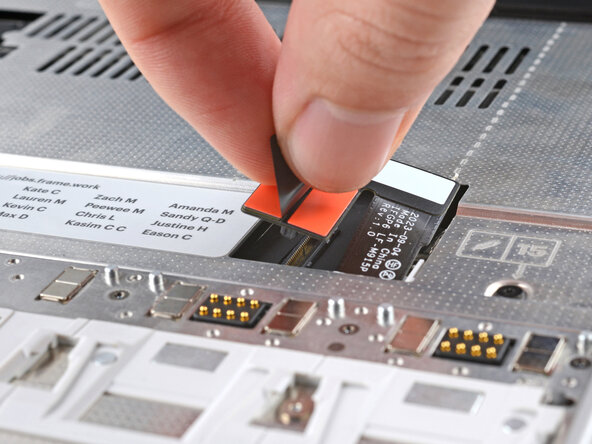
    • Grip the pull tab at the bottom of the Input Module and lift until its magnets release.

    • Remove the Input Module.

    • Repeat for any remaining Input Modules.

  8. Framework Laptop 16 eDP Cable Replacement, Disconnect the Mid Plate cable: step 8, image 1 of 2 Framework Laptop 16 eDP Cable Replacement, Disconnect the Mid Plate cable: step 8, image 2 of 2
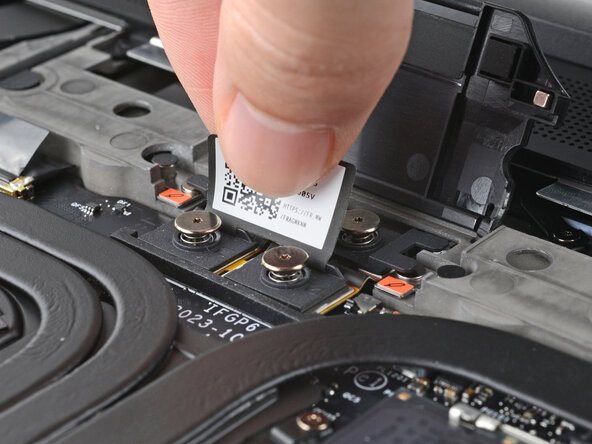
    • Grip the black pull tab on the Mid Plate cable press connector.

    • Lift up to disconnect the Mid Plate cable.

  9. Framework Laptop 16 eDP Cable Replacement, Loosen the Mid Plate screws: step 9, image 1 of 2 Framework Laptop 16 eDP Cable Replacement, Loosen the Mid Plate screws: step 9, image 2 of 2
    • The Mid Plate screws are ordered from 2–17 (number 1 is the press connector). You don't have to follow the order, but you can use it to help keep track of the screws you've loosened.

    • Use your Framework Screwdriver to loosen the 16 captive T5 Torx screws securing the Mid Plate.

  10. Framework Laptop 16 eDP Cable Replacement, Remove the Mid Plate: step 10, image 1 of 3 Framework Laptop 16 eDP Cable Replacement, Remove the Mid Plate: step 10, image 2 of 3 Framework Laptop 16 eDP Cable Replacement, Remove the Mid Plate: step 10, image 3 of 3
    • Use your fingers to lift the Mid Plate off the laptop and remove it.

  11. Framework Laptop 16 eDP Cable Replacement, Lift the interposer door: step 11, image 1 of 2 Framework Laptop 16 eDP Cable Replacement, Lift the interposer door: step 11, image 2 of 2
    • Lift the interposer door by its black pull tab and let it rest upright.

  12. Framework Laptop 16 eDP Cable Replacement, Loosen the interposer screws: step 12, image 1 of 2 Framework Laptop 16 eDP Cable Replacement, Loosen the interposer screws: step 12, image 2 of 2
    • If you have the Graphics Module installed, your interposer will have four screws. If you have the Expansion Bay Shell installed, you'll have three screws instead.

    • If you have the Graphics Module, use your Framework Screwdriver to loosen the four captive T5 Torx screws securing the interposer.

    • If you have the Expansion Bay Shell, use your Framework Screwdriver to loosen the three captive T5 Torx screws securing the interposer.

  13. Framework Laptop 16 eDP Cable Replacement, Remove the interposer: step 13, image 1 of 2 Framework Laptop 16 eDP Cable Replacement, Remove the interposer: step 13, image 2 of 2
    • Lift the interposer by its pull tab and remove it.

  14. Framework Laptop 16 eDP Cable Replacement, Loosen the Expansion Bay Module screws: step 14, image 1 of 3 Framework Laptop 16 eDP Cable Replacement, Loosen the Expansion Bay Module screws: step 14, image 2 of 3 Framework Laptop 16 eDP Cable Replacement, Loosen the Expansion Bay Module screws: step 14, image 3 of 3
    • Use your Framework Screwdriver to loosen the two captive T5 Torx screws securing the module in the Expansion Bay.

    • Close the interposer door before continuing.

  15. Framework Laptop 16 eDP Cable Replacement, Remove the Expansion Bay Module: step 15, image 1 of 3 Framework Laptop 16 eDP Cable Replacement, Remove the Expansion Bay Module: step 15, image 2 of 3 Framework Laptop 16 eDP Cable Replacement, Remove the Expansion Bay Module: step 15, image 3 of 3
    • Close your laptop and flip it over.

    • Slide the Expansion Bay Module out of the laptop and remove it.

    • The module should slide out easily. If you feel any resistance, check if the screws holding it in place are fully loosened.

    • Flip your laptop and reopen it.

  16. Framework Laptop 16 eDP Cable Replacement, Disconnect the fingerprint reader: step 16, image 1 of 2 Framework Laptop 16 eDP Cable Replacement, Disconnect the fingerprint reader: step 16, image 2 of 2
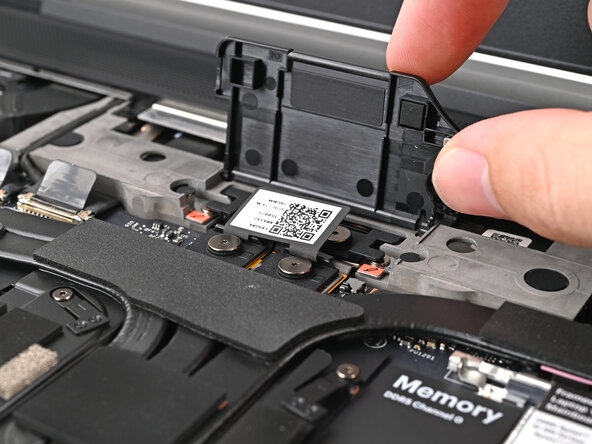
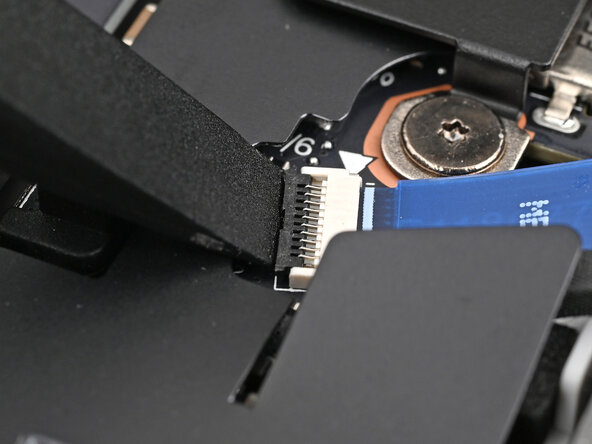
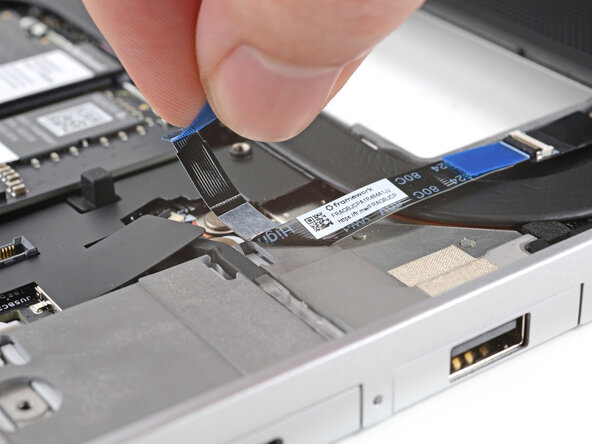
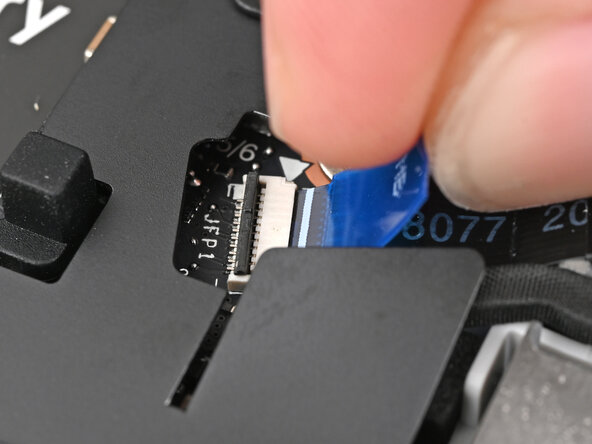
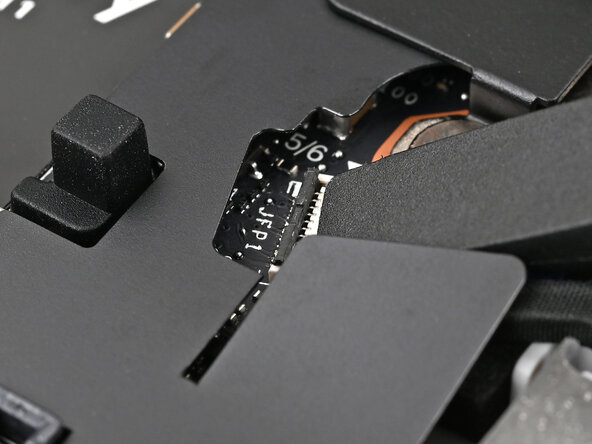
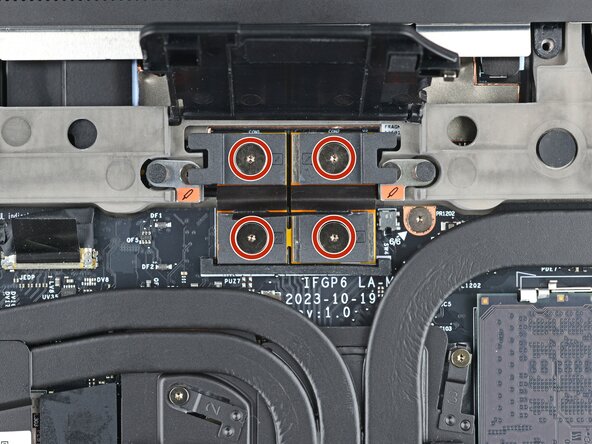
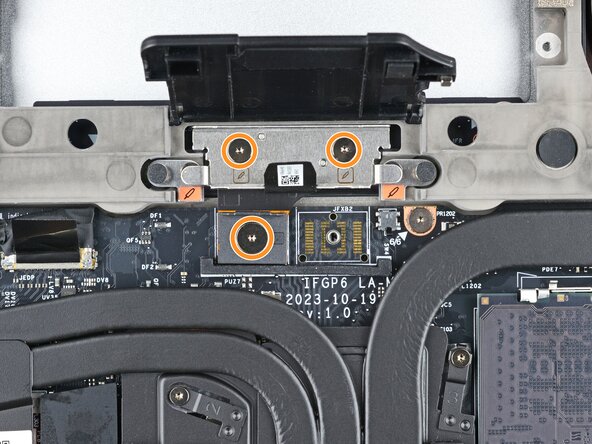
    • Use the flat end of your Framework Screwdriver, or a clean fingernail, to lift up the locking tab on the fingerprint reader ZIF connector next to the memory.

  17. Framework Laptop 16 eDP Cable Replacement: step 17, image 1 of 2 Framework Laptop 16 eDP Cable Replacement: step 17, image 2 of 2
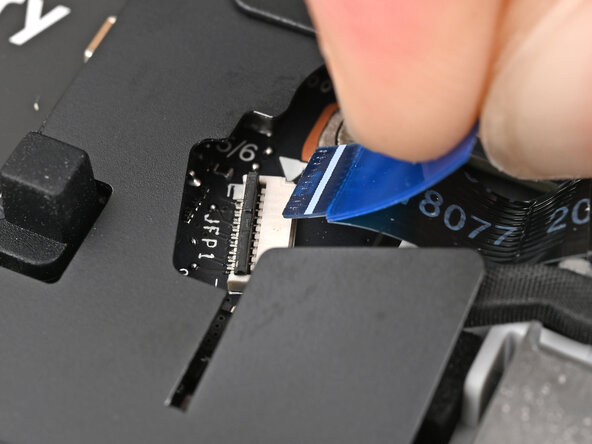
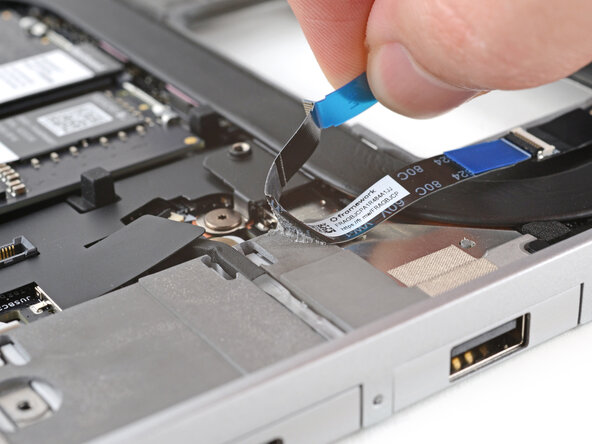
    • Use your fingers to grip the blue pull tab and slide the fingerprint reader cable straight out of its socket.

  18. Framework Laptop 16 eDP Cable Replacement: step 18, image 1 of 3 Framework Laptop 16 eDP Cable Replacement: step 18, image 2 of 3 Framework Laptop 16 eDP Cable Replacement: step 18, image 3 of 3
    • The fingerprint reader cable is lightly adhered to the laptop's frame.

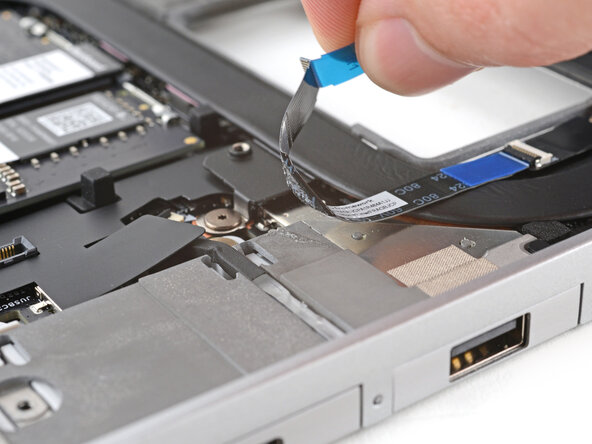
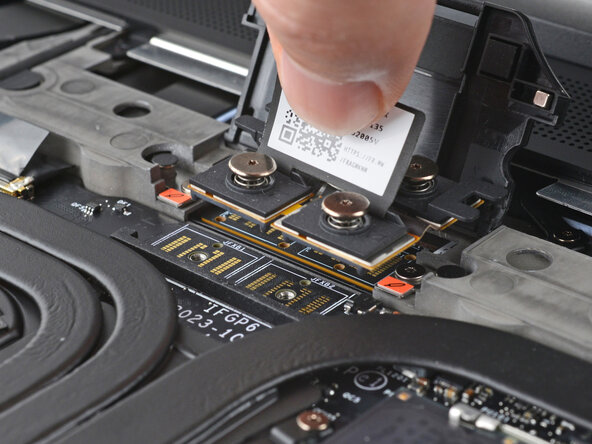
    • Use your fingers to peel the fingerprint reader cable away from the frame and separate the adhesive.

  19. Framework Laptop 16 eDP Cable Replacement, Remove the ventilation plate: step 19, image 1 of 3 Framework Laptop 16 eDP Cable Replacement, Remove the ventilation plate: step 19, image 2 of 3 Framework Laptop 16 eDP Cable Replacement, Remove the ventilation plate: step 19, image 3 of 3
    • The ventilation plate is held in place with magnets.

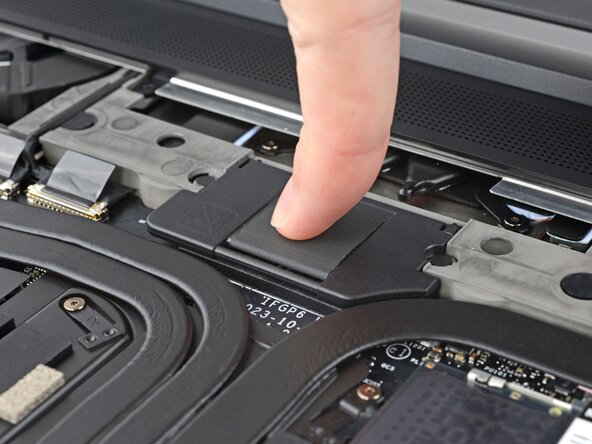
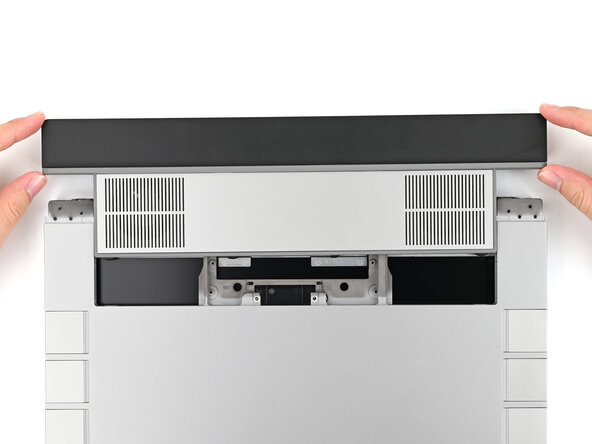
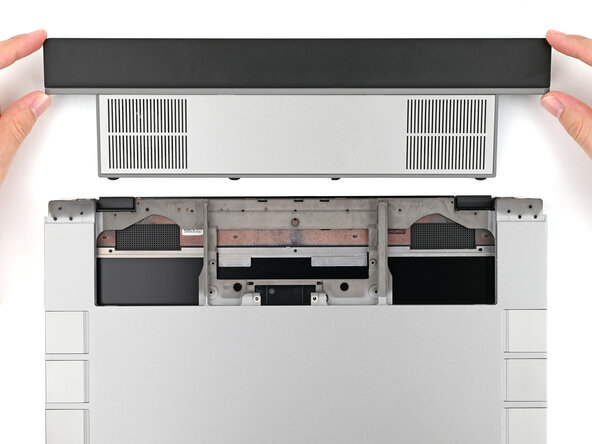
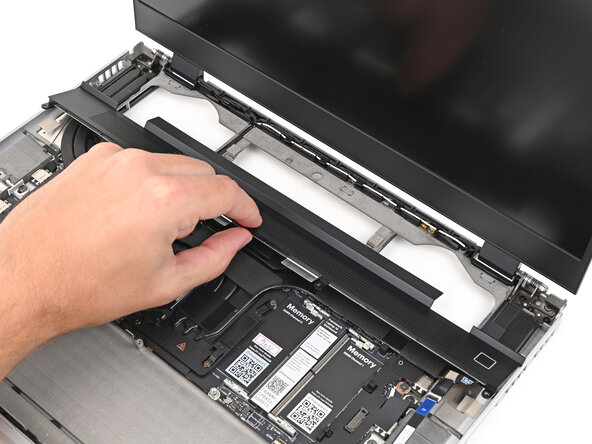
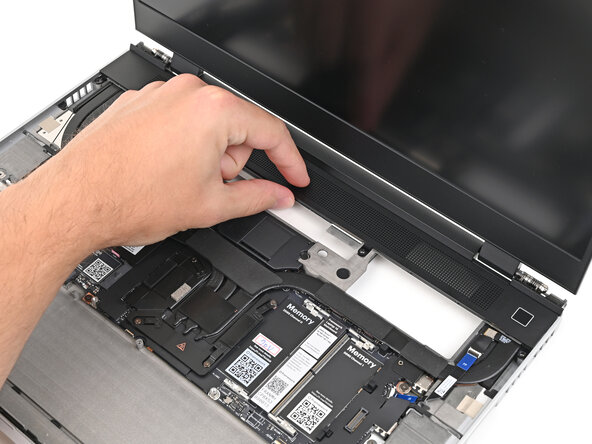
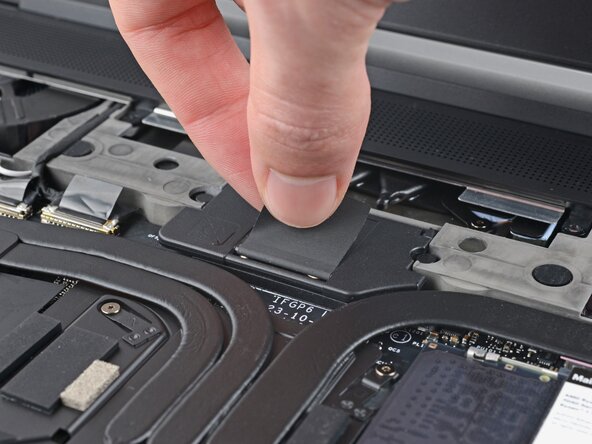
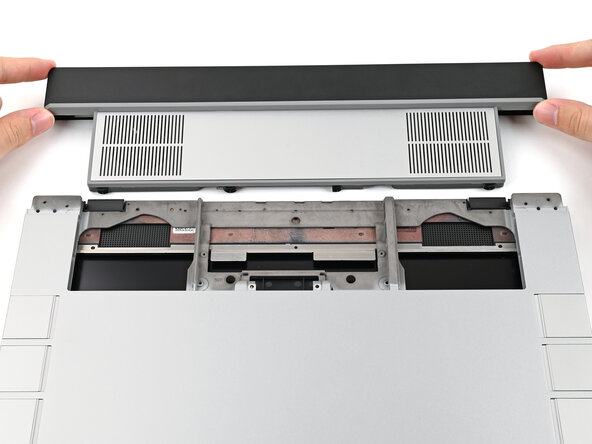
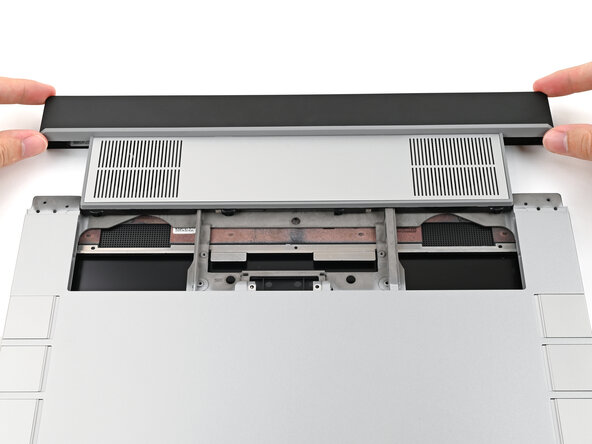
    • Lift the bottom of the ventilation plate and pull it away from the laptop until the magnets release.

    • Remove the ventilation plate.

  20. Framework Laptop 16 eDP Cable Replacement, Create a gap: step 20, image 1 of 3 Framework Laptop 16 eDP Cable Replacement, Create a gap: step 20, image 2 of 3 Framework Laptop 16 eDP Cable Replacement, Create a gap: step 20, image 3 of 3
    • The bezel is secured with magnets.

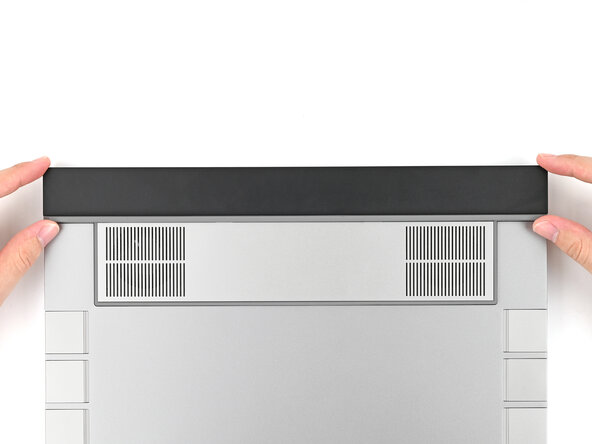
    • Slide your fingernail under the inside edge of either bottom corner of the bezel.

    • Pull the bezel away from the screen to release the first few magnets.

  21. Framework Laptop 16 eDP Cable Replacement, Remove the bezel: step 21, image 1 of 3 Framework Laptop 16 eDP Cable Replacement, Remove the bezel: step 21, image 2 of 3 Framework Laptop 16 eDP Cable Replacement, Remove the bezel: step 21, image 3 of 3
    • Lift the bezel around the perimeter of the screen until all of its magnets are released.

    • Remove the bezel.

  22. Framework Laptop 16 eDP Cable Replacement, Disconnect the eDP cable: step 22, image 1 of 2 Framework Laptop 16 eDP Cable Replacement, Disconnect the eDP cable: step 22, image 2 of 2
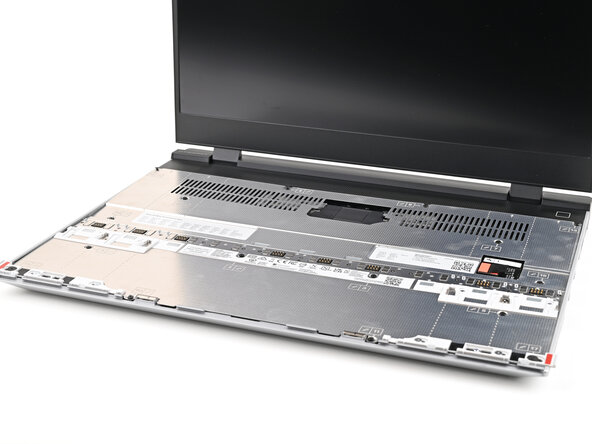
    • Grip the eDP cable connector to the right of the Wi-Fi module slot by its pull tab and lift up to disconnect it.

  23. Framework Laptop 16 eDP Cable Replacement, Reroute the eDP cable: step 23, image 1 of 2 Framework Laptop 16 eDP Cable Replacement, Reroute the eDP cable: step 23, image 2 of 2
    • Lift the eDP cable out of its vertical slot in the Bottom Cover.

  24. Framework Laptop 16 eDP Cable Replacement: step 24, image 1 of 3 Framework Laptop 16 eDP Cable Replacement: step 24, image 2 of 3 Framework Laptop 16 eDP Cable Replacement: step 24, image 3 of 3
    • Use your fingers to guide the eDP cable out of its clips along the top left edge of the Bottom Cover.

  25. Framework Laptop 16 eDP Cable Replacement, Peel off the eDP cable: step 25, image 1 of 3 Framework Laptop 16 eDP Cable Replacement, Peel off the eDP cable: step 25, image 2 of 3 Framework Laptop 16 eDP Cable Replacement, Peel off the eDP cable: step 25, image 3 of 3
    • The eDP cable is lightly adhered to the Top Cover at its "bend" near the bottom left corner.

    • Grip the eDP cable near its bend and peel it off the Top Cover.

  26. Framework Laptop 16 eDP Cable Replacement, Remove the display screws: step 26, image 1 of 3 Framework Laptop 16 eDP Cable Replacement, Remove the display screws: step 26, image 2 of 3 Framework Laptop 16 eDP Cable Replacement, Remove the display screws: step 26, image 3 of 3
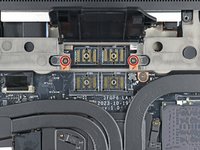
    • While supporting the display with one hand, use your Framework Screwdriver to remove the four 2.4 mm‑long T5 Torx screws securing the display.

  27. Framework Laptop 16 eDP Cable Replacement, Remove the display: step 27, image 1 of 3 Framework Laptop 16 eDP Cable Replacement, Remove the display: step 27, image 2 of 3 Framework Laptop 16 eDP Cable Replacement, Remove the display: step 27, image 3 of 3
    • Grab the display and pull it straight off the Top Cover to free it from its alignment pegs.

    • Remove the display.

  28. Framework Laptop 16 eDP Cable Replacement, Disconnect the eDP cable: step 28, image 1 of 3 Framework Laptop 16 eDP Cable Replacement, Disconnect the eDP cable: step 28, image 2 of 3 Framework Laptop 16 eDP Cable Replacement, Disconnect the eDP cable: step 28, image 3 of 3
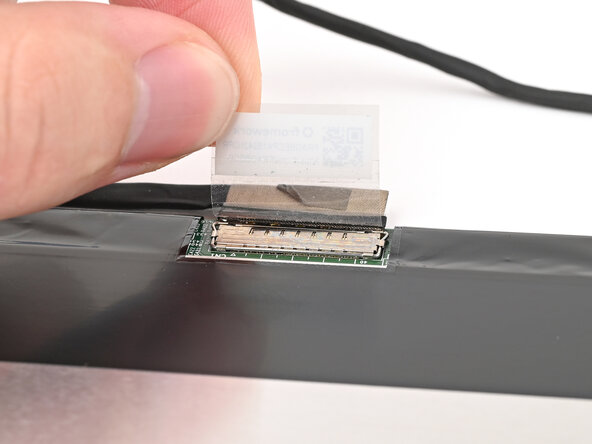
    • Rest your display facedown on a flat, clean work surface.

    • Use your fingers to flip up the plastic tab and access the connector underneath.

  29. Framework Laptop 16 eDP Cable Replacement: step 29, image 1 of 2 Framework Laptop 16 eDP Cable Replacement: step 29, image 2 of 2
    • Use the flat end of your Framework Screwdriver to lift up the metal locking tab over the display connector.

  30. Framework Laptop 16 eDP Cable Replacement: step 30, image 1 of 2 Framework Laptop 16 eDP Cable Replacement: step 30, image 2 of 2
    • Grip the display cable where it meets the connector head.

    • Slide the connector straight out of its socket to disconnect it.

  31. Framework Laptop 16 eDP Cable Replacement, Disassembly complete: step 31, image 1 of 1
    • Congratulations on completing disassembly! The remaining steps will show how to reassemble your Framework Laptop.

  32. Framework Laptop 16 eDP Cable Replacement, Connect the eDP cable: step 32, image 1 of 2 Framework Laptop 16 eDP Cable Replacement, Connect the eDP cable: step 32, image 2 of 2
    • Grip the display cable where it meets the connector head.

    • Slide the display cable connector straight into its socket.

  33. Framework Laptop 16 eDP Cable Replacement: step 33, image 1 of 3 Framework Laptop 16 eDP Cable Replacement: step 33, image 2 of 3 Framework Laptop 16 eDP Cable Replacement: step 33, image 3 of 3
    • Push the metal locking tab down over the display cable connector until it snaps into place.

  34. Framework Laptop 16 eDP Cable Replacement, Place the display: step 34, image 1 of 2 Framework Laptop 16 eDP Cable Replacement, Place the display: step 34, image 2 of 2
    • Align the display with its alignment pegs and place it on the Top Cover.

  35. Framework Laptop 16 eDP Cable Replacement, Install the display screws: step 35, image 1 of 3 Framework Laptop 16 eDP Cable Replacement, Install the display screws: step 35, image 2 of 3 Framework Laptop 16 eDP Cable Replacement, Install the display screws: step 35, image 3 of 3
    • While supporting the display with one hand, use your Framework Screwdriver to install the four 2.4 mm‑long T5 Torx screws securing the display.

  36. Framework Laptop 16 eDP Cable Replacement, Re-adhere the eDP cable: step 36, image 1 of 2 Framework Laptop 16 eDP Cable Replacement, Re-adhere the eDP cable: step 36, image 2 of 2
    • Press the bend in the eDP cable onto the Top Cover to re‑adhere it.

  37. Framework Laptop 16 eDP Cable Replacement, Reroute the eDP cable: step 37, image 1 of 2 Framework Laptop 16 eDP Cable Replacement, Reroute the eDP cable: step 37, image 2 of 2
    • Use the flat end of your Framework Screwdriver, or your fingers, to press the eDP cable into its clips at the top left edge of the Bottom Cover.

  38. Framework Laptop 16 eDP Cable Replacement: step 38, image 1 of 2 Framework Laptop 16 eDP Cable Replacement: step 38, image 2 of 2
    • Press the eDP cable into its vertical slot in the Bottom Cover.

  39. Framework Laptop 16 eDP Cable Replacement, Connect the eDP cable: step 39, image 1 of 2 Framework Laptop 16 eDP Cable Replacement, Connect the eDP cable: step 39, image 2 of 2
    • Press the eDP connector straight down into its socket to connect it.

  40. Framework Laptop 16 eDP Cable Replacement, Install the bezel: step 40, image 1 of 2 Framework Laptop 16 eDP Cable Replacement, Install the bezel: step 40, image 2 of 2
    • Align the bezel over the perimeter of the display and let the magnets pull the bezel into place.

    • The bezel should "snap" into place. If it doesn't, realign it and make sure it sits flush with the display.

  41. Framework Laptop 16 eDP Cable Replacement, Place the ventilation plate: step 41, image 1 of 2 Framework Laptop 16 eDP Cable Replacement, Place the ventilation plate: step 41, image 2 of 2
    • Lay the ventilation plate along the top edge of the laptop and let its magnets pull into place.

  42. Framework Laptop 16 eDP Cable Replacement, Connect the fingerprint reader: step 42, image 1 of 2 Framework Laptop 16 eDP Cable Replacement, Connect the fingerprint reader: step 42, image 2 of 2
    • Use your fingers to grip the blue pull tab and slide the fingerprint reader cable straight into its socket.

  43. Framework Laptop 16 eDP Cable Replacement: step 43, image 1 of 2 Framework Laptop 16 eDP Cable Replacement: step 43, image 2 of 2
    • Use the flat end of your Framework Screwdriver, or a clean fingernail, to press down the locking tab on the fingerprint reader ZIF connector.

  44. Framework Laptop 16 eDP Cable Replacement: step 44, image 1 of 1
    • Press the fingerprint reader cable to the frame to re-adhere it.

  45. Framework Laptop 16 eDP Cable Replacement, Lift the interposer door: step 45, image 1 of 2 Framework Laptop 16 eDP Cable Replacement, Lift the interposer door: step 45, image 2 of 2
    • Close the interposer door.

  46. Framework Laptop 16 eDP Cable Replacement, Tighten the interposer screws: step 46, image 1 of 3 Framework Laptop 16 eDP Cable Replacement, Tighten the interposer screws: step 46, image 2 of 3 Framework Laptop 16 eDP Cable Replacement, Tighten the interposer screws: step 46, image 3 of 3
    • If you have the Graphics Module installed, your interposer will have four screws. If you have the Expansion Bay Shell installed, you'll have three screws instead.

    • If you have the Graphics Module, use your Framework Screwdriver to tighten the four captive T5 Torx screws securing the interposer.

    • If you have the Expansion Bay Shell, use your Framework Screwdriver to tighten the three captive T5 Torx screws securing the interposer.

    • Close the interposer door.

  47. Framework Laptop 16 eDP Cable Replacement, Place the interposer: step 47, image 1 of 2 Framework Laptop 16 eDP Cable Replacement, Place the interposer: step 47, image 2 of 2
    • Place the interposer over its spot between the Mainboard and the module.

    • Depending on if you're installing a Graphics Module or the Expansion Bay Shell, the interposer should be oriented so either rubber grommets or metal tabs cover the Expansion Bay screws.

  48. Framework Laptop 16 eDP Cable Replacement, Tighten the Expansion Bay Module screws: step 48, image 1 of 2 Framework Laptop 16 eDP Cable Replacement, Tighten the Expansion Bay Module screws: step 48, image 2 of 2
    • Use your Framework Screwdriver to tighten the two captive T5 Torx screws securing the Expansion Bay Module.

  49. Framework Laptop 16 eDP Cable Replacement, Insert the Expansion Bay Module: step 49, image 1 of 2 Framework Laptop 16 eDP Cable Replacement, Insert the Expansion Bay Module: step 49, image 2 of 2
  50. Framework Laptop 16 eDP Cable Replacement, Place the Mid Plate: step 50, image 1 of 3 Framework Laptop 16 eDP Cable Replacement, Place the Mid Plate: step 50, image 2 of 3 Framework Laptop 16 eDP Cable Replacement, Place the Mid Plate: step 50, image 3 of 3
    • Place the Mid Plate on the laptop, making sure it sits evenly on its alignment pegs.

  51. Framework Laptop 16 eDP Cable Replacement, Tighten the Mid Plate screws: step 51, image 1 of 2 Framework Laptop 16 eDP Cable Replacement, Tighten the Mid Plate screws: step 51, image 2 of 2
    • Use your Framework Screwdriver to tighten the 16 captive T5 Torx screws in order (starting with 2) to secure the Mid Plate evenly.

  52. Framework Laptop 16 eDP Cable Replacement, Connect the Mid Plate cable: step 52, image 1 of 2 Framework Laptop 16 eDP Cable Replacement, Connect the Mid Plate cable: step 52, image 2 of 2
    • Align the Mid Plate cable press connector over its socket and press down to connect it.

  53. Framework Laptop 16 eDP Cable Replacement, Install the Input Modules: step 53, image 1 of 3 Framework Laptop 16 eDP Cable Replacement, Install the Input Modules: step 53, image 2 of 3 Framework Laptop 16 eDP Cable Replacement, Install the Input Modules: step 53, image 3 of 3
    • Your Input Module(s) might be different, but the procedure to remove them is the same.

    • Align the top edge of the Input Module with the top edge of the laptop.

    • Lay the Input Module on the laptop and let the magnets pull the keyboard into place

    • Make sure the Input Module is seated properly on its alignment pegs and sits flush with the edges of the laptop.

    • Repeat for any remaining Input Modules.

  54. Framework Laptop 16 eDP Cable Replacement, Install the keyboard: step 54, image 1 of 3 Framework Laptop 16 eDP Cable Replacement, Install the keyboard: step 54, image 2 of 3 Framework Laptop 16 eDP Cable Replacement, Install the keyboard: step 54, image 3 of 3
    • Align the top edge of the keyboard with the top edge of the laptop.

    • Lay the keyboard on the laptop and let the magnets pull the keyboard into place

    • Make sure the keyboard is seated properly on its alignment pegs and sits flush with the edges of the laptop.

  55. Framework Laptop 16 eDP Cable Replacement, Install the Touchpad Module: step 55, image 1 of 2 Framework Laptop 16 eDP Cable Replacement, Install the Touchpad Module: step 55, image 2 of 2
    • Place the Touchpad Module flat on its cutout so its clips are properly aligned.

    • Press the Touchpad Module down and slide it into place so it lines up evenly with the bottom edge of the laptop.

  56. Framework Laptop 16 eDP Cable Replacement, Install the Touchpad Spacers: step 56, image 1 of 3 Framework Laptop 16 eDP Cable Replacement, Install the Touchpad Spacers: step 56, image 2 of 3 Framework Laptop 16 eDP Cable Replacement, Install the Touchpad Spacers: step 56, image 3 of 3
    • Place the Touchpad Spacer over its spot on the laptop with the bottom edge overhanging slightly.

    • Slide the Touchpad Spacer towards the top of the laptop to secure it.

    • Repeat the same procedure for the other Touchpad Spacer.

Conclusion

You finished fixing your Framework Laptop!

Take your e-waste to an R2 or e-Stewards certified recycler.

If you need help, contact Framework support.

Alex Diaz-Kokaisl

Member since: 01/16/22

219,597 Reputation

1,064 Guides authored

0 Guide Comments

Add Comment

View Statistics:

Past 24 Hours: 2

Past 7 Days: 14

Past 30 Days: 23

All Time: 23