
Free Shipping on Domestic Orders $75+

Framework Laptop 12 Install the Display (separated)

Prerequisite Only
This is a prerequisite-only guide! This guide is part of another procedure and isn’t meant to be used alone.

What you need

  1. Framework Laptop 12 Install the Display (separated), Install the display: step 1, image 1 of 3 Framework Laptop 12 Install the Display (separated), Install the display: step 1, image 2 of 3 Framework Laptop 12 Install the Display (separated), Install the display: step 1, image 3 of 3
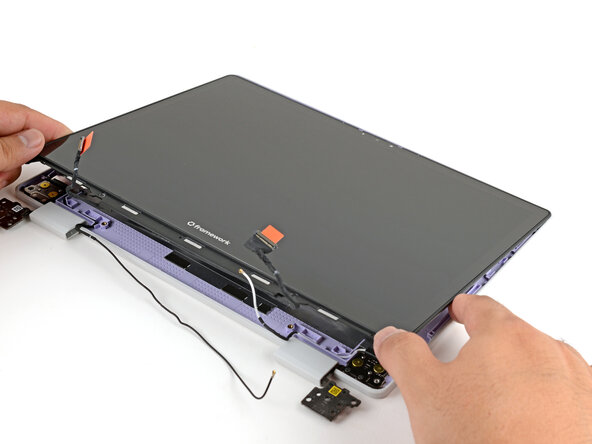
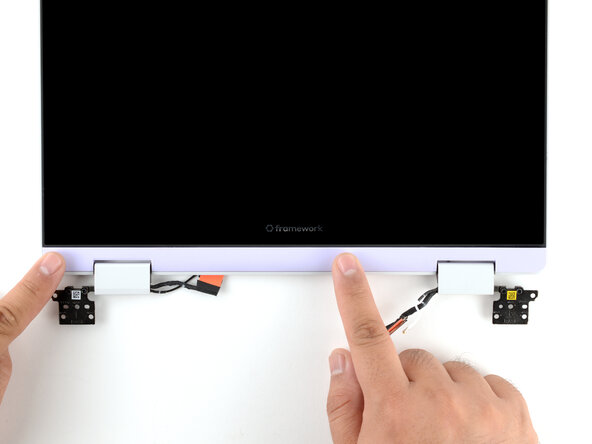
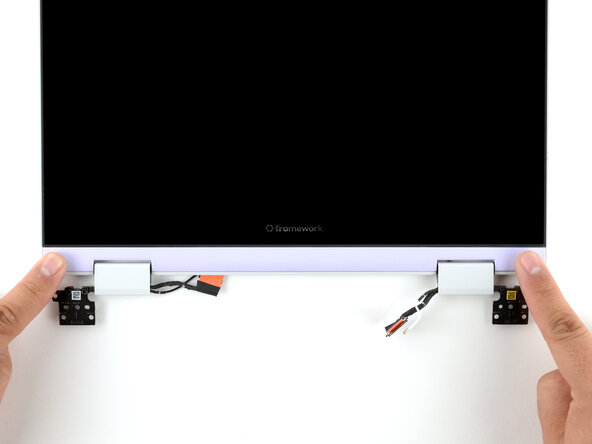
    • Lay the display in place in the Top Cover, such that the top edge of the display is slightly below the top edge of the Top Cover.

  2. Framework Laptop 12 Install the Display (separated): step 2, image 1 of 3 Framework Laptop 12 Install the Display (separated): step 2, image 2 of 3 Framework Laptop 12 Install the Display (separated): step 2, image 3 of 3
    • Use your fingers to slide the display upwards to latch the tabs on the top edge of the display.

    • The top edge shouldn't have any gaps when the display's in place.

  3. Framework Laptop 12 Install the Display (separated), Install the display screws: step 3, image 1 of 1
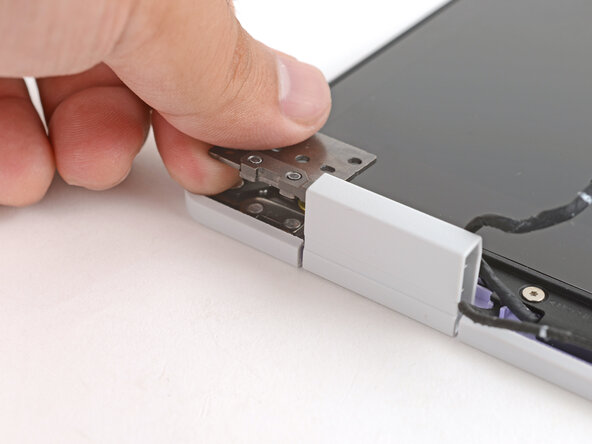
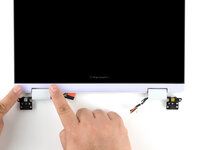
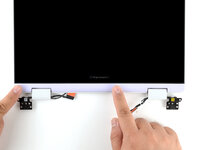
    • Use your Framework Screwdriver to install the four 3.3 mm‑long T5 Torx screws to secure the display to the Top Cover.

    • Make sure you don't accidentally install the 4.5 mm‑long hinge screws here. They look identical, but the hinge screws are longer.

    • Tighten the screws until they're snug. Don't over-tighten them, or you may damage the screw tabs.

  4. Framework Laptop 12 Install the Display (separated): step 4, image 1 of 3 Framework Laptop 12 Install the Display (separated): step 4, image 2 of 3 Framework Laptop 12 Install the Display (separated): step 4, image 3 of 3
    • Use your fingers to twist both hinge plates so they're flipped over the display.

  5. Framework Laptop 12 Install the Display (separated): step 5, image 1 of 3 Framework Laptop 12 Install the Display (separated): step 5, image 2 of 3 Framework Laptop 12 Install the Display (separated): step 5, image 3 of 3
    • Place the cable clip around the right hinge cables, where they were bent from being inserted into the hinge.

    • Use your fingers to press the clip into the hinge to secure the cables.

  6. Framework Laptop 12 Install the Display (separated): step 6, image 1 of 2 Framework Laptop 12 Install the Display (separated): step 6, image 2 of 2
    • Repeat the procedure on the left hinge to secure the left cables.

  7. Framework Laptop 12 Install the Display (separated): step 7, image 1 of 2 Framework Laptop 12 Install the Display (separated): step 7, image 2 of 2
    • Make sure both cable clips are fully inserted into the hinges, so that they won't be snagged when the hinges pivot.

  8. Framework Laptop 12 Install the Display (separated): step 8, image 1 of 3 Framework Laptop 12 Install the Display (separated): step 8, image 2 of 3 Framework Laptop 12 Install the Display (separated): step 8, image 3 of 3
    • Use your fingers to twist both hinge plates so that they lay flat on your work surface.

  9. Framework Laptop 12 Install the Display (separated): step 9, image 1 of 3 Framework Laptop 12 Install the Display (separated): step 9, image 2 of 3 Framework Laptop 12 Install the Display (separated): step 9, image 3 of 3
    • Lay the Display Cover in place below the display.

    • Use your finger to press along the length of the Display Cover to snap it onto the laptop.

Finish Line

Arthur Shi

Member since: 01/03/18

316,686 Reputation

730 Guides authored

0 Guide Comments

Add Comment

View Statistics:

Past 24 Hours: 1

Past 7 Days: 3

Past 30 Days: 6

All Time: 42