Free Shipping on Domestic Orders $75+

Framework Laptop 12 Bottom Cover Removal

Prerequisite Only
This is a prerequisite-only guide! This guide is part of another procedure and isn’t meant to be used alone.

What you need

    1. Framework Laptop 12 Bottom Cover Removal, Power down your laptop: step 1, image 1 of 3 Framework Laptop 12 Bottom Cover Removal, Power down your laptop: step 1, image 2 of 3 Framework Laptop 12 Bottom Cover Removal, Power down your laptop: step 1, image 3 of 3
      • Before you begin repairs, unplug your laptop and shut it down from the operating system. This ensures that the laptop isn't in standby/suspend mode.

      • The indicator LEDs along the edges should be unlit. The laptop should be silent.

      • If you accidentally turn on the laptop during repair, hold the power button down for 10 seconds to shut it down.

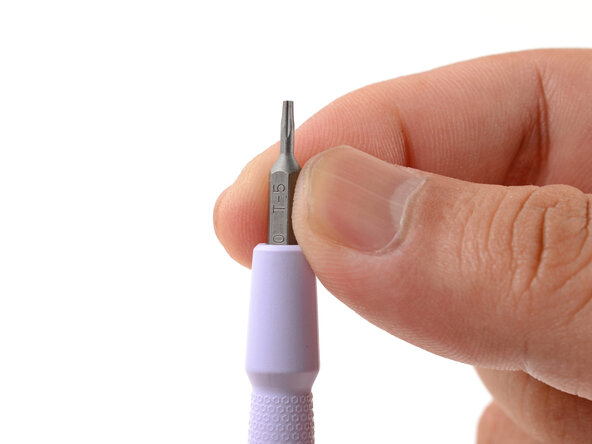
      • Make sure your Framework Screwdriver has the T5 Torx bit (labeled as T-5) facing outwards. If it's not, pull the bit out and flip it.

      Ask FixBot

      Add Comment

    1. Framework Laptop 12 Bottom Cover Removal, Set your laptop down: step 2, image 1 of 1
      • Set your Framework Laptop face-down on a clean work surface.

      Ask FixBot

      Add Comment

    2. Framework Laptop 12 Bottom Cover Removal, Remove the Expansion Cards: step 3, image 1 of 2 Framework Laptop 12 Bottom Cover Removal, Remove the Expansion Cards: step 3, image 2 of 2
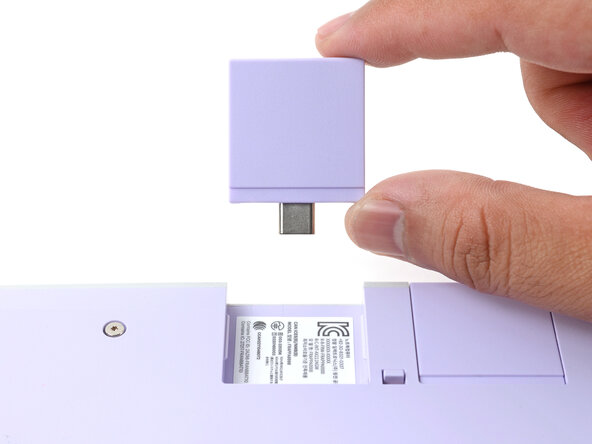
      • Use your fingers to flip the two Expansion Card latches (one for each side) into the unlocked position.

      • The latches display a red bar when they're unlocked.

      Ask FixBot

      Add Comment

    3. Framework Laptop 12 Bottom Cover Removal: step 4, image 1 of 3 Framework Laptop 12 Bottom Cover Removal: step 4, image 2 of 3 Framework Laptop 12 Bottom Cover Removal: step 4, image 3 of 3
      • Grip the lip of an Expansion Card with your fingers.

      • Pull the Expansion Card out of its slot and remove it.

      • If you have trouble pulling the Expansion Card out, you can also use the flat end of your Framework Screwdriver to push against the lip.

      • Repeat this procedure to remove all remaining Expansion Cards.

      Ask FixBot

      Add Comment

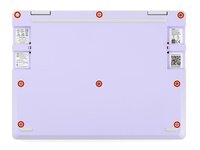
    1. Framework Laptop 12 Bottom Cover Removal, Loosen the bottom screws: step 5, image 1 of 2 Framework Laptop 12 Bottom Cover Removal, Loosen the bottom screws: step 5, image 2 of 2
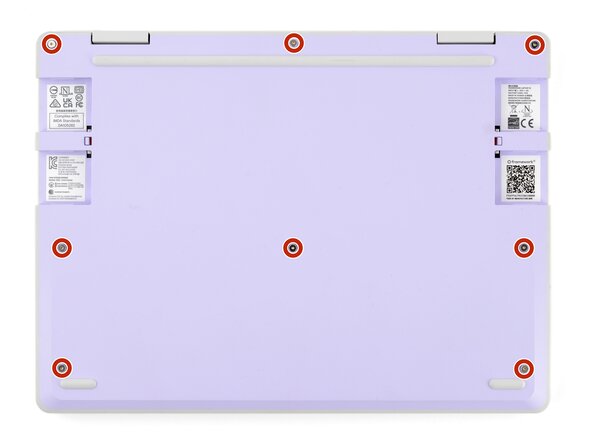
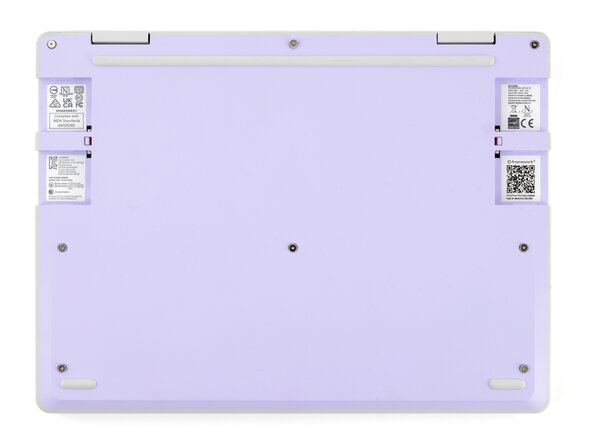
      • Use your Framework Screwdriver to fully loosen the eight captive T5 Torx screws on the bottom of your laptop.

      • Most screws in your Framework Laptop (including these) are captive—they're designed to stay in place after you loosen them.

      • Your laptop comes with a spare set of screws in the frame above the battery. Be careful—the replacement screws aren't captive.

      Ask FixBot

      Add Comment

    2. Framework Laptop 12 Bottom Cover Removal, Flip your laptop over: step 6, image 1 of 1
      • Flip your laptop face-up on your work surface.

      Ask FixBot

      Add Comment

    3. Framework Laptop 12 Bottom Cover Removal, Open your laptop: step 7, image 1 of 2 Framework Laptop 12 Bottom Cover Removal, Open your laptop: step 7, image 2 of 2
      • Open the laptop lid so that both the screen and the base lie flat on your work surface.

      Ask FixBot

      Add Comment

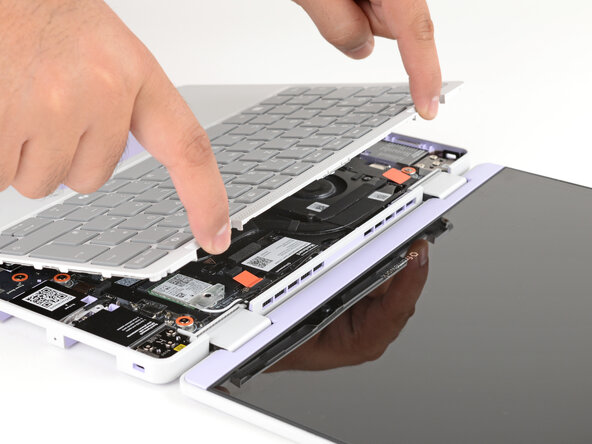
    4. Framework Laptop 12 Bottom Cover Removal, Remove the Input Cover: step 8, image 1 of 3 Framework Laptop 12 Bottom Cover Removal, Remove the Input Cover: step 8, image 2 of 3 Framework Laptop 12 Bottom Cover Removal, Remove the Input Cover: step 8, image 3 of 3
      • Use your fingers to grip the Input Cover in the hinge cutouts.

      • Lift upwards to swing the Input Cover up from the base of the laptop.

      • You may feel resistance from the magnets. If the cover feels like it's snagged, check that you've fully loosened the screws on the bottom of your laptop.

      • Remove the Input Cover.

      Ask FixBot

      Add Comment

    1. Framework Laptop 12 Bottom Cover Removal, Loosen the battery screws: step 9, image 1 of 1
      • Use your Framework Screwdriver to loosen the six captive T5 Torx screws securing the battery.

      Ask FixBot

      Add Comment

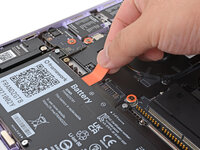
    2. Framework Laptop 12 Bottom Cover Removal, Disconnect the battery: step 10, image 1 of 2 Framework Laptop 12 Bottom Cover Removal, Disconnect the battery: step 10, image 2 of 2
      • Grab the orange battery tab with your fingers and lift straight up to disconnect the battery.

      • The battery connector can be tight, requiring some force. If it feels like part of the battery won't come up, check that the battery screws are fully loosened.

      Ask FixBot

      Add Comment

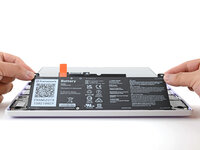
    3. Framework Laptop 12 Bottom Cover Removal, Remove the battery: step 11, image 1 of 2 Framework Laptop 12 Bottom Cover Removal, Remove the battery: step 11, image 2 of 2
      • Lift and remove the battery from the laptop.

      Ask FixBot

      Add Comment

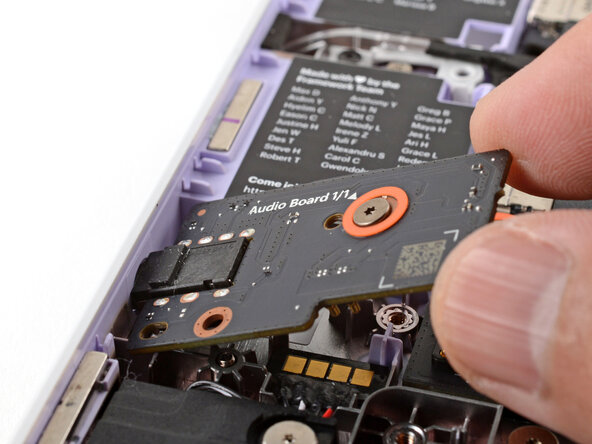
    1. Framework Laptop 12 Bottom Cover Removal, Loosen the Audio Board screw: step 12, image 1 of 1
      • Use your Framework Screwdriver to loosen the captive T5 Torx screw securing the Audio Board along the left edge of the laptop.

      Ask FixBot

      Add Comment

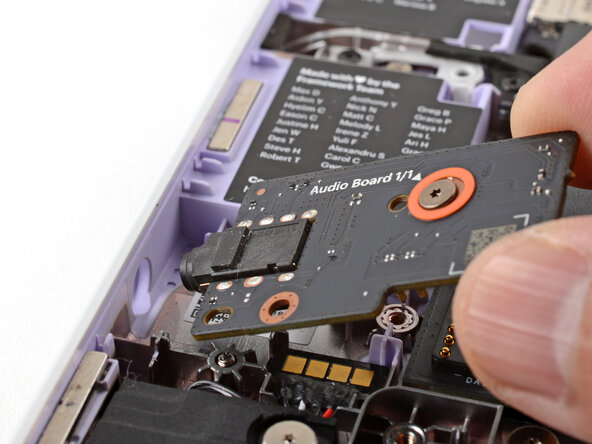
    2. Framework Laptop 12 Bottom Cover Removal, Remove the Audio Board: step 13, image 1 of 3 Framework Laptop 12 Bottom Cover Removal, Remove the Audio Board: step 13, image 2 of 3 Framework Laptop 12 Bottom Cover Removal, Remove the Audio Board: step 13, image 3 of 3
      • Use your fingers to lift the right edge of the Audio Board and pull it out of its recess.

      • Remove the Audio Board.

      Ask FixBot

      Add Comment

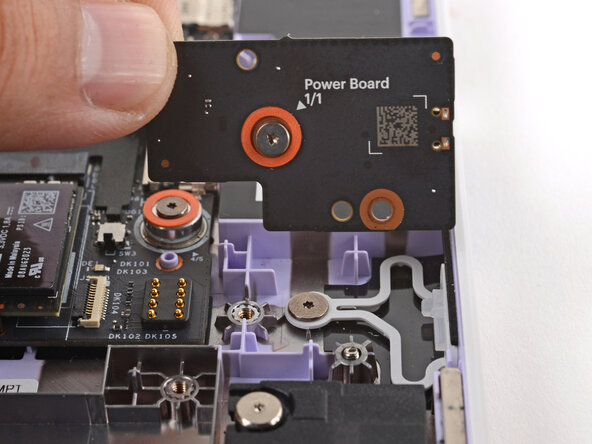
    1. Framework Laptop 12 Bottom Cover Removal, Loosen the Power Button Board screw: step 14, image 1 of 1
      • Use your Framework Screwdriver to loosen the captive T5 Torx screw securing the Power Button Board (labeled "Power Board").

      Ask FixBot

      Add Comment

    2. Framework Laptop 12 Bottom Cover Removal, Remove the Power Button Board: step 15, image 1 of 2 Framework Laptop 12 Bottom Cover Removal, Remove the Power Button Board: step 15, image 2 of 2
      • Use your fingers to lift and remove the Power Button Board.

      Ask FixBot

      Add Comment

    1. Framework Laptop 12 Bottom Cover Removal, Loosen the Wi-Fi card screw: step 16, image 1 of 1
      • Use your Framework Screwdriver to loosen the captive T5 Torx screw securing the Wi-Fi card bracket.

      • The Wi-Fi card will pop up slightly when you unfasten the bracket.

      Ask FixBot

      Add Comment

    2. Framework Laptop 12 Bottom Cover Removal, Remove the Wi-Fi card bracket: step 17, image 1 of 2 Framework Laptop 12 Bottom Cover Removal, Remove the Wi-Fi card bracket: step 17, image 2 of 2
      • Grab the Wi-Fi card bracket with your fingers and slide it off the top of the Wi-Fi card.

      • Remove the bracket and store it in a safe location for reassembly.

      Ask FixBot

      Add Comment

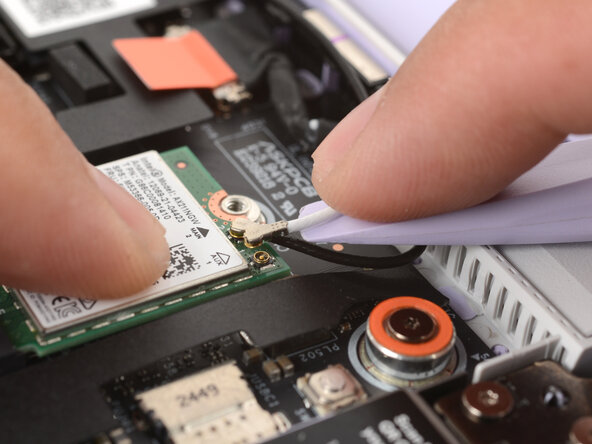
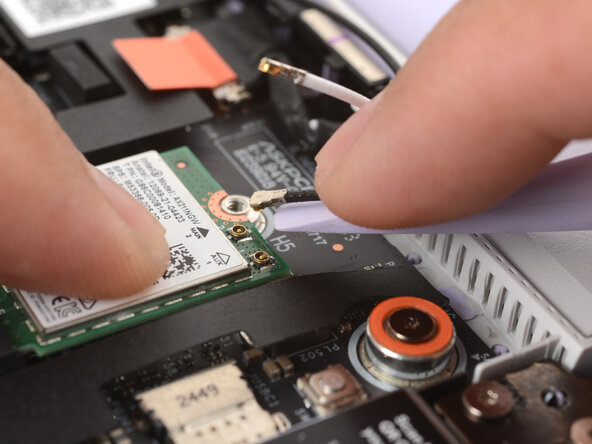
    3. Framework Laptop 12 Bottom Cover Removal, Disconnect the antenna cables: step 18, image 1 of 3 Framework Laptop 12 Bottom Cover Removal, Disconnect the antenna cables: step 18, image 2 of 3 Framework Laptop 12 Bottom Cover Removal, Disconnect the antenna cables: step 18, image 3 of 3
      • The Wi-Fi card has two delicate coaxial cable connectors. Follow this step carefully to avoid damaging them.

      • Press and hold the Wi-Fi card down with your finger.

      • Slide the flat edge of your Framework Screwdriver under the white antenna cable, as close to the metal head as possible.

      • If you have angled tweezers, slide one arm of a pair of tweezers under the antenna connector, as close to the metal head as possible.

      • Gently lift the connector straight up to disconnect the white antenna cable.

      • Repeat the procedure with the black antenna cable.

      Ask FixBot

      Add Comment

    4. Framework Laptop 12 Bottom Cover Removal, Remove the Wi-Fi card: step 19, image 1 of 2 Framework Laptop 12 Bottom Cover Removal, Remove the Wi-Fi card: step 19, image 2 of 2
      • Grab the Wi-Fi card by the edges and pull it out of its socket.

      • Remove the Wi-Fi card.

      Ask FixBot

      Add Comment

    1. Framework Laptop 12 Bottom Cover Removal, Disconnect the fan connector: step 20, image 1 of 3 Framework Laptop 12 Bottom Cover Removal, Disconnect the fan connector: step 20, image 2 of 3 Framework Laptop 12 Bottom Cover Removal, Disconnect the fan connector: step 20, image 3 of 3
      • Use the flat end of your Framework Screwdriver to gently push on one of the fan connector's protruding edges, then the other, to loosen the connector out of its socket.

      Ask FixBot

      Add Comment

    2. Framework Laptop 12 Bottom Cover Removal: step 21, image 1 of 2 Framework Laptop 12 Bottom Cover Removal: step 21, image 2 of 2
      • Use your fingers and your Framework Screwdriver to slide the fan connector out of its socket.

      Ask FixBot

      Add Comment

    3. Framework Laptop 12 Bottom Cover Removal, Loosen the fan screws: step 22, image 1 of 1
      • Use your Framework Screwdriver to loosen the two captive T5 Torx screws securing the fan.

      Ask FixBot

      Add Comment

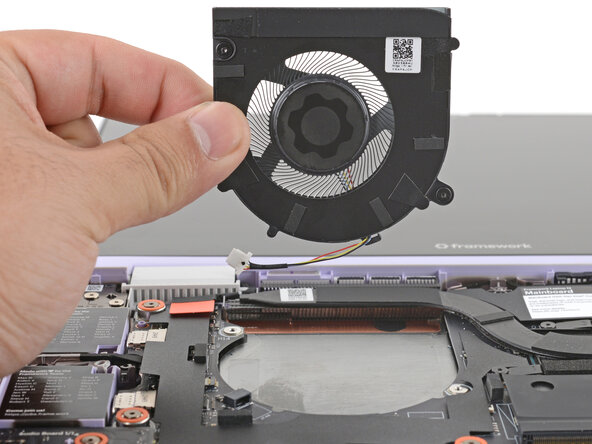
    4. Framework Laptop 12 Bottom Cover Removal, Remove the fan: step 23, image 1 of 2 Framework Laptop 12 Bottom Cover Removal, Remove the fan: step 23, image 2 of 2
      • Lift and remove the fan.

      Ask FixBot

      Add Comment

    1. Framework Laptop 12 Bottom Cover Removal, Disconnect the webcam cable: step 24, image 1 of 2 Framework Laptop 12 Bottom Cover Removal, Disconnect the webcam cable: step 24, image 2 of 2
      • Use your fingers to grab the orange tab on the webcam cable, located near the left hinge.

      • Lift straight up to disconnect the cable.

      Ask FixBot

      Add Comment

    2. Framework Laptop 12 Bottom Cover Removal, Disconnect the display cable: step 25, image 1 of 2 Framework Laptop 12 Bottom Cover Removal, Disconnect the display cable: step 25, image 2 of 2
      • Use your fingers to grab the orange tab on the display cable, located near the right hinge.

      • Lift straight up to disconnect the cable.

      Ask FixBot

      Add Comment

    3. Framework Laptop 12 Bottom Cover Removal, Loosen the Mainboard screws: step 26, image 1 of 1
      • Use your Framework Screwdriver to loosen the five captive T5 Torx screws securing the Mainboard.

      • These screws are also physically marked with an orange ring on the Mainboard.

      Ask FixBot

      Add Comment

    4. Framework Laptop 12 Bottom Cover Removal, Remove the Mainboard: step 27, image 1 of 2 Framework Laptop 12 Bottom Cover Removal, Remove the Mainboard: step 27, image 2 of 2
      • Make sure you've removed all Expansion Cards. Installed cards will hold the Mainboard in place.

      • Use your fingers to grab the Mainboard by its edges.

      • Lift and remove the Mainboard.

      Ask FixBot

      Add Comment

    5. Framework Laptop 12 Bottom Cover Removal, Unthread the antenna cable: step 28, image 1 of 2 Framework Laptop 12 Bottom Cover Removal, Unthread the antenna cable: step 28, image 2 of 2
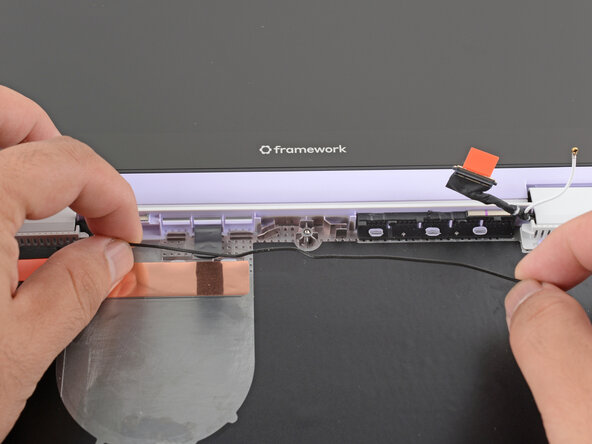
      • Use your fingers to lift the black plastic loop securing the antenna cable, near the heat vents by the left hinge.

      Ask FixBot

      Add Comment

    6. Framework Laptop 12 Bottom Cover Removal: step 29, image 1 of 2 Framework Laptop 12 Bottom Cover Removal: step 29, image 2 of 2
      • Use your fingers to lift and guide the antenna cable out of the frame channel.

      Ask FixBot

      Add Comment

    7. Framework Laptop 12 Bottom Cover Removal, Unthread the webcam cable: step 30, image 1 of 2 Framework Laptop 12 Bottom Cover Removal, Unthread the webcam cable: step 30, image 2 of 2
      • Use your fingers to gently lift the webcam cable out of its plastic channel.

      Ask FixBot

      Add Comment

    8. Framework Laptop 12 Bottom Cover Removal, Disconnect the Top Cover: step 31, image 1 of 2 Framework Laptop 12 Bottom Cover Removal, Disconnect the Top Cover: step 31, image 2 of 2
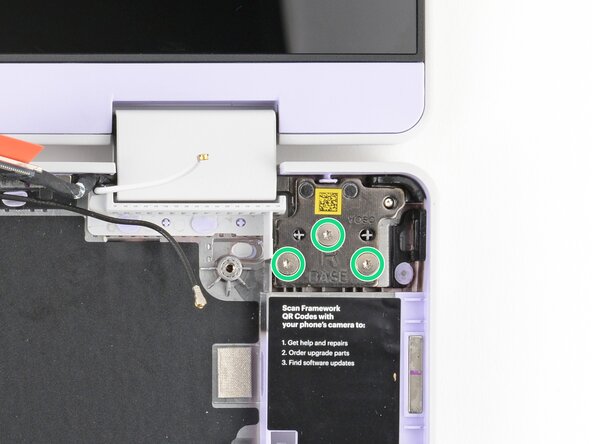
      • Use your Framework Screwdriver to remove the six (three per hinge) 4.5 mm‑long T5 Torx screws securing the two hinges.

      • These screws are not captive. Store them in a safe location for reassembly.

      Ask FixBot

      Add Comment

    9. Framework Laptop 12 Bottom Cover Removal: step 32, image 1 of 3 Framework Laptop 12 Bottom Cover Removal: step 32, image 2 of 3 Framework Laptop 12 Bottom Cover Removal: step 32, image 3 of 3
      • Use your fingers to lift the hinges over the Bottom Cover lip.

      • Separate the Top Cover from the Bottom Cover.

      Ask FixBot

      Add Comment

    1. Framework Laptop 12 Bottom Cover Removal, Check your Bottom Cover: step 33, image 1 of 1
      • Compare your new replacement Bottom Cover to the original part—you may need to transfer remaining components or remove liners from the new part before you install it.

      Ask FixBot

      Add Comment

Finish Line

Cancel: I did not complete this guide.

Arthur Shi

Member since: 01/03/18

350,889 Reputation

938 Guides authored

0 Guide Comments

Add Comment

View Statistics:

Past 24 Hours: 0

Past 7 Days: 0

Past 30 Days: 7

All Time: 103