
Fairphone 5 Screen Replacement

What you need

  1. Fairphone 5 Screen Replacement, Prepare your phone for disassembly: step 1, image 1 of 1
    • Unplug all cables and power down your phone.

    • Press the power and volume up buttons at the same time to bring up the shutdown menu.

  2. Fairphone 5 Screen Replacement, Pry up the back cover: step 2, image 1 of 2 Fairphone 5 Screen Replacement, Pry up the back cover: step 2, image 2 of 2
    • Insert your fingernail, or a pry tool like a spudger, under the notch at the bottom right of the back cover.

    • Pry up the back cover to release the bottom right corner clips.

  3. Fairphone 5 Screen Replacement, Remove the back cover: step 3, image 1 of 3 Fairphone 5 Screen Replacement, Remove the back cover: step 3, image 2 of 3 Fairphone 5 Screen Replacement, Remove the back cover: step 3, image 3 of 3
    • Grip the bottom right corner of the back cover with one hand and brace the phone frame with the other.

    • Lift the back cover away from the phone to release the clips around its perimeter.

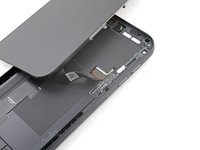
    • Remove the back cover.

    • During reassembly, align the back cover over the phone and press along the perimeter until all clips snap back into place.

  4. Fairphone 5 Screen Replacement, Remove the battery: step 4, image 1 of 3 Fairphone 5 Screen Replacement, Remove the battery: step 4, image 2 of 3 Fairphone 5 Screen Replacement, Remove the battery: step 4, image 3 of 3
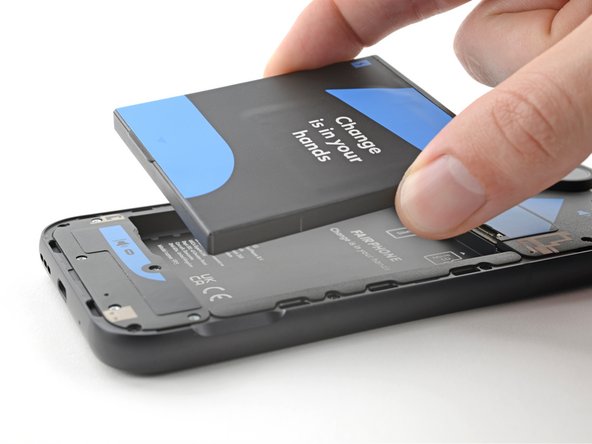
    • Use your fingernail, or a pry tool like a spudger, to lift the battery by its tab along the bottom edge.

    • Remove the battery.

    • During reassembly, slide the top edge of the battery into its recess in the frame before pressing the battery into place.

  5. Fairphone 5 Screen Replacement, Unfasten the screen: step 5, image 1 of 2 Fairphone 5 Screen Replacement, Unfasten the screen: step 5, image 2 of 2
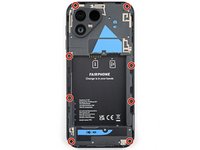
    • Use a Phillips driver to remove the eight 3.9 mm‑long screws securing the screen.

  6. Fairphone 5 Screen Replacement, Reposition the screen: step 6, image 1 of 3 Fairphone 5 Screen Replacement, Reposition the screen: step 6, image 2 of 3 Fairphone 5 Screen Replacement, Reposition the screen: step 6, image 3 of 3
    • While supporting the screen, lift the phone with the screen facing downward.

    • Pull the phone frame upward to separate it from the screen.

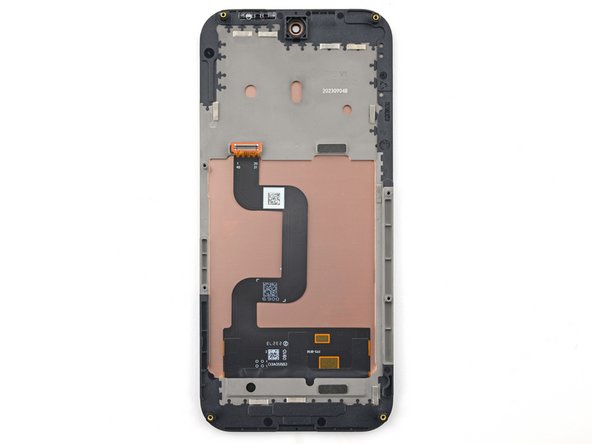
    • Flip the screen and frame over and lay them down with the screen resting over the top left portion of the frame, exposing the display cable.

    • Don't strain the cable. You only need enough space to access the screen press connector.

  7. Fairphone 5 Screen Replacement, Remove the screen: step 7, image 1 of 3 Fairphone 5 Screen Replacement, Remove the screen: step 7, image 2 of 3 Fairphone 5 Screen Replacement, Remove the screen: step 7, image 3 of 3
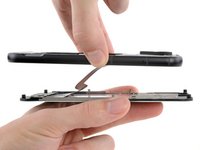
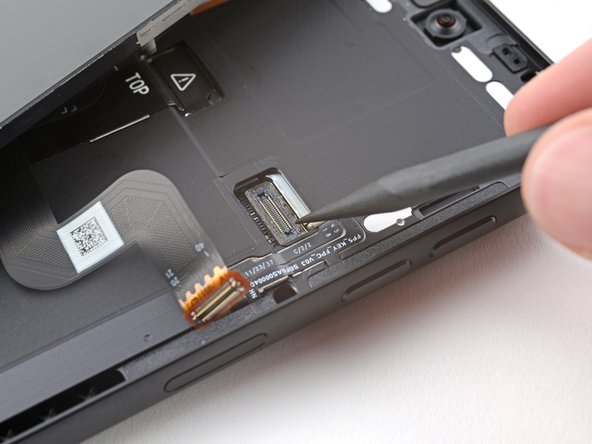
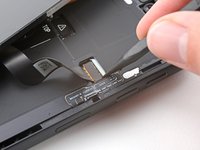
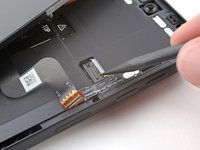
    • Use the point of a spudger to pry up and disconnect the screen press connector.

    • Remove the screen.

    • To re-attach press connectors like this one, carefully align and press down on one side until it clicks into place, then repeat on the other side. Don't press down in the middle. If the connector is misaligned, the pins can bend and cause permanent damage.

Conclusion

To reassemble your device, follow these instructions in reverse order.

Take your e-waste to an R2 or e-Stewards certified recycler.

Repair didn’t go as planned? Try some basic troubleshooting, or ask our Answers community for help.

Alex Diaz-Kokaisl

Member since: 01/16/22

123,840 Reputation

581 Guides authored

Team

iFixit Member of iFixit

Staff

135 Members

17,125 Guides authored

0 Comments

Add Comment

View Statistics:

Past 24 Hours: 9

Past 7 Days: 42

Past 30 Days: 189

All Time: 885