
Epson Powerlite 460 Motherboard Replacement

What you need

  1. Epson Powerlite 460 Motherboard Replacement, Motherboard: step 1, image 1 of 2 Epson Powerlite 460 Motherboard Replacement, Motherboard: step 1, image 2 of 2
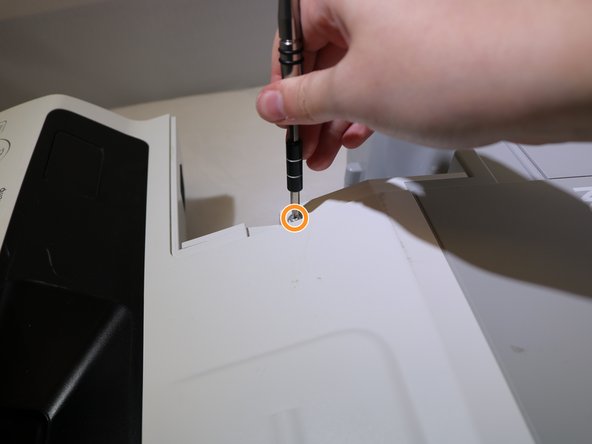
    • Orient the device so that the projection window is facing down and the bottom of the device is visible.

    • Remove the eleven 13.3mm screws using a Phillips #2 screwdriver.

  2. Epson Powerlite 460 Motherboard Replacement: step 2, image 1 of 3 Epson Powerlite 460 Motherboard Replacement: step 2, image 2 of 3 Epson Powerlite 460 Motherboard Replacement: step 2, image 3 of 3
    • Flip the device over so that the projection window is facing up.

    • Slide the air filter cover opener in the direction indicated by the arrow to release the air filter cover.

    • Remove the air filter cover.

  3. Epson Powerlite 460 Motherboard Replacement: step 3, image 1 of 2 Epson Powerlite 460 Motherboard Replacement: step 3, image 2 of 2
    • Remove the two 13.3mm screws from the top cover above the air filter using a Phillips #2 screwdriver.

    • Remove one 13.3mm screw from above the connection panel using a Phillips #2 screwdriver.

  4. Epson Powerlite 460 Motherboard Replacement: step 4, image 1 of 2 Epson Powerlite 460 Motherboard Replacement: step 4, image 2 of 2
    • Remove the cover from the projector and set aside.

    • The cover will be connected by ribbon cables. You do not need to disconnect these to complete this repair, but it may make it easier.

  5. Epson Powerlite 460 Motherboard Replacement: step 5, image 1 of 3 Epson Powerlite 460 Motherboard Replacement: step 5, image 2 of 3 Epson Powerlite 460 Motherboard Replacement: step 5, image 3 of 3
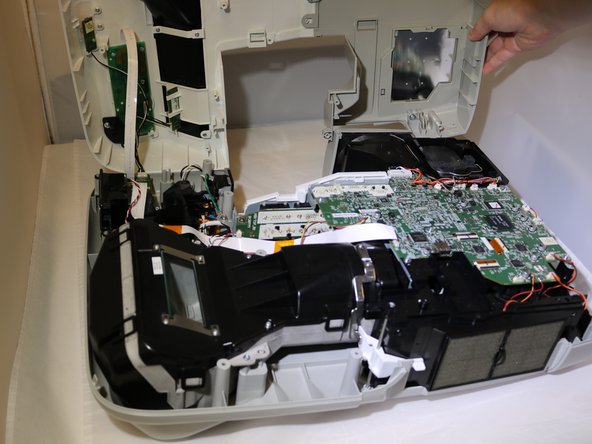
    • Use the opening tool to disconnect eleven clip cables on the motherboard.

    • These will be the colorful cables connected with white plastic clips.

    • Disconnect the black cable clip by pressing the side tabs. Use the opening tool to release the cable if it is difficult.

    • To disconnect the ribbon cables, use the opening tool to lift the locking flap on the connector and slide the cable back and out of the connector.

  6. Epson Powerlite 460 Motherboard Replacement: step 6, image 1 of 1
    • Disconnect the clip cable from below the motherboard and behind the connection panel.

  7. Epson Powerlite 460 Motherboard Replacement: step 7, image 1 of 3 Epson Powerlite 460 Motherboard Replacement: step 7, image 2 of 3 Epson Powerlite 460 Motherboard Replacement: step 7, image 3 of 3
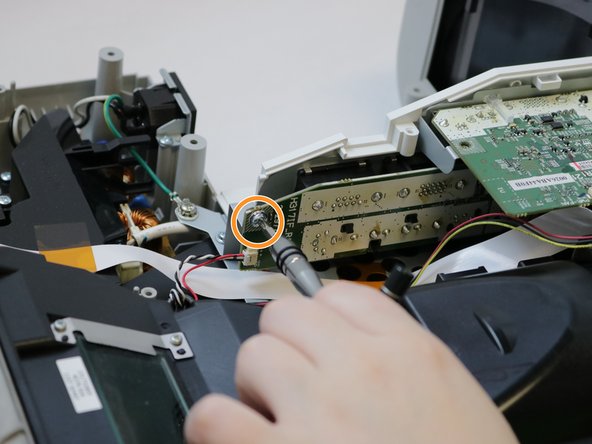
    • Remove seven 8.1mm screws from the motherboard using a Phillips #2 screwdriver.

    • Remove the 8.1mm screw from the back of the projection panel below the motherboard using a Phillips #2 screwdriver.

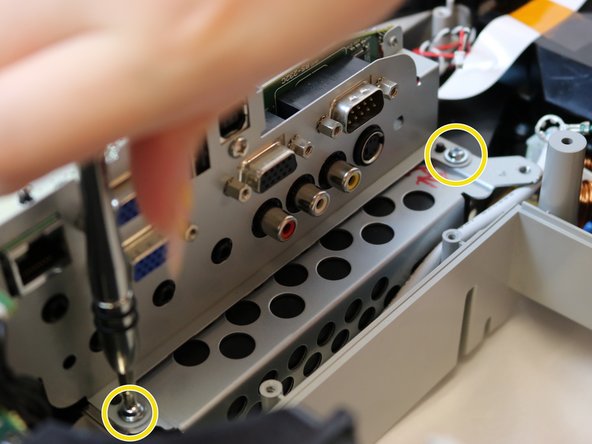
    • Remove two 8.1mm screws from the front of the projection panel using a Phillips #2 screwdriver.

  8. Epson Powerlite 460 Motherboard Replacement: step 8, image 1 of 1
    • Gently lift the motherboard out of the device.

Conclusion

To reassemble your device, follow these instructions in reverse order.

Kristen Gismondi

Member since: 11/12/14

82,987 Reputation

203 Guides authored

Team

iFixit Member of iFixit

Staff

137 Members

17,485 Guides authored

0 Comments

Add Comment

View Statistics:

Past 24 Hours: 0

Past 7 Days: 0

Past 30 Days: 0

All Time: 111