
Emerson EM744 Motherboard Replacement

What you need

  1. Emerson EM744 Motherboard Replacement, Back Plate: step 1, image 1 of 1
    • Use a Phillips 00 bit to remove two 3mm screws from the bottom of the tablet.

  2. Emerson EM744 Motherboard Replacement: step 2, image 1 of 3 Emerson EM744 Motherboard Replacement: step 2, image 2 of 3 Emerson EM744 Motherboard Replacement: step 2, image 3 of 3
    • Insert the nylon spudger into the bottom of the tablet, and gently slide it up the side.

    • Pull apart the two sides of the tablet, exposing the circuit board, battery, and other components of the tablet.

  3. Emerson EM744 Motherboard Replacement, Motherboard: step 3, image 1 of 1
    • Use a Phillips 00 bit to remove 3 screws from the top of the tablet.

  4. Emerson EM744 Motherboard Replacement: step 4, image 1 of 2 Emerson EM744 Motherboard Replacement: step 4, image 2 of 2
    • Disconnect three ribbon connectors from the circuit board with the nylon spudger.

  5. Emerson EM744 Motherboard Replacement: step 5, image 1 of 1
    • Remove tape from the motherboard.

  6. Emerson EM744 Motherboard Replacement: step 6, image 1 of 3 Emerson EM744 Motherboard Replacement: step 6, image 2 of 3 Emerson EM744 Motherboard Replacement: step 6, image 3 of 3
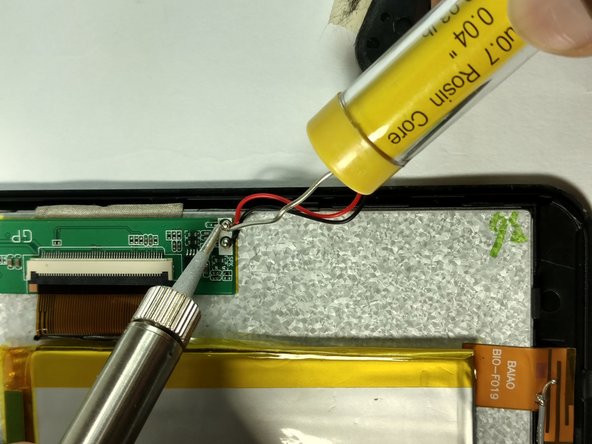
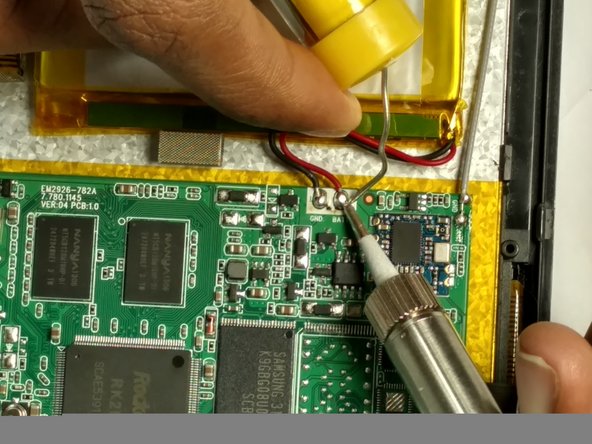
    • Desolder the positive (red) wire to the positive (+) lead, followed by desoldering the negative (black) wire to the negative lead.

    • Refer to the solder technique guide.

Conclusion

To reassemble your device, follow these instructions in reverse order.

One other person completed this guide.

Micalle Marin

Member since: 09/15/16

267 Reputation

2 Guides authored

Team

USF Tampa, Team 2-5, Blackwell Fall 2016 Member of USF Tampa, Team 2-5, Blackwell Fall 2016

USFT-BLACKWELL-F16S2G5

4 Members

12 Guides authored

0 Comments

Add Comment

View Statistics:

Past 24 Hours: 0

Past 7 Days: 0

Past 30 Days: 0

All Time: 475