Introduction
As time goes on your battery life may diminish. This guide will show you how to get to the battery, take it out, and replace it on the EasySMX X15.
What you need
-
-
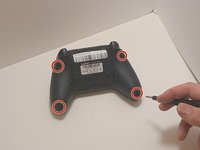
Use a Phillips #00 screwdriver to remove the four 9 mm screws from the bottom of the EasySMX X15.
-
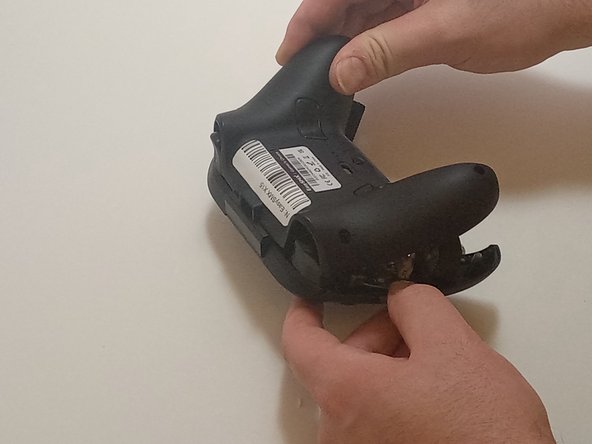
Use an opening tool to gently pry between the seams of the controller to separate the lower and upper casings.
 Ask FixBot
-
-
-
-
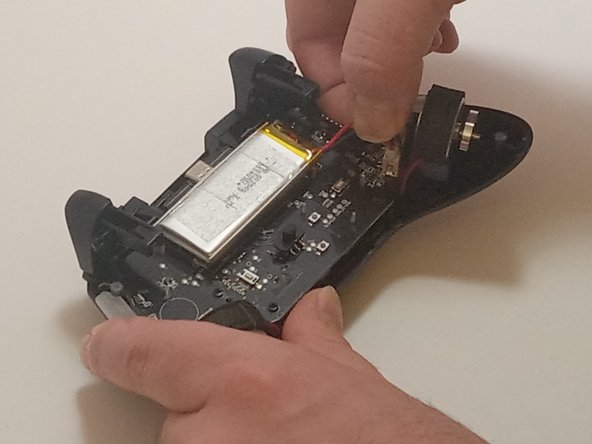
Push on alternating sides of the connector to disconnect the red battery cable from the board.
-
-
-
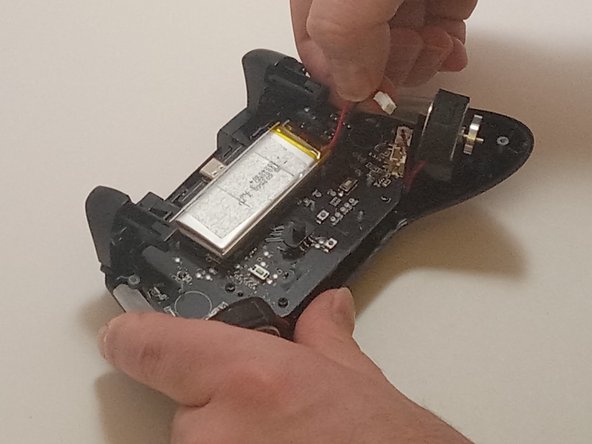
Use a spudger to pry the battery loose from the controller.
-
Remove the battery.
-


To reassemble your device, follow these instructions in reverse order.
Cancel: I did not complete this guide.
One other person completed this guide.

Team

Austin Community College, Team 7-3, Watkins Fall 2024 Member of Austin Community College, Team 7-3, Watkins Fall 2024
AUSTINCC-WATKINS-F24S7G3
3 Members
7 Guides authored
1 Guide Comment
What battery do i need compatible with this controller? where i can find it?