Introduction
This guide is meant to walk you through the basic steps of replacing an SSD in a simple and clear way. Before you begin, make sure your device is powered off and unplugged to avoid any damage or safety issues.
What you need
-
-
-
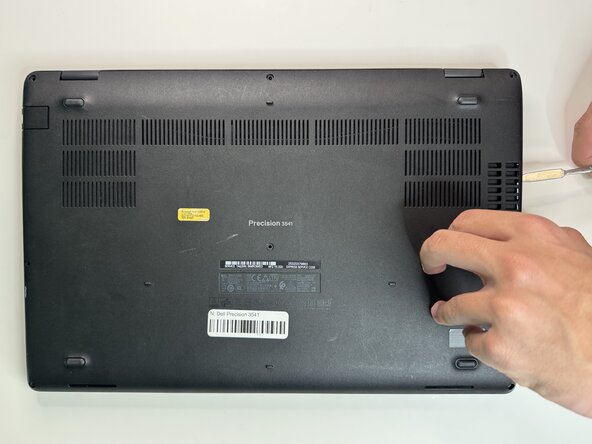
The first step for SSD replacement is to remove the base cover which is the bottom panel of the device. You will find a total of eight small screws, three on each side, and two in the middle of the panel. Once all screws are removed, it may be helpful to use a flat, pointy tool such as a paint key, to pop the panel off of the device.
 Ask FixBot
-
-
-
-
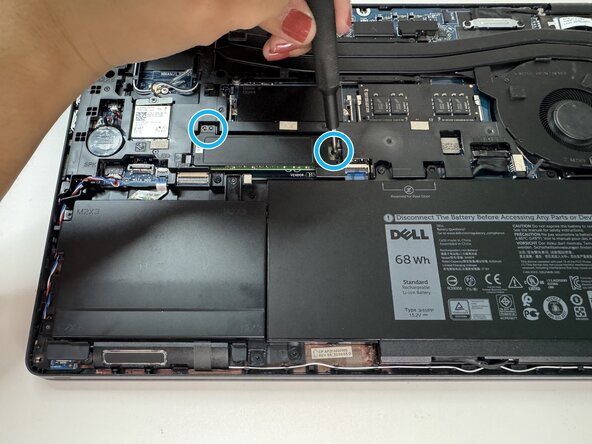
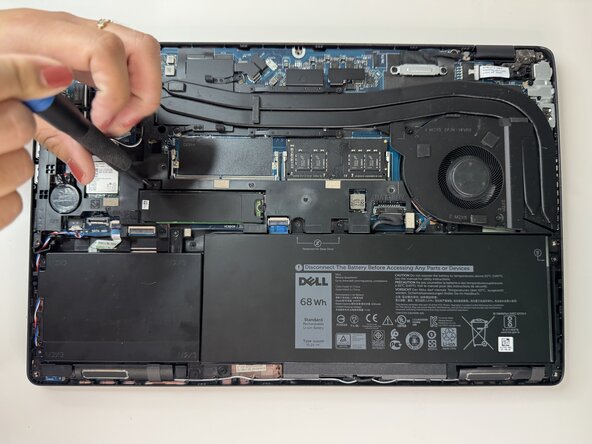
Now, you can locate the SSD. It is a rectangular component, about 3 inches in length. It will be embedded into the left-ward side of the underbody, almost exactly in the center latitudinally. The SSD drive will have two screws holding it in place, one on the top left, and another on the right side. Once unscrewed, the SSD can be carefully removed.
-
-





To reassemble your device, follow these instructions in reverse order. Take your e-waste to an R2 or e-Stewards certified recycler.
Cancel: I did not complete this guide.
One other person completed this guide.

Team

Austin Community College, Team 49-4, Cox Spring 2026 Member of Austin Community College, Team 49-4, Cox Spring 2026
AUSTINCC-COX-S26S49G4
3 Members
60 Guides authored
