
Dell Latitude 9410 2-in-1 CMOS Battery Replacement

What you need

  1. Dell Latitude 9410 2-in-1 CMOS Battery Replacement, Base Panel: step 1, image 1 of 1
    • Ensure that the laptop is unplugged and powered off before beginning.

    • Place the laptop upside down on a flat surface.

  2. Dell Latitude 9410 2-in-1 CMOS Battery Replacement: step 2, image 1 of 2 Dell Latitude 9410 2-in-1 CMOS Battery Replacement: step 2, image 2 of 2
    • Use a Phillips #00 screwdriver to loosen the ten captive screws.

    • The screws are permanently fastened to the base panel; do not attempt to remove them.

  3. Dell Latitude 9410 2-in-1 CMOS Battery Replacement: step 3, image 1 of 3 Dell Latitude 9410 2-in-1 CMOS Battery Replacement: step 3, image 2 of 3 Dell Latitude 9410 2-in-1 CMOS Battery Replacement: step 3, image 3 of 3
    • Carefully lift off the back panel.

  4. Dell Latitude 9410 2-in-1 CMOS Battery Replacement, CMOS Battery: step 4, image 1 of 3 Dell Latitude 9410 2-in-1 CMOS Battery Replacement, CMOS Battery: step 4, image 2 of 3 Dell Latitude 9410 2-in-1 CMOS Battery Replacement, CMOS Battery: step 4, image 3 of 3
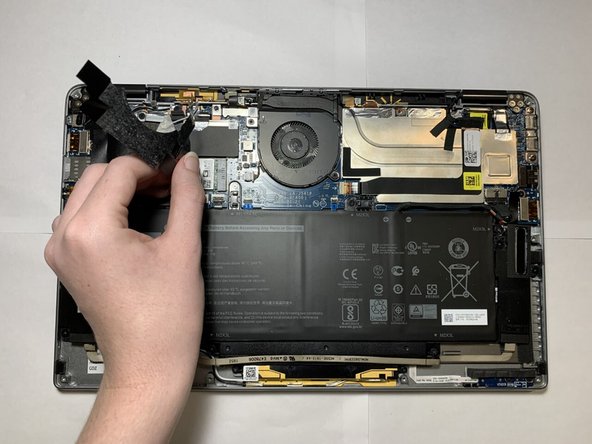
    • Carefully peel back and remove the black tape around the top left corner of the motherboard.

  5. Dell Latitude 9410 2-in-1 CMOS Battery Replacement: step 5, image 1 of 3 Dell Latitude 9410 2-in-1 CMOS Battery Replacement: step 5, image 2 of 3 Dell Latitude 9410 2-in-1 CMOS Battery Replacement: step 5, image 3 of 3
    • Grip the CMOS cable as close as possible to the plug, and gently pull directly backwards, in the direction of the cables, until the CMOS cable disconnects from the motherboard.

    • If the cable is hard to pull out by hand, use tweezers to get a better grip on the cable connector.

Conclusion

To reassemble your device, follow these instructions in reverse order.

0 Comments

Add Comment

View Statistics:

Past 24 Hours: 1

Past 7 Days: 4

Past 30 Days: 26

All Time: 671