Introduction
This guide teaches you how to repair and replace the cooling fan on the Dell Inspiron 15-7560 laptop.
What you need
-
-
-
Power off the laptop and place the laptop with the bottom facing upwards.
-
Remove eight 5 mm screws from the bottom of the laptop.
-
Loosen the three captive screws.
-
Use an iFixit opening tool to pry the bottom cover away from the laptop.
 Ask FixBot
-
-
-
-
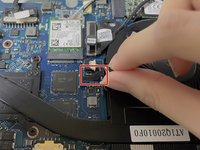
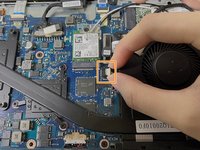
Remove the black insulating tape from the fan connector.
-
Pinch the sides of the white fan connector with your thumb and index fingernail and pull it out of its socket.
-
-



To reassemble your device, follow these instructions in reverse order.
Cancel: I did not complete this guide.
6 other people completed this guide.
Special thanks to these translators:
100%


These translators are helping us fix the world! Want to contribute?
Start translating ›

Team

York University, Team 1-4, O'Regan Winter 2022 Member of York University, Team 1-4, O'Regan Winter 2022
YORK-O'REGAN-W22S1G4
1 Member
9 Guides authored
