Free Shipping on Domestic Orders $75+

CHUWI GemiBook XPro Fan Replacement

What you need

    1. CHUWI GemiBook XPro Fan Replacement, Lower Case: step 1, image 1 of 2 CHUWI GemiBook XPro Fan Replacement, Lower Case: step 1, image 2 of 2
      • Discharge the battery below 25%, since a charged lithium-ion battery is a potential safety hazard. Fully power down the laptop and unplug any peripheries.

      • Orient the device to where you can see the bottom of the case.

      • Use a Phillips #1 screwdriver to remove the twelve 5.6 mm screws that secure the lower case.

      Ask FixBot

      Add Comment

    2. CHUWI GemiBook XPro Fan Replacement: step 2, image 1 of 3 CHUWI GemiBook XPro Fan Replacement: step 2, image 2 of 3 CHUWI GemiBook XPro Fan Replacement: step 2, image 3 of 3
      • Insert an opening pick into the gap between the lower case and the chassis.

      • Pry along the entire perimeter of the laptop until the lower case fully releases.

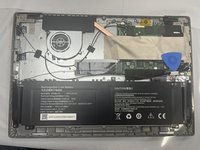
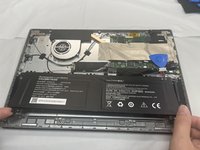
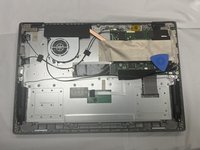
      • Lift the lower case up and off of the chassis.

      Ask FixBot

      Add Comment

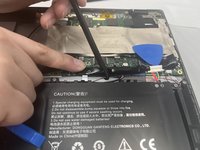
    1. CHUWI GemiBook XPro Fan Replacement, Battery: step 3, image 1 of 2 CHUWI GemiBook XPro Fan Replacement, Battery: step 3, image 2 of 2
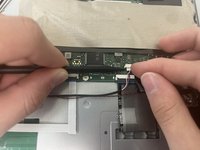
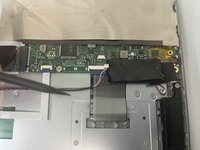
      • Peel off the black tape on the upper-right side of the motherboard.

      Ask FixBot

      Add Comment

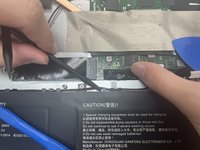
    2. CHUWI GemiBook XPro Fan Replacement: step 4, image 1 of 2 CHUWI GemiBook XPro Fan Replacement: step 4, image 2 of 2
      • Use two opening tools or your fingernails to carefully "walk" the battery connector out of its socket.

      Ask FixBot

      Add Comment

    3. CHUWI GemiBook XPro Fan Replacement: step 5, image 1 of 3 CHUWI GemiBook XPro Fan Replacement: step 5, image 2 of 3 CHUWI GemiBook XPro Fan Replacement: step 5, image 3 of 3
      • Unseat the speaker wires and antenna wire from their retaining hooks on the battery with a halberd spudger.

      Ask FixBot

      Add Comment

    4. CHUWI GemiBook XPro Fan Replacement: step 6, image 1 of 1
      • Use a Phillips #1 screwdriver to remove the five 4.3 mm screws that secure the battery.

      Ask FixBot

      Add Comment

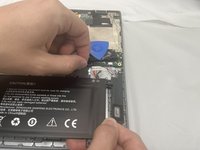
    5. CHUWI GemiBook XPro Fan Replacement: step 7, image 1 of 3 CHUWI GemiBook XPro Fan Replacement: step 7, image 2 of 3 CHUWI GemiBook XPro Fan Replacement: step 7, image 3 of 3
      • Lift the battery up and out of the chassis.

      Ask FixBot

      Add Comment

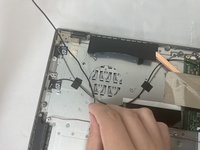
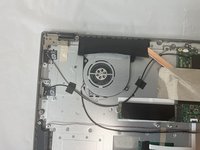
    1. CHUWI GemiBook XPro Fan Replacement, Fan: step 8, image 1 of 2 CHUWI GemiBook XPro Fan Replacement, Fan: step 8, image 2 of 2
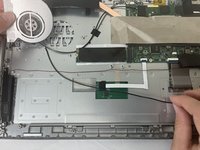
      • Use a spudger to push the fan connector out of its socket.

      Ask FixBot

      Add Comment

    2. CHUWI GemiBook XPro Fan Replacement: step 9, image 1 of 2 CHUWI GemiBook XPro Fan Replacement: step 9, image 2 of 2
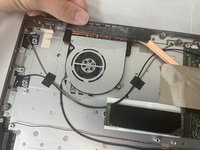
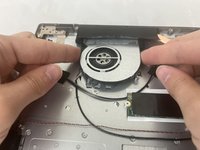
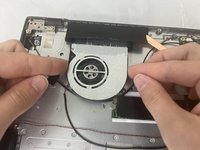
      • The copper piping can be damaged easily, so take care not to bend it.

      • Carefully peel back the black tape on the radiator.

      Ask FixBot

      Add Comment

    3. CHUWI GemiBook XPro Fan Replacement: step 10, image 1 of 1
      • Use a Phillips #1 screwdriver to remove the two 4.2 mm screws that secure the fan.

      Ask FixBot

      Add Comment

    4. CHUWI GemiBook XPro Fan Replacement: step 11, image 1 of 2 CHUWI GemiBook XPro Fan Replacement: step 11, image 2 of 2
      • Gently lift the fan out of the chassis, with care not to strain the connected wire.

      Ask FixBot

      Add Comment

    5. CHUWI GemiBook XPro Fan Replacement: step 12, image 1 of 2 CHUWI GemiBook XPro Fan Replacement: step 12, image 2 of 2
      • Gently remove the fan cable from under other wires and fully remove the fan.

      Ask FixBot

      Add Comment

Conclusion

To reassemble your device, follow these instructions in reverse order.

Cancel: I did not complete this guide.

One other person completed this guide.

1 Guide Comment

Where did you get the replacement fan ? I'm unable to find one with the long wire connector

demint3@roadrunner.com - Reply Share
Add Comment

View Statistics:

Past 24 Hours: 1

Past 7 Days: 12

Past 30 Days: 46

All Time: 701