Introduction
This guide describes all of the necessary steps to replace the battery in the VENSTAR Taco. This guide is needed when the original device battery no longer holds a charge. Hazards when following this guide are risks associated with soldering the wires from the battery to the motherboard. The tool involved in replacing the battery is a soldering tool.
What you need
-
-
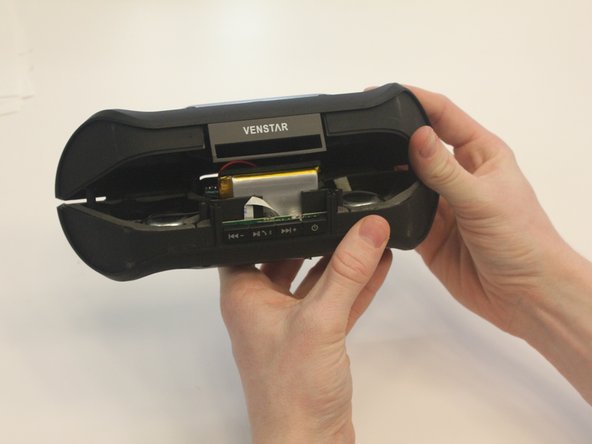
Starting with the Taco on its side, use the plastic opening tool to pop off the outer casing near the base.
-
-
-
Using a Phillips PH0 3 mm-bit screwdriver, remove the six screws on the inner layer of the Taco.
-
-
-
-
From the same side you just unscrewed, use a plastic opening tool to unwedge the inner cover on both sides of the base.
-
-
-
A black fabric covers the ribbon retaining flap, remove it using the curved tweezers as it can be a fire hazard when soldering.
-
-
-
Using a portable soldering iron, melt the solder on the red and black wires on the logic board. Be careful as you are working with the hot metal, it can burn you! You could also cut the wires as close as you can to the battery, and strip them. Then combine the red wire on the new battery with the speaker, repeat with the black wire.
-


Team

University of Kentucky Louisville, Team 1-3, Matravers Spring 2016 Member of University of Kentucky Louisville, Team 1-3, Matravers Spring 2016
LOUISVILLE-MATRAVERS-S16S1G3
4 Members
5 Guides authored