Introduction
The hardrive is critical to the life of the device. The hardrive is a key piece of the time capsule, so awareness and moving slow through the steps is beneficial to ensuring no problems when the repair is made. This guide is do-able by anyone, but will not consume much time. If the user wants to add more storage then a replacement of the hardrive is a popular choice.
What you need
-
-
Turn the device upside down to reveal the rubber section of the back plate. Using a metal spudger, carefully wedge the blunt tip into the space between the aluminum back plate and the rubber, separating the two pieces.
-
Depending on air temperature and how set the adhesive is, you may need to spend some time warming the back plate with a hot plate (on low) or hair dryer.
-
-
-
-
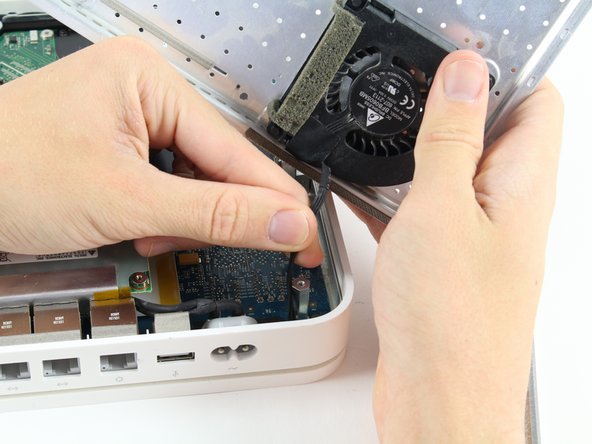
The fan affixed to the back plate is connected to the logic board. A small wire must be detached to fully remove the back plate.
-
Pull the base of the wire close to the logic board and the connector will pop off.
-
-
-
Peel off the adhesive backed foam from the top of the drive.
-
Lift the drive straight up and out of the device.
-
-
-
Remove the SATA connector and power connector from the end of the hard drive by simply pulling the cables straight away from the connection points.
-


Team

Cal Poly, Team 4-2, Livingston Fall 2016 Member of Cal Poly, Team 4-2, Livingston Fall 2016
CPSU-LIVINGSTON-F16S4G2
4 Members
17 Guides authored