Introduction
Are the speakers on your Anker Soundcore Motion 3000 muffled, the audio coming in and out, or seemingly broken; causing the audio from your device to be distorted? All you need is a Phillips head screwdriver, your opening tool, and the replacement guide below to help with your problem.
What you need
-
-
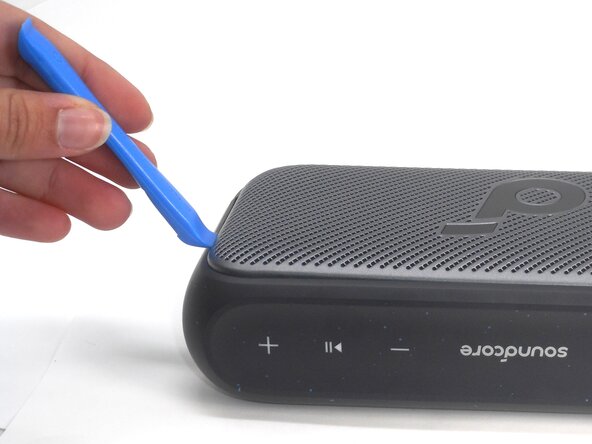
Insert an opening tool into a seam between the grille and chassis.
-
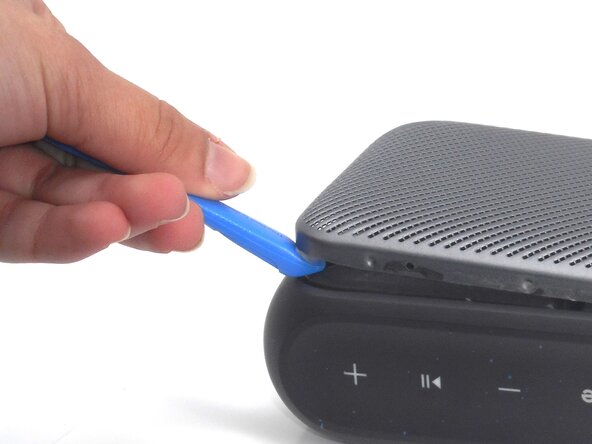
Gently pry the grille up to begin disengaging the retaining clip.
-
Once a corner starts to lift, slowly slide the tool along the edge to loosen more of the grille.
 Ask FixBot
-
-
-
-
Use a Phillips #0 screwdriver to remove all eight 11.5 mm screws that secure the driver housing.
-
-
-
Use an opening tool to pry up the speaker housing.
-
Set the speaker housing beside the speaker, with care not to strain the cables connected to the drivers.
-
-
-
With a Phillips #0 screwdriver, remove the four 7.5 mm screws that secure the driver.
-
Repeat the previous bullet for the other driver.
-
Gently lift off the drivers; the speakers may be slightly glued or stuck to the plastic plate so try not pull on the wiring attaching the components.
-
Disconnect each of the the two driver connectors from the motherboard.
-
Remove the drivers.
-


To reassemble your device, follow the above steps in reverse order.
Take your e-waste to an R2 or e-Stewards certified recycler.
Repair didn’t go as planned? Try some basic troubleshooting or ask our Answers community for help.
Team

University of Memphis, Team 1-2, Sneed Spring 2025 Member of University of Memphis, Team 1-2, Sneed Spring 2025
UM-SNEED-S25S1G2
4 Members
5 Guides authored