Introduction
The Kindle Fire 7th Generation features a rechargeable 2950 mAh battery, which allows you to use your Kindle for extended periods without needing to recharge. If you notice that your Kindle Fire 7th Generation battery drains quickly, charges slowly, or won’t power on, these are signs it may be time to replace the battery.
Replacing an old or worn-out battery allows you to continue using your Kindle without interruptions from short battery life, slow charging, or the device failing to turn on.
For the Amazon Fire 7 (5th Gen) battery replace guide, follow this guide instead.
What you need
-
-
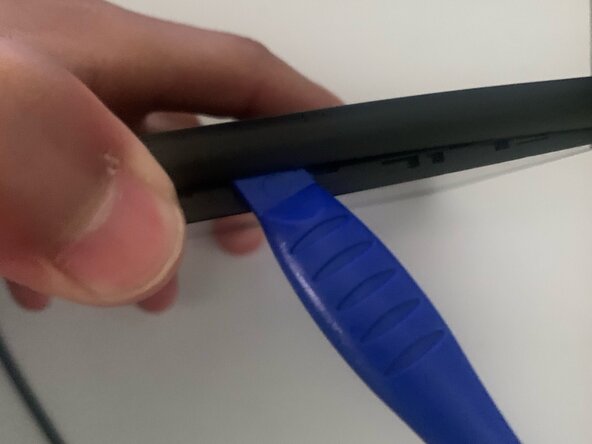
Insert the plastic prying tool along the edge of the tablet, where the back cover meets the screen's bezel.
-
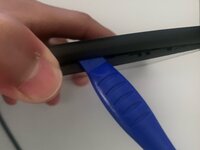
Carefully work your way around the edges to free all of the clips that secure the back cover in place.
 Ask FixBot
-
-
-
-
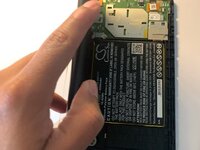
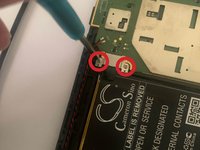
Remove the two screws that secure the battery connector cover in place with a Phillips #00 screwdriver.
-
Lift the battery connector cover off.
-
-
-
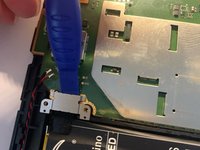
Disconnect the battery from the motherboard.
-
Fit the tip of the plastic opening tool under the bottom right of the battery.
-
Remove the battery from the frame.
-


To reassemble your device, follow these instructions in reverse order. Take your e-waste to an R2 or e-Stewards certified recycler.
Cancel: I did not complete this guide.
3 other people completed this guide.

Team

CSU Los Angeles, Team 1-1, Briggs Fall 2023 Member of CSU Los Angeles, Team 1-1, Briggs Fall 2023
CSULA-BRIGGS-F23S1G1
6 Members
5 Guides authored