
Alienware Pro Wireless Gaming Mouse Side Button Replacement

Samuel Blanton and 4 other contributors
Last updated on Dec 15, 2025
Views: 278
View statistics:
- Past 24 Hours:
- 0
- Past 7 Days:
- 17
- Past 30 Days:
- 79
- All Time:
- 278
Comments: 0
No one has left comments on this guide. Will you be first?
Go to guide commentsCompleted: 1 2
1 person has marked this guide "completed." Will you be next?
2 people have marked this guide "completed." Including you — great job!
Favorites: 0 1
No one has favorited (and subscribed to) this guide. Will you be the first?
1 person has favorited (and subscribed to) this guide — and that's you!
Introduction
Go to step 1 ↓This guide will help you remove and replace the side buttons (often labeled M4 and M5) on your Alienware Pro Wireless Gaming Mouse (Model: PRO-MS and PRO-M-D).
The side buttons are the physical pieces your fingers press. They are essential as they function as Forward (front button) and Backward (rear button) in web browsers, but are mainly used for in-game commands.
This repair may be needed if the plastic buttons are cracked, snapped off, or keep popping out because their tiny internal clip is broken. If your buttons are "mushy" or "double-clicking," the problem is the switch underneath.
Before you begin, power off the mouse and disconnect it from any charger or device.
When you reassemble the mouse, make sure the ribbon line is facing the correct direction.
What you need
Tools
-
Spudger4.9
-
-


-
-
-
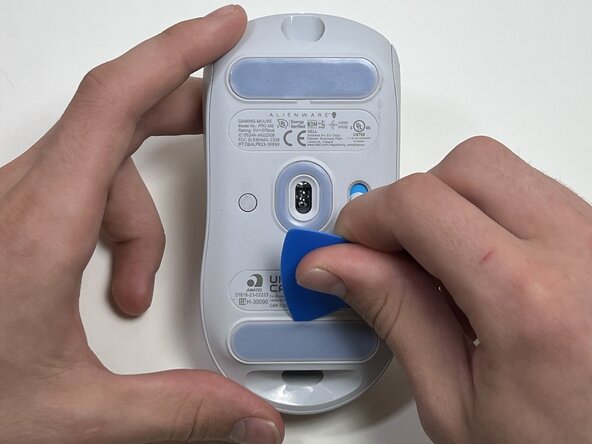
Flip the mouse over so the bottom is facing up..
-
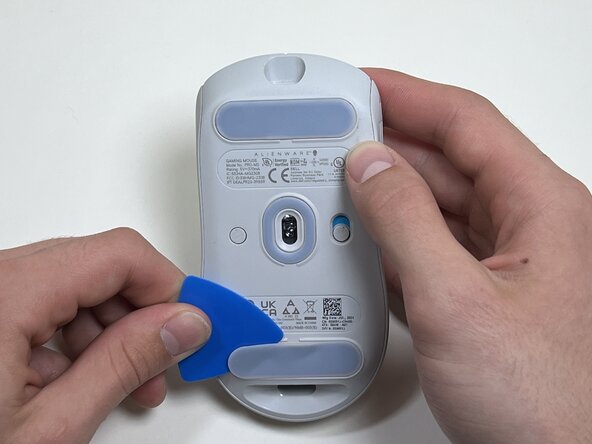
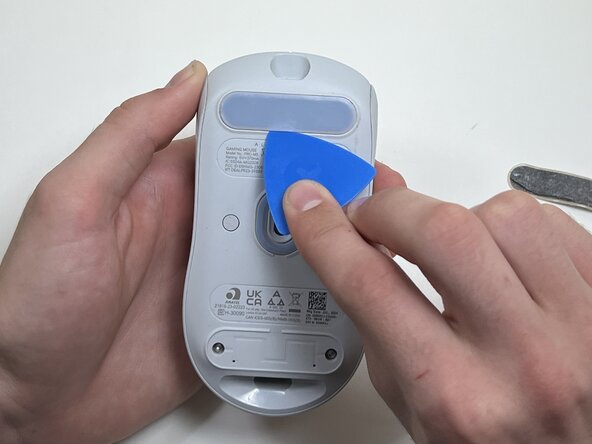
Use an opening pick to gently peel the mouse foot off the bottom case.
 Ask FixBot
-
-
-
-
-
Use a TR6 Torx security screwdriver to remove the four 6 mm screws under the foot pads.
-
-
-
-
Use your hands or a spudger to separate the bottom and top of the mouse.
-
Insert the end of the spudger in the seam between the top and bottom case, and slide it around the perimeter to release the clips holding it together.
-
-
-
Use the pointed end of a spudger to push on alternating sides of the battery connector to "walk" it out of its socket.
-
-
-
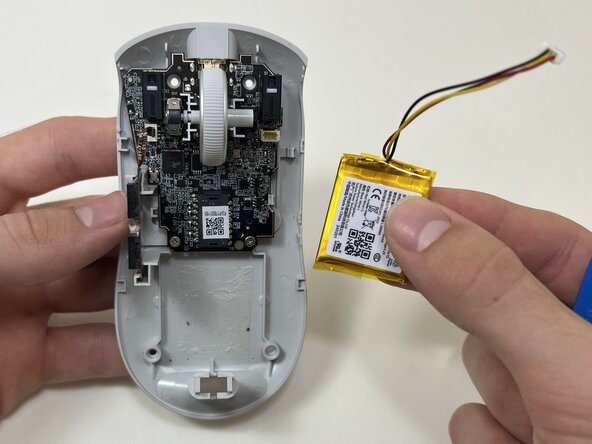
Use an opening tool or spudger to loosen the adhesive under the battery.
-
Remove the battery.
-
-
-
-
-
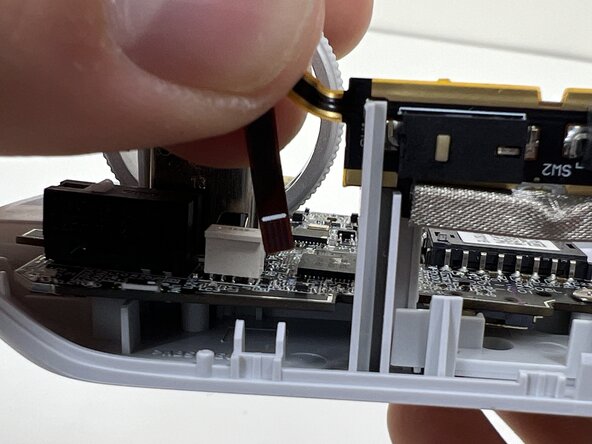
Pinch the upper part of the ribbon cable.
-
Pull the ribbon cable gently to detach it from the socket on the motherboard.
-
-









To reassemble your device, follow these instructions in reverse order. Take your e-waste to an R2 or e-Stewards certified recycler.
Cancel: I did not complete this guide.
One other person completed this guide.

Team

Austin Community College, Team 10-3, Watkins Fall 2025 Member of Austin Community College, Team 10-3, Watkins Fall 2025
AUSTINCC-WATKINS-F25S10G3
4 Members
84 Guides authored
