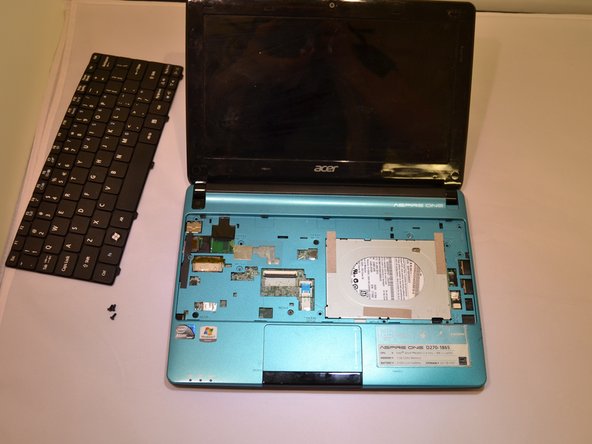
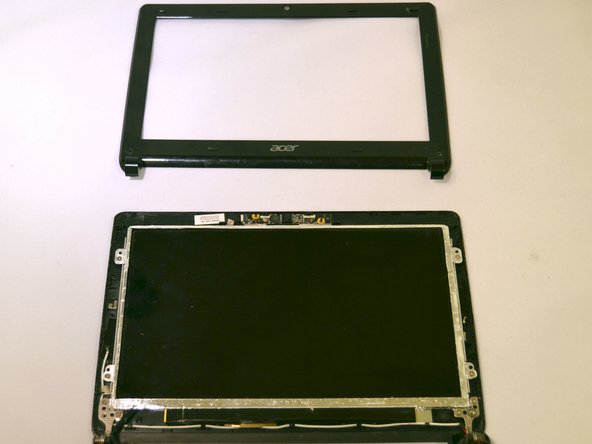
Acer Aspire One D270-1865 Screen Replacement

What you need

  1. Acer Aspire One D270-1865 Screen Replacement, LCD Screen: step 1, image 1 of 3 Acer Aspire One D270-1865 Screen Replacement, LCD Screen: step 1, image 2 of 3 Acer Aspire One D270-1865 Screen Replacement, LCD Screen: step 1, image 3 of 3
    • Put on an anti-static wrist band, attaching the end onto a large piece of metal.

    • Make sure the laptop is unplugged from its charging cord.

    • Flip the laptop over to view the underside.

    • Slide the right battery lock/unlock button to unlock, sliding the tab outward to unlock.

    • At the same time, slide the left tab outwards while placing a thumb on the grip strips of the battery and pull the battery outwards until it slides out.

  2. Acer Aspire One D270-1865 Screen Replacement: step 2, image 1 of 3 Acer Aspire One D270-1865 Screen Replacement: step 2, image 2 of 3 Acer Aspire One D270-1865 Screen Replacement: step 2, image 3 of 3
    • Using a Phillips #00 screwdriver, unscrew the three 2mm screws on the bottom of the laptop,

    • Flip the laptop over right-side up and open the laptop.

  3. Acer Aspire One D270-1865 Screen Replacement: step 3, image 1 of 3 Acer Aspire One D270-1865 Screen Replacement: step 3, image 2 of 3 Acer Aspire One D270-1865 Screen Replacement: step 3, image 3 of 3
    • Carefully insert the blue plastic opening tool between the F8 key and the blue plastic covering.

    • Try not to damage the F8 key.

    • After insertion, carefully slide the tool popping the keyboard out.

    • The keyboard is still attached to the blue casing by a ribbon cable.

    • On the bottom of the keyboard, gently pull the ribbon cable out of the cable holder.

  4. Acer Aspire One D270-1865 Screen Replacement: step 4, image 1 of 3 Acer Aspire One D270-1865 Screen Replacement: step 4, image 2 of 3 Acer Aspire One D270-1865 Screen Replacement: step 4, image 3 of 3
    • Using a Phillips #00 screwdriver, remove each screw:

    • Eleven 2mm Phillips #00 screws

    • Three 2mm Phillips #00 screws

    • Using the opening tool, gently insert it into the crack of the blue casing and the bottom of the laptop.

    • Begin separating the two until the blue casing is fully off.

  5. Acer Aspire One D270-1865 Screen Replacement: step 5, image 1 of 3 Acer Aspire One D270-1865 Screen Replacement: step 5, image 2 of 3 Acer Aspire One D270-1865 Screen Replacement: step 5, image 3 of 3
    • Using a Phillips #00 screwdriver, remove the screws on the hinges holding the laptop screen and the keyboard together:

    • Three 2mm Phillips #00 screws

    • One 2mm Phillips #00 screws

    • On the left hinge, gently lift up the motherboard and carefully pull out the hinge.

  6. Acer Aspire One D270-1865 Screen Replacement: step 6, image 1 of 3 Acer Aspire One D270-1865 Screen Replacement: step 6, image 2 of 3 Acer Aspire One D270-1865 Screen Replacement: step 6, image 3 of 3
    • Using a #1.0 flat head screwdriver, remove the two black circle covers on bottom corners of the screen.

    • Place the covers facing up since the bottom of the covers are sticky.

    • Remove the two 2mm Phillips #00 screws holding the screen casing to the screen.

  7. Acer Aspire One D270-1865 Screen Replacement: step 7, image 1 of 2 Acer Aspire One D270-1865 Screen Replacement: step 7, image 2 of 2
    • Insert the opening tool between the screen casing and the back casing.

    • Begin separation until the casing and the back is fully separated.

  8. Acer Aspire One D270-1865 Screen Replacement: step 8, image 1 of 3 Acer Aspire One D270-1865 Screen Replacement: step 8, image 2 of 3 Acer Aspire One D270-1865 Screen Replacement: step 8, image 3 of 3
    • Remove the four 2mm Phillips #00 screws holding the screen in place.

    • Gently lift the screen up while holding down the cable cord at the top of the screen.

    • Gently remove the cable cord from its outlet.

  9. Acer Aspire One D270-1865 Screen Replacement: step 9, image 1 of 3 Acer Aspire One D270-1865 Screen Replacement: step 9, image 2 of 3 Acer Aspire One D270-1865 Screen Replacement: step 9, image 3 of 3
    • Remove the yellow sticky tape at the bottom of the screen.

    • Gently pull the cable at the bottom of the screen, detaching all wires and the tape from screen.

    • Remove the screen.

Conclusion

To reassemble your device, follow these instructions in reverse order.

6 other people completed this guide.

0 Comments

Add Comment

View Statistics:

Past 24 Hours: 0

Past 7 Days: 0

Past 30 Days: 8

All Time: 3,592