
Abask J05 Front Case Replacement

What you need

  1. Abask J05 Front Case Replacement, Front Case: step 1, image 1 of 2 Abask J05 Front Case Replacement, Front Case: step 1, image 2 of 2
    • Gently press on the SD card with a fingernail until it clicks.

    • Release, then remove the card.

  2. Abask J05 Front Case Replacement: step 2, image 1 of 1
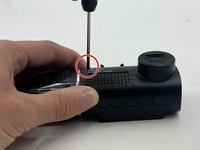
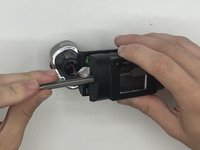
    • Remove the 5 mm screw from the side of the device next to the suction cup dock with a Phillips #00 screwdriver.

  3. Abask J05 Front Case Replacement: step 3, image 1 of 2 Abask J05 Front Case Replacement: step 3, image 2 of 2
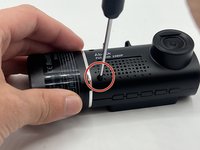
    • Remove the two 8 mm screws from opposite sides of the screen with a Phillips #00 precision screwdriver.

  4. Abask J05 Front Case Replacement: step 4, image 1 of 2 Abask J05 Front Case Replacement: step 4, image 2 of 2
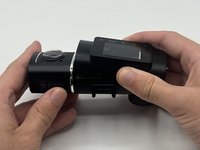
    • Gently lift the screen.

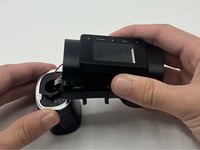
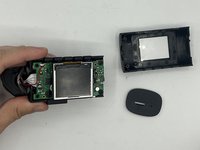
    • Push up on the interior camera portion of the device. It should pop out of the socket. Being careful to keep the wires attached, set it to the side.

  5. Abask J05 Front Case Replacement: step 5, image 1 of 2 Abask J05 Front Case Replacement: step 5, image 2 of 2
    • Reach into the device with a spudger to release the top two snap joints keeping the end cap attached one at a time until the front face lifts off.

    • Be careful not to touch the screen.

    • Repeat the process with the two remaining snap joints.

Conclusion

To reassemble your device, follow these instructions in reverse order.

Kristen Gismondi

Member since: 11/12/14

83,164 Reputation

204 Guides authored

Team

iFixit Member of iFixit

Staff

137 Members

17,524 Guides authored

0 Comments

Add Comment

View Statistics:

Past 24 Hours: 1

Past 7 Days: 1

Past 30 Days: 1

All Time: 10