
ATT CL4940 Internal Microphone Replacement

Charles Moore and 3 other contributors
Last updated on Jun 15, 2022
Views: 1.7K
View statistics:
- Past 24 Hours:
- 3
- Past 7 Days:
- 22
- Past 30 Days:
- 96
- All Time:
- 1,671
Comments: 1
1 guide comment.
Go to guide commentsCompleted: 0 1
No one has marked this guide "completed." Will you be the first?
1 person has marked this guide "completed." It's you — great job!
Favorites: 0 1
No one has favorited (and subscribed to) this guide. Will you be the first?
1 person has favorited (and subscribed to) this guide — and that's you!
Introduction
Go to step 1 ↓If you are unable to hear anything during hands free calling, the internal speaker may need to be replaced. This guide will teach you how to disassemble your AT&T CL4940 corded answering system, and how to replace the speaker used for hands free calling. This is a fairly simple process, and it can be accomplished with minimal technical expertise.
What you need
Tools


-
-
-
Remove the phone line and the power cord from the back of the device.
-
Remove the phone cable from the side of the device.
 Ask FixBot
-
-
-
Remove the five 4mm X 10mm Phillips head screws from the back cover of the device.
-
-
-
-
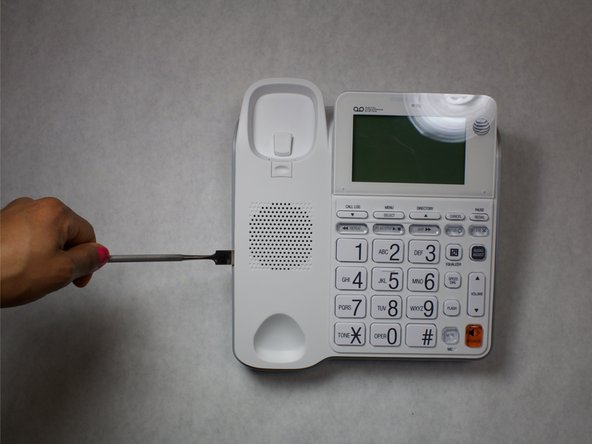
Starting from the bottom of the device, (using a metal spudger) separate the top (white) plastic piece from the bottom (gray) plastic piece.
-
Work your way across the bottom of the device, then to each side, and finally to the top.
-
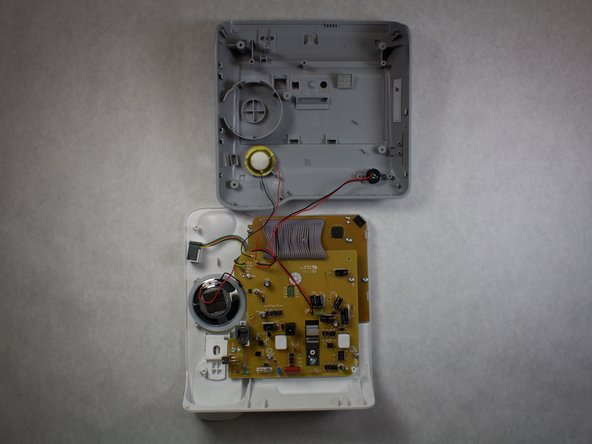
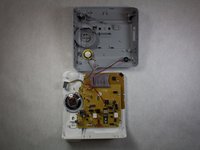
The top and bottom pieces should separate, and the internals of the device will now be accessible.
-
-
-
Using wire cutters, sever both the red and the black wires connected to the microphone.
-
To remove the microphone from the device, gently wiggle it while pulling it apart.
-
-



To reassemble your device, follow these instructions in reverse order.

Team

IUPUI, Team 2-2, Harley Spring 2016 Member of IUPUI, Team 2-2, Harley Spring 2016
IUPUI-HARLEY-S16S2G2
4 Members
48 Guides authored
