
ASUS VivoBook S400C LCD Replacement

What you need

  1. ASUS VivoBook S400C LCD Replacement, Remove the Bottom Cover: step 1, image 1 of 1
    • Flip the device over and remove the ten 5.7 mm screws with a Phillips #0 screwdriver.

  2. ASUS VivoBook S400C LCD Replacement: step 2, image 1 of 2 ASUS VivoBook S400C LCD Replacement: step 2, image 2 of 2
    • Use a spudger or your fingers to go around and lift the edges and release the back panel.

  3. ASUS VivoBook S400C LCD Replacement, Disconnect the Battery: step 3, image 1 of 1
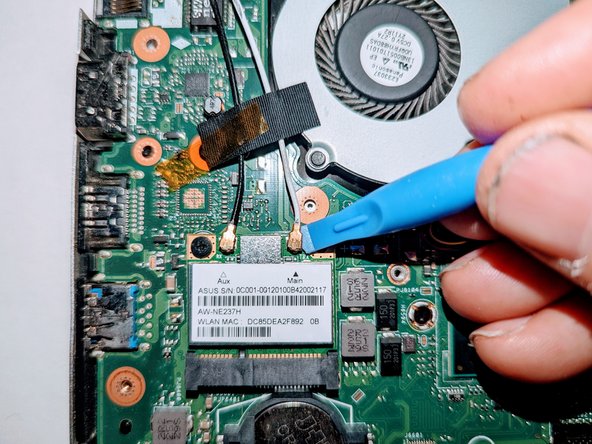
    • Using a spudger, lift up the plug connecting the battery to the motherboard.

  4. ASUS VivoBook S400C LCD Replacement, Heat Shield: step 4, image 1 of 2 ASUS VivoBook S400C LCD Replacement, Heat Shield: step 4, image 2 of 2
    • Remove the black shield covering the display connector and the heat sink.

    • You may need to use double-sided adhesive tape to resecure the shield.

  5. ASUS VivoBook S400C LCD Replacement, Display Assembly: step 5, image 1 of 1
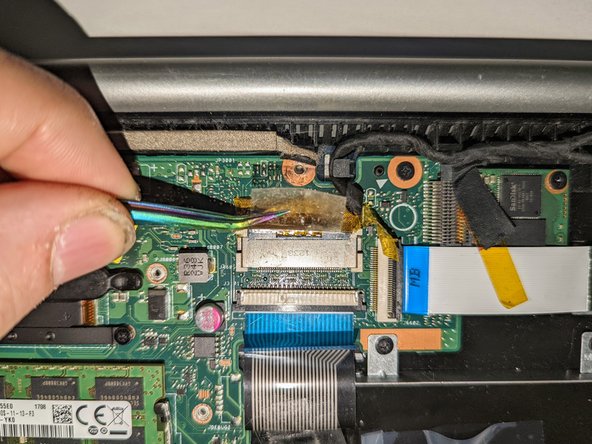
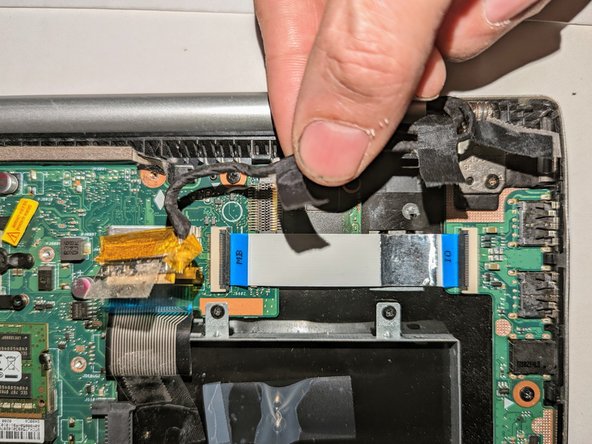
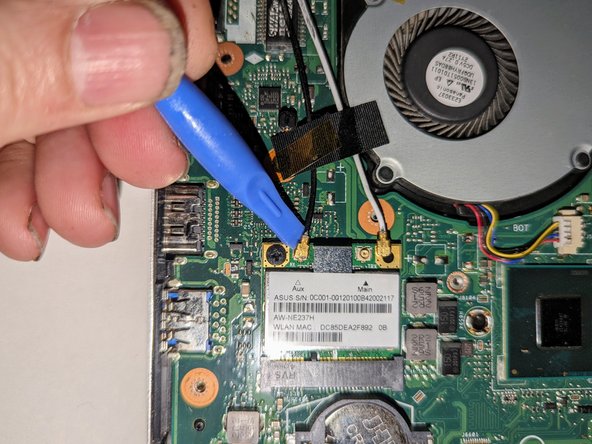
    • Remove the black tape securing the keyboard ribbon cable to the display connector.

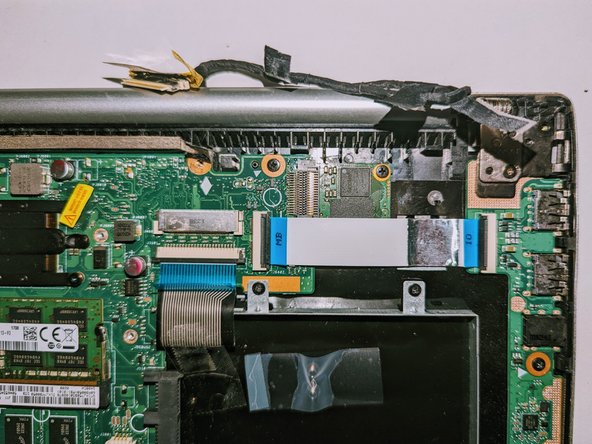
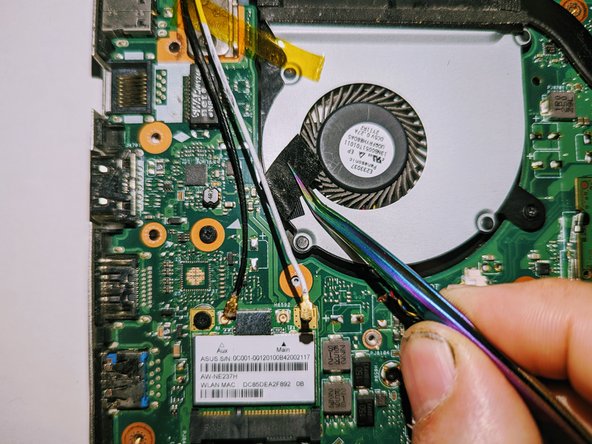
    • Fold the ribbon cable the opposite way, resecuring it to the hard drive to keep it out of the way.

  6. ASUS VivoBook S400C LCD Replacement: step 6, image 1 of 2 ASUS VivoBook S400C LCD Replacement: step 6, image 2 of 2
    • Peel off the clear tape from the motherboard display connector.

  7. ASUS VivoBook S400C LCD Replacement: step 7, image 1 of 2 ASUS VivoBook S400C LCD Replacement: step 7, image 2 of 2
    • Position spudgers on the white tabs on either side of the connector and push evenly to unplug the display.

  8. ASUS VivoBook S400C LCD Replacement: step 8, image 1 of 3 ASUS VivoBook S400C LCD Replacement: step 8, image 2 of 3 ASUS VivoBook S400C LCD Replacement: step 8, image 3 of 3
    • Peel off the three pieces of black tape securing the display cable to the motherboard.

    • Deroute the cable from the channel it sits in.

    • Move the cable to the side, out of the way.

  9. ASUS VivoBook S400C LCD Replacement: step 9, image 1 of 3 ASUS VivoBook S400C LCD Replacement: step 9, image 2 of 3 ASUS VivoBook S400C LCD Replacement: step 9, image 3 of 3
    • Use a spudger to release the cables from the wifi card.

  10. ASUS VivoBook S400C LCD Replacement: step 10, image 1 of 3 ASUS VivoBook S400C LCD Replacement: step 10, image 2 of 3 ASUS VivoBook S400C LCD Replacement: step 10, image 3 of 3
    • Lift the tapes securing the wires to the motherboard.

    • Move the wires to the side out of the way.

  11. ASUS VivoBook S400C LCD Replacement, Disconnect the Hinges: step 11, image 1 of 2 ASUS VivoBook S400C LCD Replacement, Disconnect the Hinges: step 11, image 2 of 2
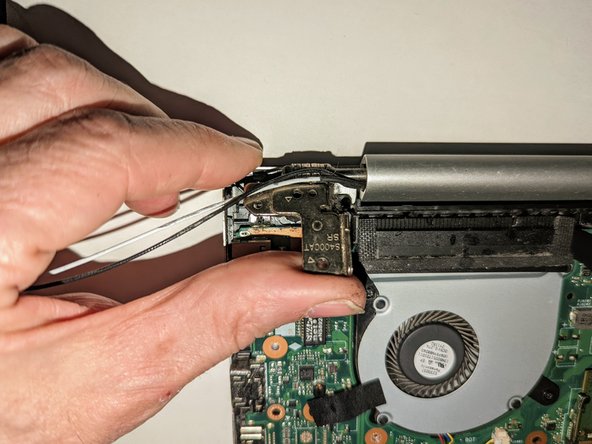
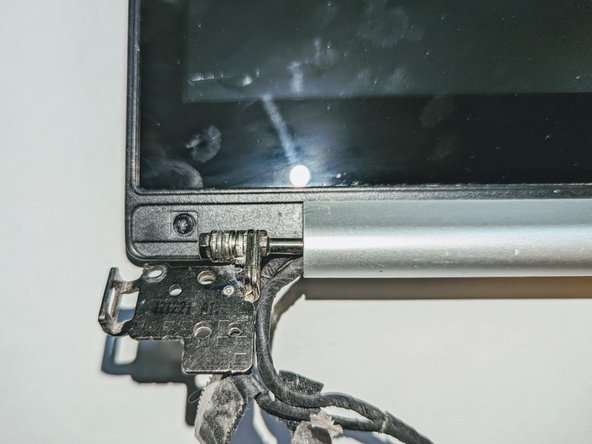
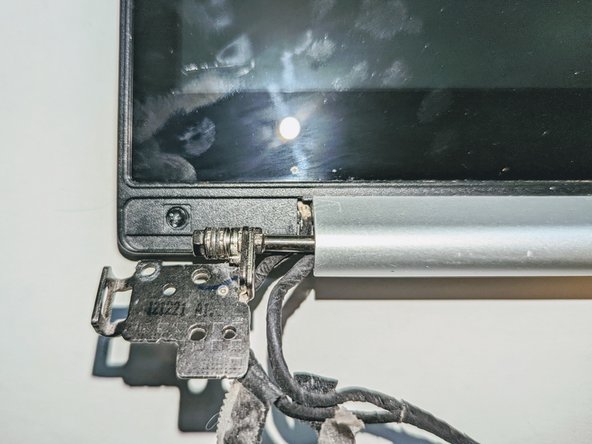
    • Remove the two screws securing the hinge on the left.

    • Pry the hinge up by hand to a 90 degree angle.

  12. ASUS VivoBook S400C LCD Replacement: step 12, image 1 of 2 ASUS VivoBook S400C LCD Replacement: step 12, image 2 of 2
    • Remove the two screws securing the hinge on the right.

    • Pry the hinge up by hand to a 90 degree angle.

  13. ASUS VivoBook S400C LCD Replacement, Remove the Display: step 13, image 1 of 3 ASUS VivoBook S400C LCD Replacement, Remove the Display: step 13, image 2 of 3 ASUS VivoBook S400C LCD Replacement, Remove the Display: step 13, image 3 of 3
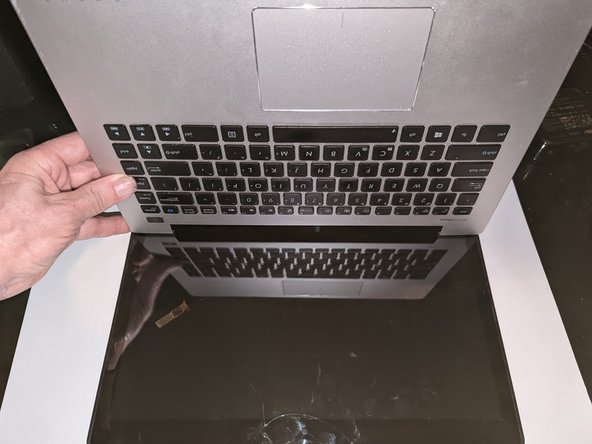
    • Lift the base of the laptop from the front.

    • Raise it to a 90 degree angle.

    • Slide it forward slightly to clear the hinges.

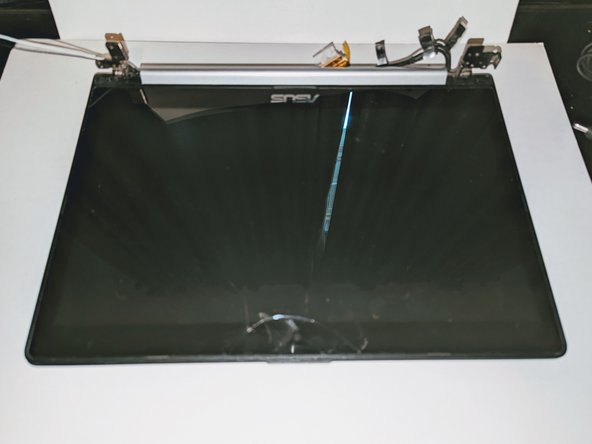
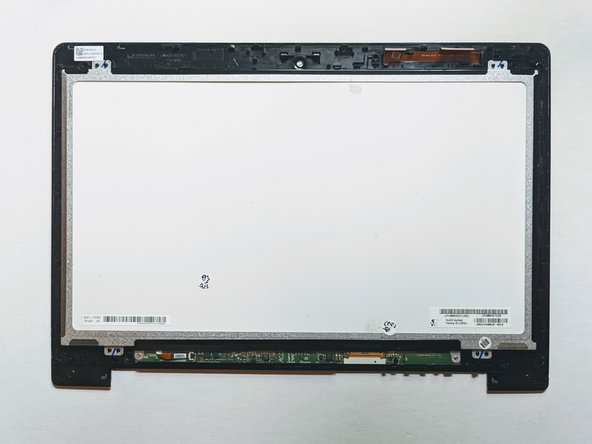
    • The display is now free.

  14. ASUS VivoBook S400C LCD Replacement, Remove the Display Retaining Screws: step 14, image 1 of 3 ASUS VivoBook S400C LCD Replacement, Remove the Display Retaining Screws: step 14, image 2 of 3 ASUS VivoBook S400C LCD Replacement, Remove the Display Retaining Screws: step 14, image 3 of 3
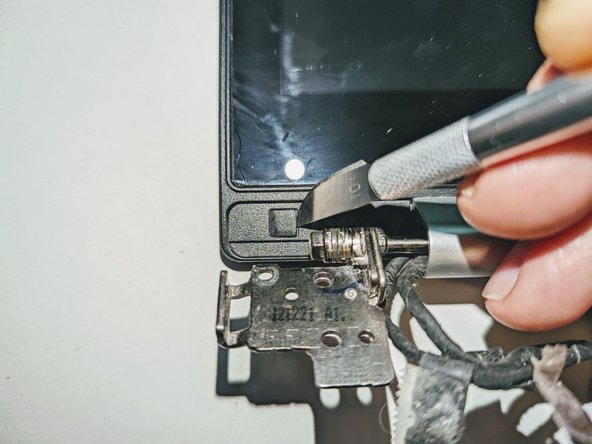
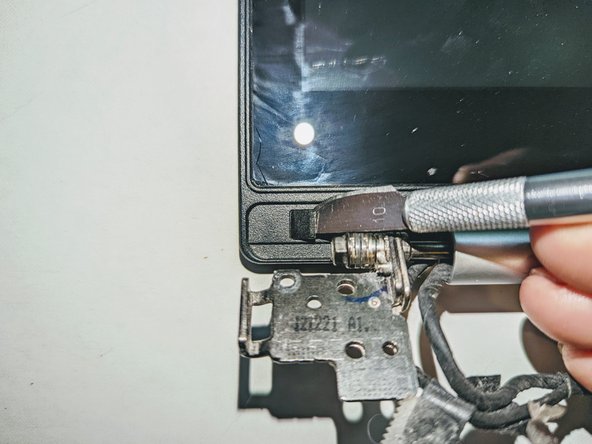
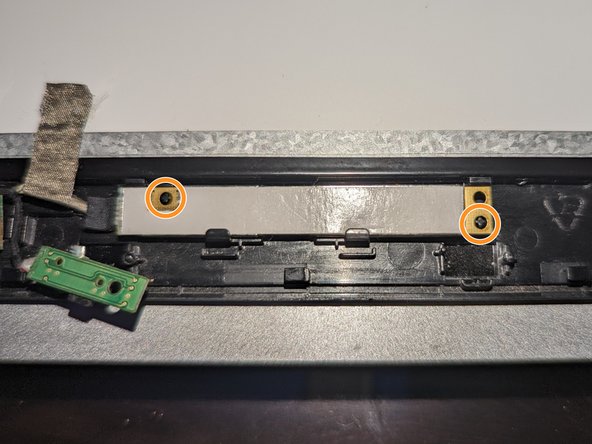
    • There are two black square plastic tabs covering the retaining screws. The tabs are fixed in place with light adhesive.

    • Using a thin blade, pry off the tabs covering the screws.

  15. ASUS VivoBook S400C LCD Replacement: step 15, image 1 of 2 ASUS VivoBook S400C LCD Replacement: step 15, image 2 of 2
    • With a Phillips #0 screwdriver, remove the two 3.8 mm screws holding the bezel in place.

  16. ASUS VivoBook S400C LCD Replacement, Remove the Hinge Cover: step 16, image 1 of 3 ASUS VivoBook S400C LCD Replacement, Remove the Hinge Cover: step 16, image 2 of 3 ASUS VivoBook S400C LCD Replacement, Remove the Hinge Cover: step 16, image 3 of 3
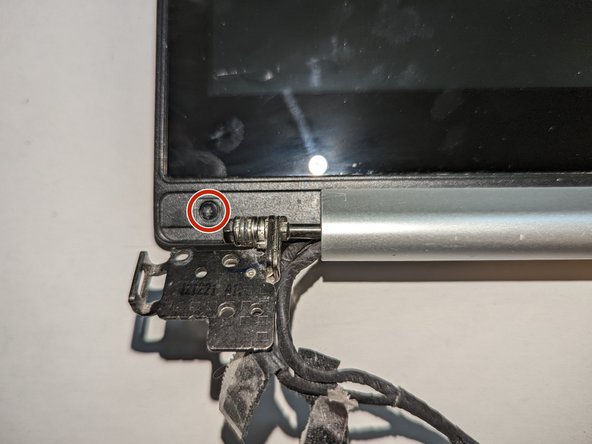
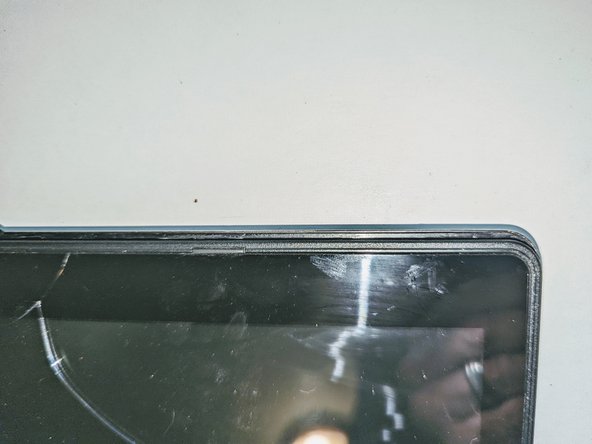
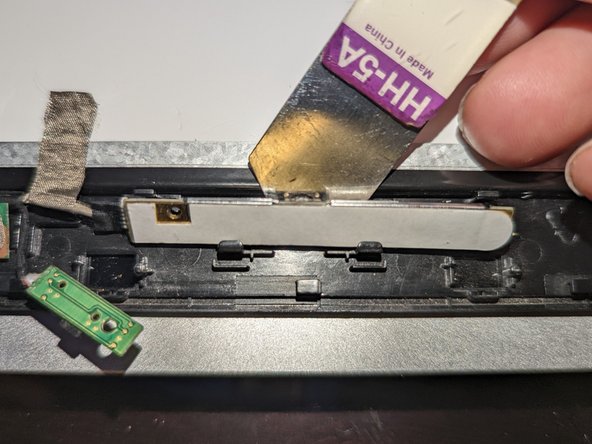
    • Grasp the hinge cover and slide it to the right. It will only move about 3mm (1/8 inch).

  17. ASUS VivoBook S400C LCD Replacement: step 17, image 1 of 2 ASUS VivoBook S400C LCD Replacement: step 17, image 2 of 2
    • Tilt the hinge cover toward you and pull up to remove it.

    • It may catch on the parts it's covering as you remove it. If that happens, just wiggle it around until it comes free.

    • No force should be needed to remove it. You do not have to pry on it to take it out.

  18. ASUS VivoBook S400C LCD Replacement, Release the Display Panel: step 18, image 1 of 2 ASUS VivoBook S400C LCD Replacement, Release the Display Panel: step 18, image 2 of 2
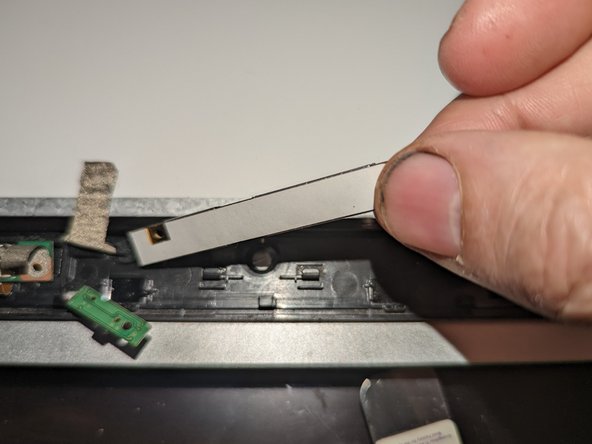
    • Slide the screen down to release the catches holding it in place.

    • It will only move about 3mm (1/8 inch) and will stop when it has moved sufficiently.

  19. ASUS VivoBook S400C LCD Replacement: step 19, image 1 of 3 ASUS VivoBook S400C LCD Replacement: step 19, image 2 of 3 ASUS VivoBook S400C LCD Replacement: step 19, image 3 of 3
    • Lift up on the now-exposed bottom edge of the screen. Go around the edges, lifting it away from the housing. If it is still caught anywhere, remember to slide it down to free it.

    • Again, no force is needed. You do not have to pry on it to take it out. Doing so will damage the housing and/or the bezel.

    • Slide the screen out from under the hinges and remove it.

  20. ASUS VivoBook S400C LCD Replacement, Disconnect the LCD Cable: step 20, image 1 of 2 ASUS VivoBook S400C LCD Replacement, Disconnect the LCD Cable: step 20, image 2 of 2
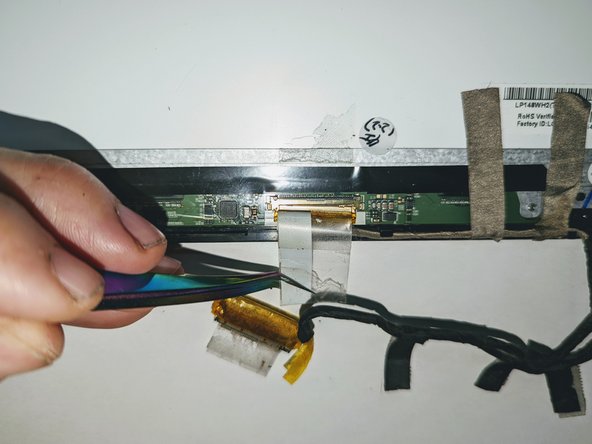
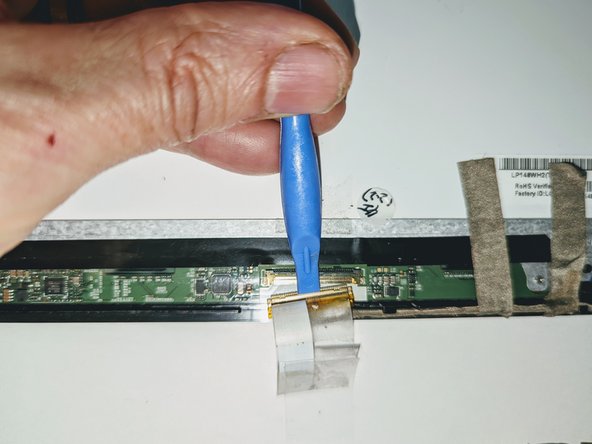
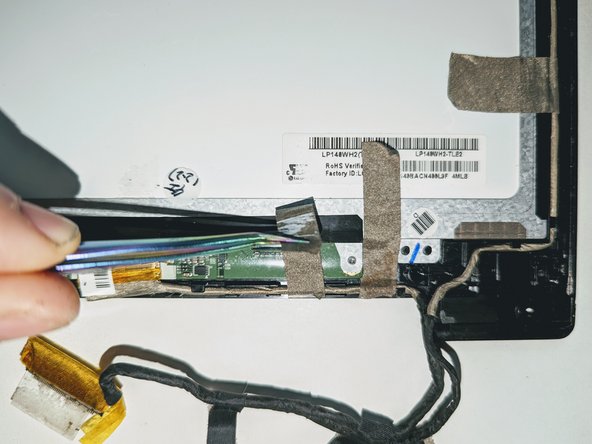
    • Flip the touch screen assembly over and peel the clear tape covering the LCD connector off the LCD panel.

  21. ASUS VivoBook S400C LCD Replacement: step 21, image 1 of 2 ASUS VivoBook S400C LCD Replacement: step 21, image 2 of 2
    • Using a spudger, slide the connector out in the direction of the bottom of the screen.

  22. ASUS VivoBook S400C LCD Replacement, Dismount the Touchscreen Controller Board: step 22, image 1 of 3 ASUS VivoBook S400C LCD Replacement, Dismount the Touchscreen Controller Board: step 22, image 2 of 3 ASUS VivoBook S400C LCD Replacement, Dismount the Touchscreen Controller Board: step 22, image 3 of 3
    • The next few steps are easier if you rotate the display so the top of the screen is facing you.

    • Peel off the tape providing a ground point to the LCD frame.

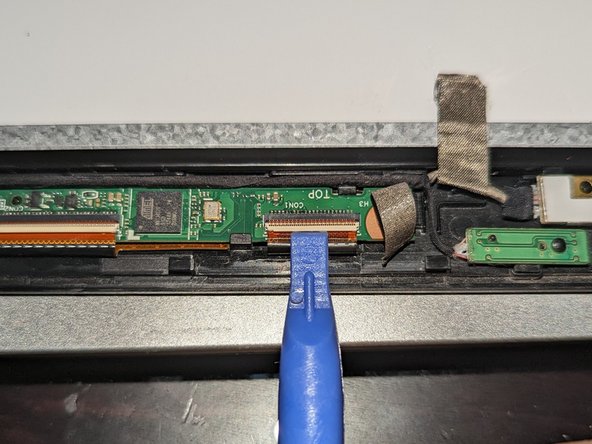
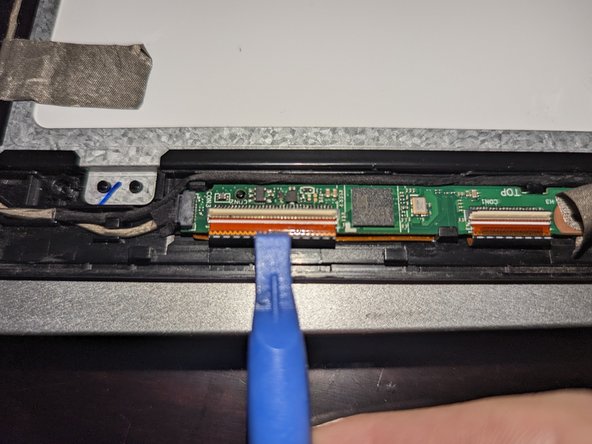
    • Use the flat end of a spudger to flip up the latch on the right connector.

  23. ASUS VivoBook S400C LCD Replacement: step 23, image 1 of 2 ASUS VivoBook S400C LCD Replacement: step 23, image 2 of 2
    • Use the flat end of a spudger to flip up the latch on the left connector.

  24. ASUS VivoBook S400C LCD Replacement: step 24, image 1 of 2 ASUS VivoBook S400C LCD Replacement: step 24, image 2 of 2
    • Use fine tip tweezers to slide the right ribbon cable out of the connector.

  25. ASUS VivoBook S400C LCD Replacement: step 25, image 1 of 2 ASUS VivoBook S400C LCD Replacement: step 25, image 2 of 2
    • Use fine tip tweezers to slide the left ribbon cable out of the connector.

  26. ASUS VivoBook S400C LCD Replacement: step 26, image 1 of 3 ASUS VivoBook S400C LCD Replacement: step 26, image 2 of 3 ASUS VivoBook S400C LCD Replacement: step 26, image 3 of 3
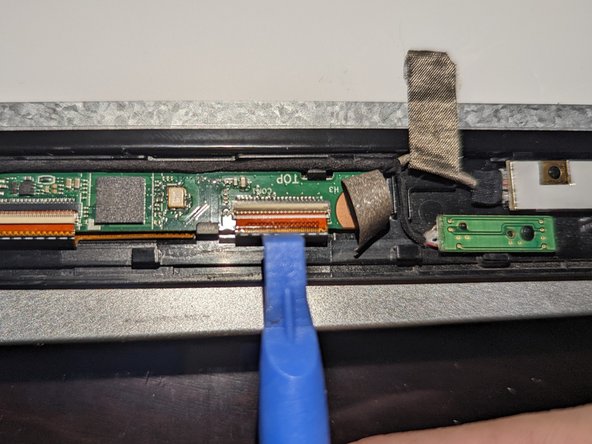
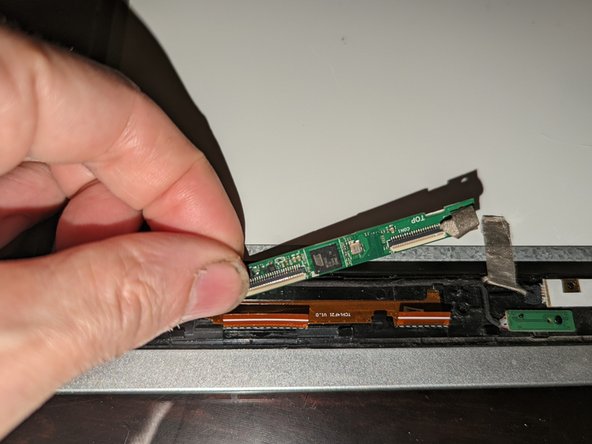
    • The touchscreen board is secured to the bezel with two latches on the far side and a plastic hook on the near side.

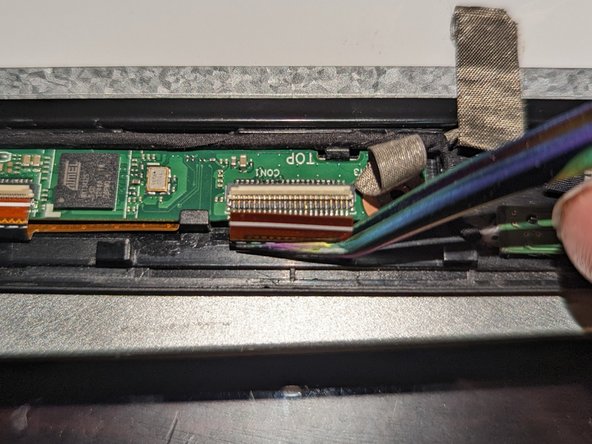
    • Use a spudger to open the right latch while gently prying up with an opening tool or a fingernail.

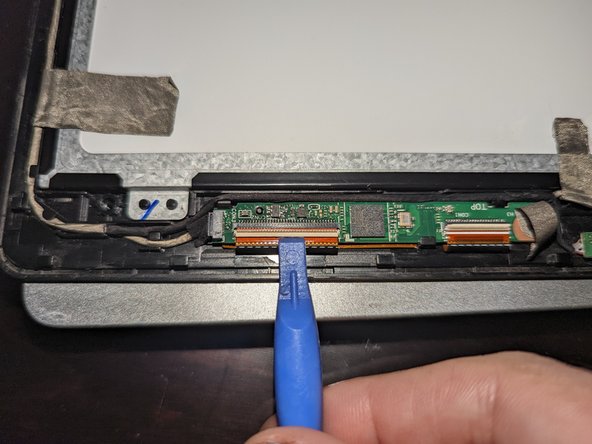
    • Use a spudger to open the left latch while gently prying up with an opening tool or a fingernail.

  27. ASUS VivoBook S400C LCD Replacement: step 27, image 1 of 2 ASUS VivoBook S400C LCD Replacement: step 27, image 2 of 2
    • Rotate the board toward you while sliding it forward slightly to free it from the bottom hook.

    • Lift the board away from the bezel and move it aside.

  28. ASUS VivoBook S400C LCD Replacement, Dismount the Microphone Board: step 28, image 1 of 2 ASUS VivoBook S400C LCD Replacement, Dismount the Microphone Board: step 28, image 2 of 2
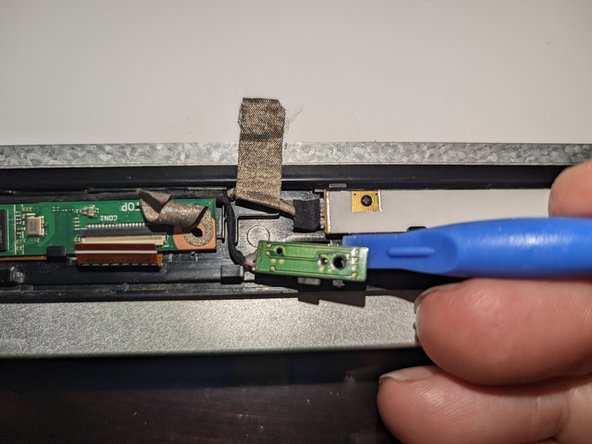
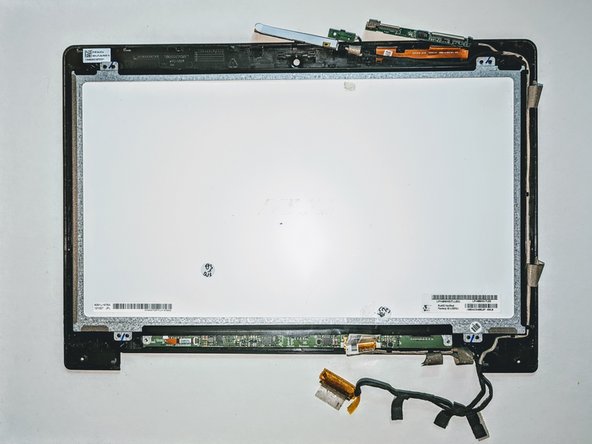
    • The microphone daughterboard is held in place by being pressed down onto a plastic pin.

    • Pry it up off the retaining pin with a plastic spudger.

  29. ASUS VivoBook S400C LCD Replacement, Dismount the Camera Board: step 29, image 1 of 2 ASUS VivoBook S400C LCD Replacement, Dismount the Camera Board: step 29, image 2 of 2
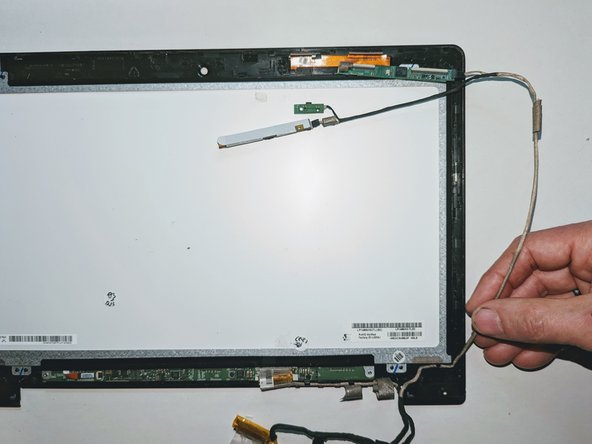
    • The camera daughterboard is held in place with two latches along the top of the board and two hooks on the bottom.

    • It is seated on two plastic guide pins as well.

    • Be sure the board is fully seated on the guide pins when reassembling.

  30. ASUS VivoBook S400C LCD Replacement: step 30, image 1 of 3 ASUS VivoBook S400C LCD Replacement: step 30, image 2 of 3 ASUS VivoBook S400C LCD Replacement: step 30, image 3 of 3
    • Slide a thin pry tool between the top of the camera board and the lip of the bezel.

    • Gently pry up on the board to free it from the latches and the guide pins it sits on.

    • Lift it up and away from the bezel and set it to the side.

  31. ASUS VivoBook S400C LCD Replacement, Remove the Wiring Harness: step 31, image 1 of 3 ASUS VivoBook S400C LCD Replacement, Remove the Wiring Harness: step 31, image 2 of 3 ASUS VivoBook S400C LCD Replacement, Remove the Wiring Harness: step 31, image 3 of 3
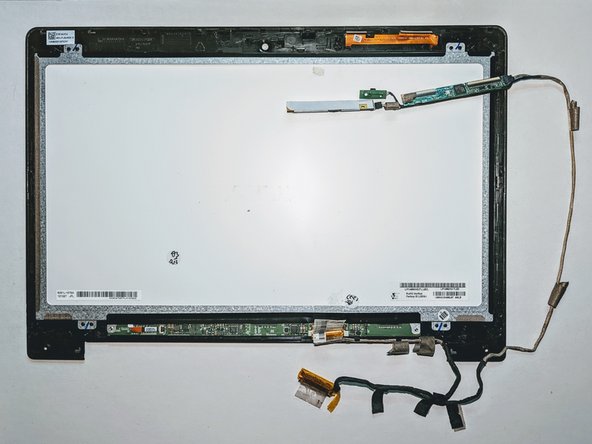
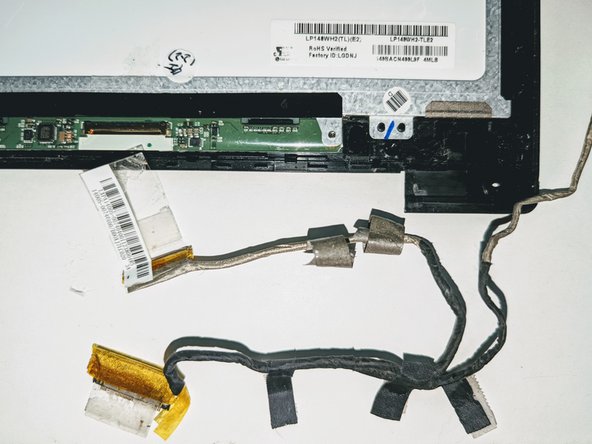
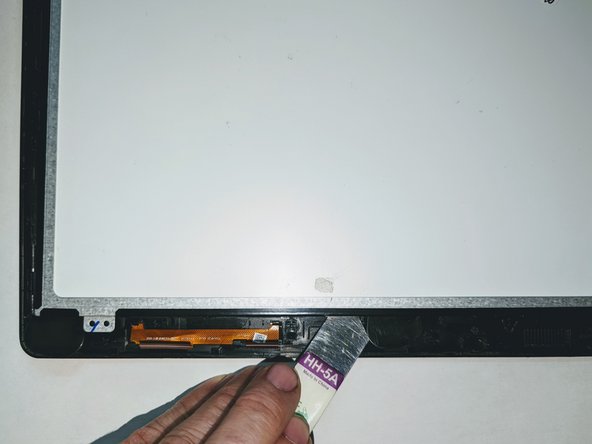
    • Carefully remove the five pieces of conductive tape securing the cables to the LCD frame.

  32. ASUS VivoBook S400C LCD Replacement: step 32, image 1 of 3 ASUS VivoBook S400C LCD Replacement: step 32, image 2 of 3 ASUS VivoBook S400C LCD Replacement: step 32, image 3 of 3
    • Deroute the wiring to the daughterboards from the front bezel.

  33. ASUS VivoBook S400C LCD Replacement: step 33, image 1 of 3 ASUS VivoBook S400C LCD Replacement: step 33, image 2 of 3 ASUS VivoBook S400C LCD Replacement: step 33, image 3 of 3
    • Deroute the LCD cable from the display.

    • The LCD / digitizer assembly is now free.

  34. ASUS VivoBook S400C LCD Replacement, Separate the LCD from the Display: step 34, image 1 of 3 ASUS VivoBook S400C LCD Replacement, Separate the LCD from the Display: step 34, image 2 of 3 ASUS VivoBook S400C LCD Replacement, Separate the LCD from the Display: step 34, image 3 of 3
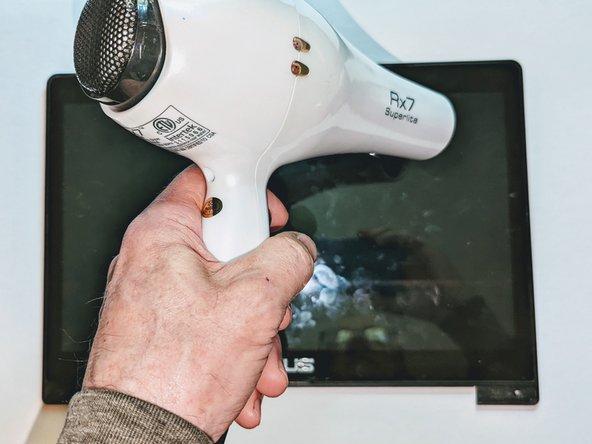
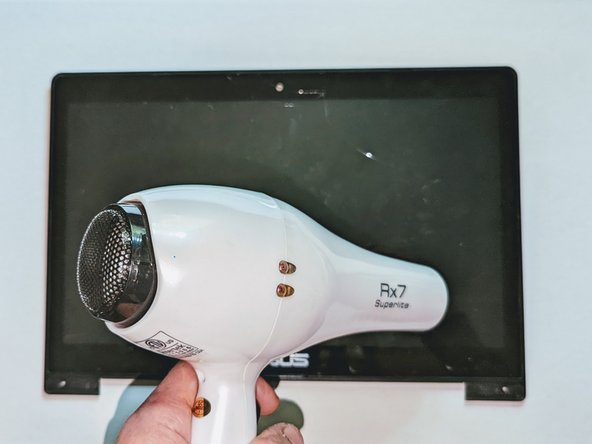
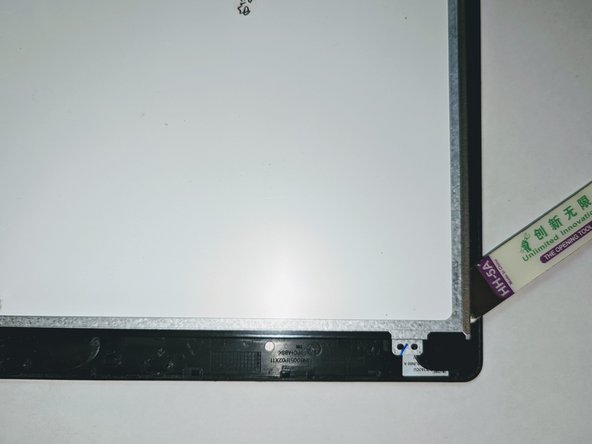
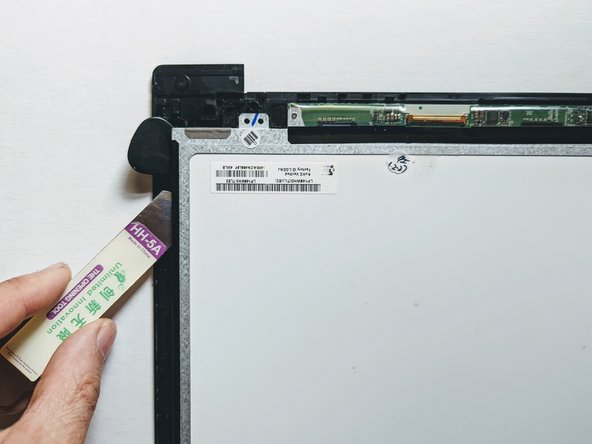
    • Heat the front edges of the touch screen with an iOpener, a heat gun or a hair dryer to loosen the adhesive securing the LCD to the digitizer.

  35. ASUS VivoBook S400C LCD Replacement: step 35, image 1 of 3 ASUS VivoBook S400C LCD Replacement: step 35, image 2 of 3 ASUS VivoBook S400C LCD Replacement: step 35, image 3 of 3
    • Using a flat metal opening tool, carefully pry up the LCD, inserting opening picks as you go to prevent the display from re-adhering to the digitizer.

    • If you encounter significant resistance, reheat the section you are working on.

    • Start with the top edge of the display.

  36. ASUS VivoBook S400C LCD Replacement: step 36, image 1 of 3 ASUS VivoBook S400C LCD Replacement: step 36, image 2 of 3 ASUS VivoBook S400C LCD Replacement: step 36, image 3 of 3
    • Proceed down the sides of the display and place picks at the bottom corners.

    • Do not attempt to slide an opener under the circuit board along the bottom of the display; you may damage the delicate electrical connectors.

  37. ASUS VivoBook S400C LCD Replacement: step 37, image 1 of 3 ASUS VivoBook S400C LCD Replacement: step 37, image 2 of 3 ASUS VivoBook S400C LCD Replacement: step 37, image 3 of 3
    • Carefully lift the top edge of the LCD away from the frame.

    • The remaining adhesive on the bottom of the glass will peel off as you continue to lift the LCD.

    • The LCD is now free from the display.

Conclusion

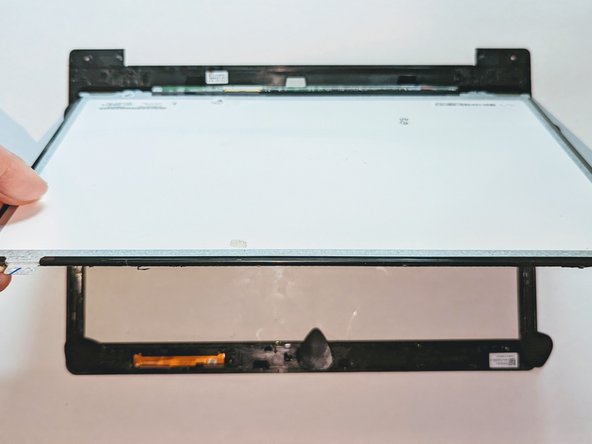
To reassemble your device, follow these instructions in reverse order.

See the ASUS VivoBook S400C LCD Adhesive Replacement guide for instructions on how to replace the adhesive tape on the display frame if needed.

Jerry Wheeler

Member since: 03/21/22

57,500 Reputation

69 Guides authored

Team

Oregonians Member of Oregonians

Community

7 Members

176 Guides authored

0 Comments

Add Comment

View Statistics:

Past 24 Hours: 0

Past 7 Days: 2

Past 30 Days: 10

All Time: 365