
ASUS Q302L Battery Replacement

khalifa and 9 other contributors
Last updated on Mar 11, 2020
Views: 6.9K
View statistics:
- Past 24 Hours:
- 5
- Past 7 Days:
- 30
- Past 30 Days:
- 107
- All Time:
- 6,899
Comments: 0
No one has left comments on this guide. Will you be first?
Go to guide commentsCompleted: 3 4
3 people have marked this guide "completed." Will you be next?
4 people have marked this guide "completed." Including you — great job!
Favorites: 1 2
1 person has favorited (and subscribed to) this guide. Will you be next?
2 people have favorited (and subscribed to) this guide — including you!
Introduction
Go to step 1 ↓This guide will take you through the steps of replacing your faulty battery on your ASUS Q302L.
What you need
Fix Kit
This kit contains all the parts and tools needed to complete this guide.

Parts

Tools


-
-
-
Use a Phillips #0 screw driver to remove all ten 10 mm screws around the back of the laptop.
 Ask FixBot
-
-
-
Wedge a plastic opening tool under the rear case near the hinge.
-
Pry around the outer edge to release the plastic clips holding the rear case to the laptop.
-
-
-
-
-
-
Use a Phillips #0 screwdriver and remove all five 5 mm screws securing the battery.
-
-
-
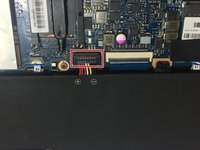
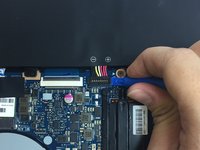
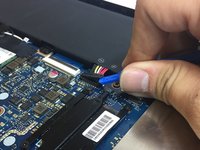
Gently wedge a plastic opening tool under the connector.
-
Carefully lift the connector up away from the socket to disconnect it.
-
-
-
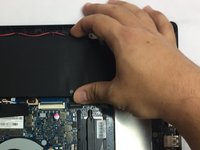
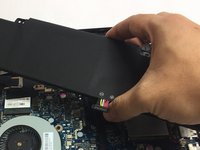
Once the screws and connector are removed, simply pull out the battery from its place.
-
-




To reassemble your device, follow these instructions in reverse order.
Take your e-waste to an R2 or e-Stewards certified recycler.
Cancel: I did not complete this guide.
3 other people completed this guide.

Team

USF Tampa, Team S13-G4, Cagle Spring 2017 Member of USF Tampa, Team S13-G4, Cagle Spring 2017
USFT-CAGLE-S17S13G4
3 Members
36 Guides authored
