Introduction
The button conductive pad is a silicon component located beneath each button (including the D-pad). It allows the button to interface with a conductive contact on the control board, registering an input when pressed. Over time, these pads can accumulate dirt, dust, oils, and wear down, leading to unresponsive and overall less consistent inputs. Accessing these pads and cleaning/replacing them can potentially resolve these problems.
What you need
-
-
-
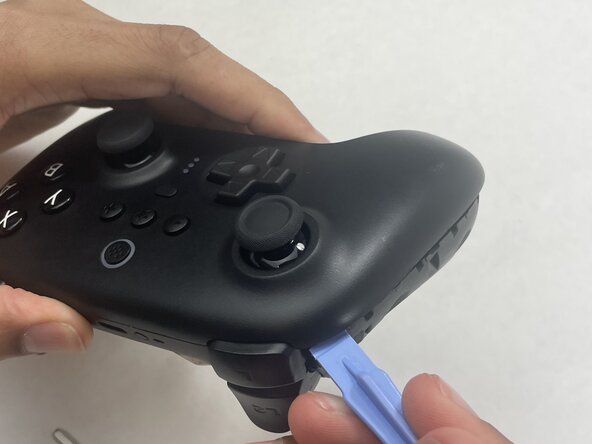
Insert an opening pick into the seam between the left controller grip and main controller body.
-
Pry the grip off.
-
Repeat for the right grip.
 Ask FixBot
-
-
-
-
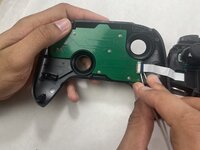
Insert an opening tool into seam at the bottom of the device and carefully pry the front and back shells apart.
-
Set the halves next to each other with care not to strain the connected ribbon cables.
-
-
-
The ribbon cable is secured with a locking tab connector.
-
Use tweezers to unlock the locking tab on the ribbon cable connector, then gently disconnect the ribbon cable.
-
-
-
-
-
Remove the seven 5 mm Phillips #00 screws securing the PCB to the top shell.
-
Lift the PCB out.
-
-
-
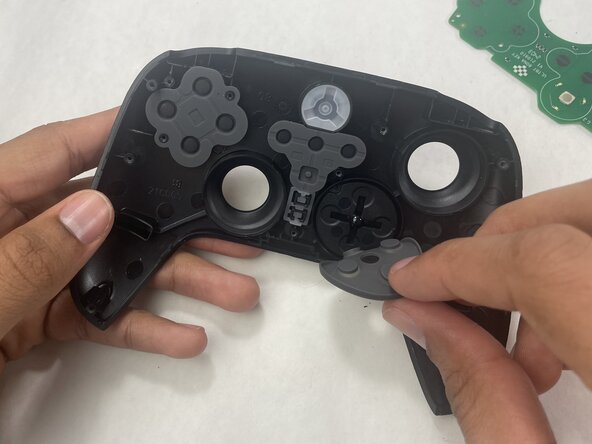
Lift button conductive pads out of the shell with your hands.
-
Replace or clean as needed.
-
-


To reassemble your device, follow the above steps in reverse order.
Take your e-waste to an R2 or e-Stewards certified recycler.
Repair didn’t go as planned? Try some basic troubleshooting or ask our Answers community for help.
Cancel: I did not complete this guide.
One other person completed this guide.

Team

UMass Dartmouth, Team 1-3, Biswokarma Spring 2026 Member of UMass Dartmouth, Team 1-3, Biswokarma Spring 2026
UMASSD-BISWOKARMA-S26S1G3
5 Members
54 Guides authored